|
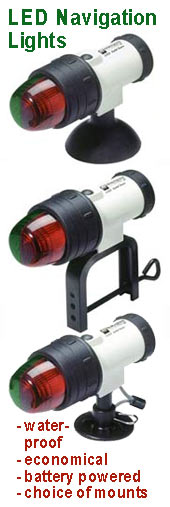
Being new to sailing and being a bit conservative about life and limb at this stage of my existence, I'd purchased LED bow and stern lights (Innovative Lighting TM) from Duckworks shortly after purchasing my Drascombe Scaffie. The models with the clamps seemed like they would hang on without modifying the boat. Well, sort of.
The clamps are reasonably solid. The bow light clamp attached securely to the boat's very small front deck. This did, however, require re-attaching the clamp to the light so that the light was vertical. However, the stern light when clamped to the aft part of the hull tended to slide (potential hull scratches) and was well off vertical.
For better attachment, I cut a pad to fit the clamp's screw and support blocks to stabilize the clamp from scrap plastic decking. The pieces were faced with black shelf liner attached with spray adhesive. The pad for the screw was inletted with a suitably sized bit and attached with a blob of solvent-based roofing sealer. The support blocks were grooved with a table saw to fit the U-channel of the clamp's body. The pad outside the hull attaches to the clamp with a ¼" stainless bolt. This greatly reduces in-and-out motion. The cross piece under the clamp's center, held with a #8 stainless screw, keeps things secure fore and aft along the gunnel.
|
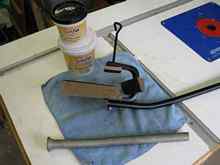
Useful tools for modifying the stern light. |
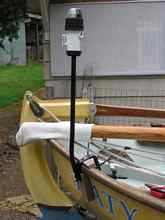
| The modified stern light installed. |
|
To determine the correct bend for the tubing, I attached the light to the hull and measured offset (the tangent) from vertical with a level. This equaled about 20 degrees in line with the clamp's plane. A friend who is a semi-retired marine engineer supplied a spring tubing bender and smarts. I'd built a wood jig for the tubing to follow, but in the end it was my friend's moxie and expertise that put a pretty close kink in the tube. The first attempt got it mostly vertical when viewed from the side. A second bend got it reasonably vertical when viewed from astern. The thin wall aluminum tubing was more difficult to bend than we'd expected. We ended up clamping it to a workbench and then leaning on the free end.
In the process, I'd noticed that the attachment bolts were flattening the tubing. I recalled a solution from somewhere on the web, maybe West Brother's, of plugging the tubing with a bit of foam and then adding epoxy filler. I happened to have System Three Quickfair, and used the sandwich bag-cake decorator's trick for filling the end of the tube. To finish the job, I masked both lamps' lens with Gorilla tape (has good water fastness) to create the correct viewing angles.
The attachment modifications worked out well. For the stern light, adding pads greatly strengthened that light's attachment to the boat. The scrap plastic decking pieces match the boat, are acceptably strong, won't rot and don't need finishing. This lighting arrangement stores, attaches and removes easily. Total workshop time likely amounted to no more than a couple of hours. I most probably spent more time pondering how to do it.

|