Part 1
What follows is an account of how I turned a small pile of timber
and plywood into a very small canoe. When you have finished reading,
you will see that I am no professional and no expert boatbuilder.
My methods may not be the best, or the quickest, but they worked
for me. For those of you that do manage to make it to the end,
I hope you will have found some of it of interest or perhaps maybe
even helpful. Most of all, I hope it may persuade one or two to
take the plunge and build that boat, because boat building is
fun (and addictive).
I had thought about building (and possibly even designing - something
for later perhaps!) my own boat off and on for many years - more
years than I care to think about! Until the growth of the Internet,
information was not as readily available as it is now. Consequently,
I never progressed any further than purchasing the odd study plan
or design catalogue and always for small cruiser/racers, and dreaming.
That was to remain the position until I discovered the Duckworks
website two and a half years or so ago, which bought my ambitions
into focus. I had found the Selway Fisher Design website towards
the end of 2003. There were plenty of larger eighteen to twenty
foot sail boats on the site that I liked the look of and I even
purchased the study plans for a couple of them. To build one would
be a major investment in both time and money. I did not feel confident
enough to make that sort of commitment without prior experience,
so I hesitated.
This is where Duckworks came in. I had read a number of times
that you should ‘build the boat you want’, but there
are many unfinished boat projects around and I didn’t want
to add to the number. Duckworks showed me that you should just
get on and enjoy the process by building as many or as few boats
as you want and that it can be done at relatively little cost.
It is not necessary to use the best marine grade materials, particularly
when the finished product would spend most of its time stored
under cover.
This led me to make the decision to build a small (read cheap)
boat by an established designer as a first stage. Paul Fisher
at Selway fisher has the 1.83m (6') Baby
Kate design in his catalogue, which seemed to fit the
bill. It is small enough to be cheap and, although too small to
be used by myself, it could be used by my children. I ordered
the plan, which arrived on the 6th August 2007.
.JPG) |
The plan from Selway Fisher |
The plan shows a side elevation; half plan; half section at 1:5
scale; details of panel joint construction at full size; and,
half panel and half frames at full size. It also gives details
for paddle construction. The building instructions supplied with
the plans state that, to transfer the panel shapes to the ply,
you trace over the drawing with carbon paper. As I am using this
as a trial to build larger, I decided I wanted to copy the panels
onto the ply using offsets, as is the norm.
The first thing I did was to convert the panel shapes into a
cad drawing. Once the cad drawing was complete, I took off a set
of panel offsets. I also printed a set of panels and moulds at
1:4 scale, which I used to make a model of the canoe, including
the paddle!
.JPG) |
The 1:4 scale model |
Keeping the end moulds as bulkheads to form buoyancy compartments
was one of the options suggested on the plan. As the canoe will
be used by my children, I decided to take this option, but to
make them look a little smarter I put a radius on the top edge
of the bulkhead. This gave the deck a pleasing camber as can be
seen on the model. The only other change I made from the plans
was to change the timber from Pine to Douglas Fir.
Due to no local timber suppliers stocking, or being able to obtain
3mm or 4mm thick marine ply, I looked to the Internet. I was able
to find a reputable supplier who was able to supply the Ply and
Douglas Fir at a competitive cost, but, because of the small quantity
I wanted, the delivery charge was greater than the value of the
ply and timber! Because of this, I opted to use 3.6mm (1/8")
thick exterior grade WBP ply, which is readily available locally.
I ordered the ply and Douglas Fir from a local supplier and collected
a couple of days later.
I decided to use the WEST system epoxy for the build. This decision
was made for two reasons: one, my local chandlery had it available
off the shelf at a reasonable cost; and two, I did not know how
much I would need.
It was now almost the end of November, but a last I was ready
to begin. The first job was to lay out the panels on the ply using
the offsets from the plan. I took this process slowly and carefully
frequently checking and re-checking my measurements. Once the
ply is cut there is no going back, but you can measure and re
draw as many times as you want.
.JPG) |
Laying out the panels |
After marking out, I carefully cut out the panels using my jig
saw cutting just outside the panel lines to allow me to plane
back to the correct line later.
I marked out one of the permanent bulkheads on to the ply. I
cut it out, planed and filed it to size and used it as a template
for the second bulkhead. I repeated this for the two temporary
moulds ‘A’, but this time using some thin scrap chipboard
(old drawer bottoms I had retained as I thought they might come
in useful some day!) and the temporary centre mould.
.JPG) |
The Permanent Bulkheads |
.JPG) |
Temporary Moulds ‘A’ |
.JPG) |
Temporary Centre Mould |
Next, I clamped the first pair of corresponding panels together
and carefully planed and filed them to a matching pair. After
a couple of hours of honest graft, I had all ten hull panels planed
to size. I was now ready to start the process of assembly. My
pile of plywood would soon cease to be an odd looking selection
of panels and start to look like a canoe.
At about this time in the build, Jordan boats, a UK based company
specializing in CNC cut plywood boat kits, introduced a DVD called
Home Boat Building, The Stitch and Tape Method - Volume One.
As a first time boat builder buying the DVD seemed like £20
well spent.
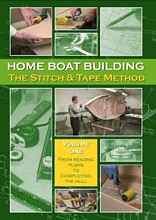 |
Home Boat Building, The Stitch and Tape
Method |
Having watched the DVD on a number of occasions, I cannot recommend
it highly enough for the first time boat builders. The DVD covers
all aspects of building to the stage of having a hull fully taped
up ready for fitting out. Volume two will take this on further,
but at the time of writing it is not available. The DVD shows
quite a few hints, tips and little tricks that make the process
of building a boat easier and quicker and in some areas de-mystifies
the process completely.
Using the first of the tips I picked up from the DVD, I carefully
marked out the stitch holes along both edges of one of each of
the pairs of panels using a compass set at 150mm (6") working
from the centre line out. I clamped the panels together onto the
backing board and drilled the holes. The final thing to do before
assembly, was to apply brown parcel tape to the edges of the moulds
and bulkheads to prevent them becoming a permanent part of the
boat. Panel assembly starts with the centre joint on the two bottom
(garboard) panels. I stitched these together with small plastic
cable ties leaving them loose initially. I needed to open out
the panels, but this was likely to be the worst stage in the assembly
process as the bottom panels twist almost 90 degrees from bow
to centre and that is over a length of only 900mm (3')! I need
not have worried though as 3.6mm ply is very flexible and I had
no problems.
To hold the panels apart so that I could fit the moulds and bulkheads,
I used a piece of timber as a strong back while clamping the outer
edges of the garboard panels to the strong back. I fitted the
moulds and bulkheads to these panels. I now had the garboard panels
held in their correct alignment and could continue to fit hull
panels while leaving all the ties loose for now.
I had a canoe (albeit a small one) that needed to be ‘tightened
up’. Starting at the bottom panels at the centre joint,
I began tightening up the cable ties progressively working outwards
from the centre and towards each end. As the cable tightening
reached each mould and bulkhead, I completed fitting them to the
hull panels.
.JPG) |
Stitching Complete |
After completing the tightening up, I had to do some fettling
to the panel edges to get them to sit properly. I found that in
a couple of places, the cable ties were not strong enough to pull
the panels together, so I replaced them with copper wire (recovered
from some old electrical cable).
Canoe building then took a back seat for over two months while
I refitted the bathroom in the house. The weather during most
of this period, was really too cold for quick epoxy curing, so
having the enforced break did not affect the build a great deal.
Using epoxy was the one area of the build that made me nervous.
Although I have used epoxy on the odd occasion in the past, it
has only been to affect minor repairs, so any mistakes would not
have been a major disaster or cost much in terms of materials.
If I made a mistake with the next stage, I could conceivably need
to scrap everything and start again or give myself a whole heap
of work scraping off uncured epoxy. The enforced break was almost
welcome!
Once the bathroom had progressed far enough, my thoughts again
turned to boatbuilding. Going back to the boatbuilding DVD, it
is suggested that, after the stitching is completed, the panels
are tacked together externally with epoxy and filler prior to
removing the stitches. Then the seams are taped internally. This
looked like a good method of getting a fair hull finish and as
I did not think taping both sides of the joints would be necessary
because of the boats small size, I decided to adopt this method
for my build.
After rechecking the hull for alignment, I mixed up the first
batch of neat epoxy and, using a disposable paintbrush, coated
the panel edges. This allowed the ply to soak up epoxy prior to
applying the thickened glue mix thus preventing joint epoxy starvation.
Having applied the neat mix, I immediately mixed up a second
batch of epoxy that I then thickened with filleting blend filler
to what I thought was a suitable consistency. I applied this to
the ply joints using a mixing (lolly) stick with one end cut square.
As a first major use of the epoxy, I was happy with the way things
turned out.
.JPG) |
The Hull Epoxy Glued Together |
It took a couple of days for the epoxy to get to the stage where
it had gone off enough to remove the stitching ties just leaving
the ties holding the moulds and bulkheads in.
.JPG) |
Panel Stitches Removed |
Although still a long way from completion, I felt I had reached
an important milestone. As can be seen from the photo, I now had
a lot of cleaning up to do to the outside of the hull. I started
the process off using my detail sander, but found that I was in
danger of taking off too much of the uncoated ply while removing
the excess resin. The suggested method on the DVD was to do the
initial cleaning up with a scraper. As I didn’t own any
scrapers, I went out and purchased a set. Although scraping is
harder work than using a power sander, it is a more controlled
process thus allowing me to remove only the excess resin.
After cleaning the outside of the hull to a satisfactory level,
I switched my attention to the interior of the hull. Swapping
between the inside and the outside presented no problems as the
bare hull weighed about 3kg (6.5lbs). After turning the hull over,
I removed the bulkheads and moulds. The inside of the boat needed
just a small amount of cleaning up. It was mostly epoxy runs from
the gluing operation.
.JPG) |
Hull Ready for Taping & Filleting |
As it was going to be impossible to get the glass tape right
into the bows, I needed to run an epoxy fillet up them instead.
Now to get a fillet all the way up the bow, I had to make a tool
to do this as using one of my standard (lolly) mixing sticks was
not possible because they were to wide. I trimmed down a stick
to allow me to do the first section of the fillet, but this was
still too wide to do the whole fillet, so I trimmed down a second
stick to suit.
.JPG) |
Filleting Tools |
After making the filleting sticks, I marked the position of one
edge of the glass tape at each chine location using a compass
set to half the tape width. This was another tip from the DVD.
I then mixed up some epoxy and filleted both bows. I had to ensure
that the filleting mix filled the whole area, particularly at
the forefoot where the fill was quite deep due to the hull panels
being so close together.
Once the fillets had cured, I went on to apply the glass tape
to the internal joints. At the same time, I also coated the bare
ply areas between the tapes with epoxy, thus sealing the interior
completely. As a first attempt at glassing seams, I was reasonably
happy. The quality of the seams improved noticeably as I progressed,
with the last two seams being of a standard that I was very happy
with.
.JPG) |
Hull Taping Complete |
I left the epoxy a couple of days to go off properly before
starting to sand down the interior. As I was fitting bulkheads
at both ends, I did not sand the bows beyond the area that the
fillet holding the bulkheads in will cover. Although breast hooks
separate from the decks are not shown on the plan, I decided that
I would to fit them. I also needed to do some further work to
the bulkheads prior to fitting in the boat. This involved fitting
a 9mm x 18mm (3/8" x 3/4") Douglas Fir stringer across
them at outwale level and a 3.6mm ply doubler above the stringer
in order to give a larger area for the deck to land on.
As a break from sanding the interior, I did the assembly of the
breasthook blank and the bulkheads. For the breasthooks, I laminated
together three pieces of the scrap ply I had left from cutting
out the hull panels at a size that would be big enough for both
the breasthooks.
.JPG) |
Assembled Bulkhead |
Once the epoxy had cured, the next thing was to cut the breast
hooks out. I marked them out by holding the blank over the area
it was to be fitted and tracing the shape of the bow with a pencil.
I re-marked the lines adding a few millimetres to allow for trimming
to fit and so on and cut them out.
Both bulkheads needed to be trimmed to fit. I first marked and
cut the stringers to the correct length and angle taking the size
directly off the boat. I had made the bulkhead doubler larger
than the bulkhead, so I cut it down to the correct size. The final
thing to do, was to shape the bottom of the bulkheads to match
the epoxy fillet along the centre joint of the hull.
.JPG) |
Bulkheads and Breasthooks Ready |
After completing the sanding, I fitted the bulkheads ready for
filleting. First of all, I levelled the boat both fore and aft
and side to side.
I then discovered that I needed to do some extra trimming to
the bulkheads to make them fit vertically. Or, I could have let
the bottom slope in towards the centre. Having set the second
bulkhead up to check, I had the same problem with that one. I
elected to let them slope inwards. I am pleased with this decision
as the finished slightly sloping bulkheads look good.
Once I had the bulkheads in place, I pinned the top both sides
pinning through the hull into the ends of the stringer. The bottom
of the bulkhead was left loose. You can see the pinning in photo
17.
.JPG) |
Sanding Complete & Bulkheads Pinned |
To form the fillets that will hold the bulkheads in, I used one
of my lolly stick mixers as they have a good radius on them already.
I now used another tip from the DVD. Using the fillet former,
I marked the limits of the fillet on both the bulkhead and hull.
I ran masking tape up the line. I only did this on the outside
of the bulkheads, as the inside fillet will not be seen once the
boat is complete and it would have been a difficult job to do
due to the lack of space. I then mixed up the epoxy to the consistency
of peanut butter and formed the fillets. The outer fillets were
checked to make sure they had not sagged. They were then left
to cure.
.JPG) |
Bulkhead External Fillet |
After about half an hour, I went back and carefully removed the
masking tape which gave me a neat clean edge to the fillets. This
was a pleasing conclusion to my first proper fillets.
.JPG) |
Bulkhead Fillet |
.JPG) |
Completed Fillet |
The final thing I did, prior to turning the boat back upside
down, was to coat the bare surface of the bulkheads with epoxy.
I also over coated a couple of areas of the hull where I had sanded
through to the plywood.
To Be Continued...

***** |

.JPG)