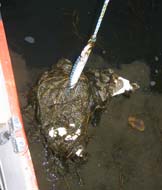
Here in southern Wisconsin we have mostly relatively shallow lakes with mud bottoms. Easy anchoring, right? Well, it used to be, but a massive invasion of Asian Milfoil weed is making it terribly difficult. My first homemade anchor immediately gets so fouled it becomes a ball of weed dragging along the bottom.
In water more than maybe 10 feet deep this weed doesn’t seem to grow, but we very often need to anchor in shallower water. That’s much of the point of a shoal draft boat, I would say.
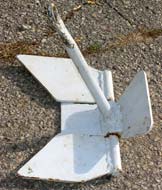 
This mess only comes off with a sharp knife or deliberately palpating the slime. Granted, this anchor doesn’t have ideal Danforth proportions, but any anchor of this type seems to have trouble with dense weeds. I guess the shape of the flukes sort of funnel the weeds in.
Poling with moderate pressure would drag the anchor, so it clearly wasn’t biting at all. It is only an 8 lb. anchor, but it should do better than that.
It was time to figure out a better anchor. But this is daunting for people as poor or cheap as me! Fortunately, welding things from scrap metal is pretty cheap. This works reasonably well for anchors if you spend some money on Rustoleum, which I think works every bit as well as galvanizing in fresh water. Even if you don’t weld, these are cheap jobs for a local welder if you do the cutting and grinding.
I decided to try the Bulwagga because it purports to cut through weeds well. It is also has few parts and almost no moving parts, which makes it relatively easy to build. I’m pretty sure I’d be infringing on a patent if I ever tried to sell one of these, but I bet the Bulwagga people will view this one-off as free advertising. If I like it enough I’ll probably save myself some work and buy the next one anyway.
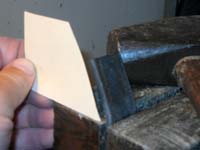
I lucked out and scored some 12” epoxy-coated 1/4” steel plate squares from a friend. This allowed me to use the dimensions from the 17 lb. model. First I made the pattern for the head.
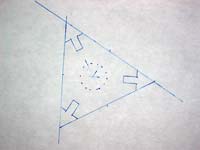
With this in hand I cut the flukes and head.
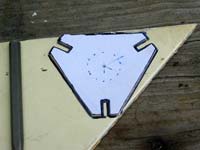
Cutting thick metal is tedious but accurate with an angle grinder. It is well worth the cost to get good name-brand cutoff wheels that are very thin. I used .045” Forney wheels and it took plenty long enough. A 1/8” wheel would more than double the cutting time, heat, and wear on the grinder! The heat is significant. I nearly melted a rubber shoe sole.
The drilling, too, will take some time. I used a 1” bit to drill the large hole in the head, then finished the beveling with files. Most folks will not have so large a bit or the drill to power it, but it works fine to drill smaller holes around the periphery, punch out the center, and finish to the line with files.
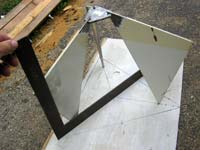
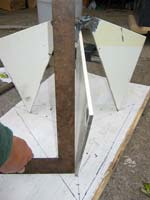
To build one of these anchors you need it set in a jig. I drew the outline of the entire shape on scrap plywood. I ended up putting the tips in 3” from the outer corners of the flukes.
Time for tack welding. Then we gently hammer it into alignment.
We need some braces between these flukes. Looks like about 5” plus welding tabs bent to 30-degree angles. I used ¾” x 3/16” steel strap, and used a cardboard template to guide the bending. A big vice is terribly handy here.
After some hammering, clamping and welding we’re mostly done.
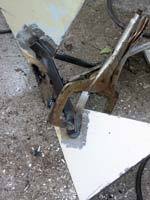
After finishing the welds we need only add a length of 7/8” rod as a shank, which was $3 at the local scrapyard. The Bulwagga design calls for a hole in this shank that a shackle passes through. I thought it would be easier to simply weld on a screw link.
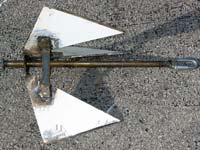
It came out to 16 lbs – pretty close to the 17 I was shooting for. In action it is a dramatic improvement over my prior anchor. It bites through weeds and holds like I’m tied to a bridge. I wound an 18 horse motor up to about half throttle and couldn’t make it budge, and this was in terribly weedy soft mud. The boat would, however, dance madly around the anchor with this much power applied, and I dared not apply more.
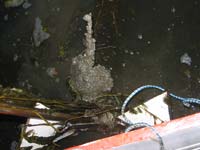
Interestingly, it doesn’t come up clean, but the longer weeds are hanging on the spring-loaded hook attached to the anchor’s eye. Most of what’s on it is just thick, gooey mud. Not bad at all. It doesn’t stow as neatly as a Danforth, but I am perfectly willing to deal with that for improved anchoring in weeds.
Wooden Anchor
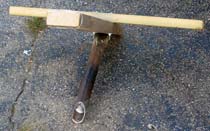
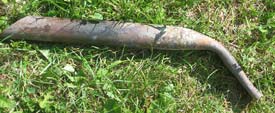
Now that I’ve blithely dragged you through a bunch of welding, let’s look at something the non-welders can do. The ancient Chinese had a pretty cool wooden anchor, and Craig O’Donnell’s “Cheap Pages” has preserved the information for us from a really old issue of The Rudder. Basically this anchor is a wooden shaft with a wooden crosspiece lashed to it. A heavy metal fluke is attached to it, and we can count on the fluke ending up pointing downward. It is trying to sink and the wood is trying to float. Clever of them to figure out how to get away with only one fluke!
I used a piece of scrap pipe for the fluke and did a little idiot-level blacksmithing to flatten one end and bend it to a 45-degree angle. However this should work just as well with a few layers of scrap leaf spring and a wooden block to create the angle. I bet you have something suitable in your junk pile already.
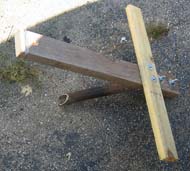
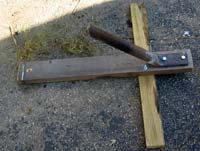
It felt a little light, so I added some lead.
The job is finished with some common lumber and bolts.
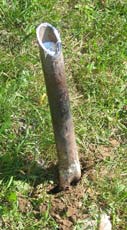
This one came out to 14.5 lbs, and it too held like a rock. Again I could not break it loose with half throttle on an 18 horse motor.
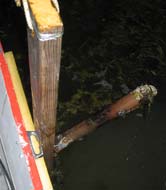
Interestingly, this one comes up quite clean! I guess the ancients hit on something really ingenious with a single fluke. It has been commonly assumed that this was to save cost, as metals were very expensive in antiquity. But perhaps they simply had an anchor that worked really well. This anchor is hardly pretty and rather bulky, but the price is certainly right if you have the space.
This article might seem sort of incomplete, and indeed it is. I think there is probably a lot more experimentation to be done with the wooden anchor, but better to have more of us looking at it than just me. If you come up with an improvement or an easier way to build it, by all means write something!
Rob Rohde-Szudy
Madison, Wisconsin, USA
robrohdeszudy@yahoo.com
|