| What better way to enjoy a weekend camping adventure once you’ve completed your wooden boat project, than in a home-built camping trailer. |
 |
 |
About four years ago I was looking for a winter project and began to research wooden kayaks. I decided to build a woodstrip and purchased the plans for a John Winters Caspian Sea. |
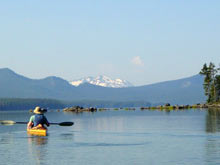
| After four months of work a few hours a night she was done. On her maiden voyage at Waldo Lake in the Oregon Cascades, it was very satisfying to find out she paddled as beautifuly as she looked. |
 |
In the same time frame, our daughter left home for college. We wanted to downsize our Rockwood™ tent trailer of many years, into something more basic and lighter that comfortably slept two. We searched high and low but nothing met our criteria. Therefore, I decided to build my own. The first trailer I built was an aluminum diamond plated trailer box model after an old military jeep trailer and used an expedition style rooftop tent unit for sleeping quarters.
 |
As normal, my ‘continue to improve’ mode kicked in and I began to look for ways to improve upon our camping trailer. I was drawn to the simplicity of vintage Tent and Teardrop trailers. |
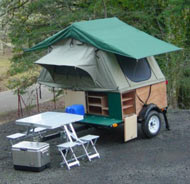
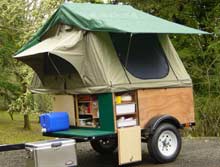
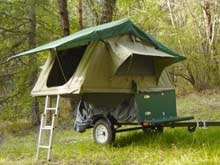
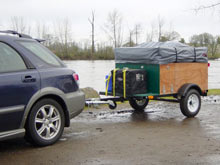
| I also rummaged into my research on wooden kayaks, specifically plywood models. From this was born a camping trailer design I call an Explorer Box. It’s a rolling camp box of sorts. |
 |
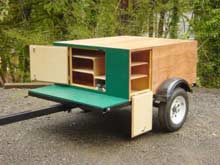 |
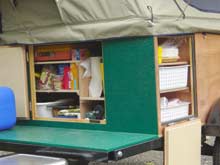
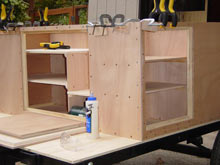
It has a kitchen/galley area on the front that includes organized, shelved storage compartments and counter space. In the rear is a large general storage compartment for bulkier items and storage containers. |
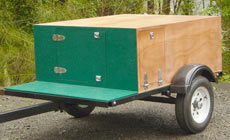
| On top I again used an expedition style roof top tent for sleeping quarters. The Explore Box is great for extending our Subaru’s storage space and at just under 400 lbs dry it’s a breeze to tow. |
 |
The Explorer Box uses a straight forward glue and screw corner block method of assembly. The floor is made from ACX Radiata Pine, shelves are from Baltic Birch and the exterior is made from 9mm BS1088 Okuome for its light weight, strength and beautiful Mahogany finish.
 |
Here are the basic building steps. |
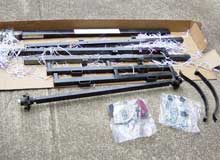
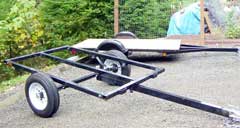
| If you don’t weld, a square tubing bolt together frame kit is an easy alternative to achieve a solid trailer frame platform to build on. |
 |
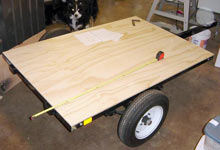 |
Start by building and mounting the floor. |
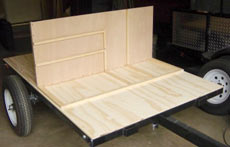
| Build the center wall and attach it to the floor. |
 |
 |
Build the two side walls and attach them to the floor and center wall. |
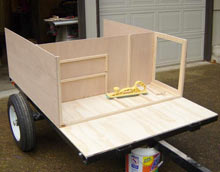
| Build the front wall and attach it to the side walls and floor. |
 |
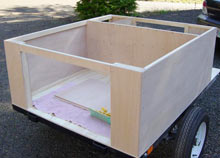 |
Build the rear wings and attach them with the rear door cross support. |
Seal the interior of the box and shelves. Install the front and side compartment shelves.
<<eb-s678-1>> |
 |
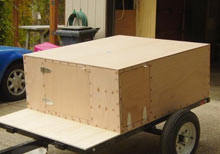 |
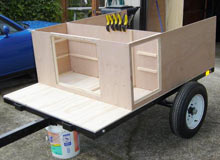
Attach the box top and fit the doors. |
| I like to seal the exterior of the box with a few coats of CPES. The deck and front of the box is finished in a polyurethane truck bed liner material called Durabak to protect from rock chips. The non-conventional clear finish portion of the trailer box is my idea and I’m testing out Target Coatings new Hybrivar waterborne hybrid alkyd varnish. |
 |
 |
The final step is adding miscellaneous hardware, fenders, lights and the tent unit. Now you’re ready to set out on a weekend adventure. |
|