| A Micro-Shanty
Style Houseboat as built by Bill Nolen
Part
1 - Part
2 - Part
3 - Part
4 - Part
5 - Part 6 - Part
7
After building the external window frames for the
Harmonica, and gluing them in place as detailed in
Part 5,
I decided that for a change of pace I'd install the
stern transom drain plug. I've never had a boat that
didn't need some method of draining unwanted water
from inside the hull. With the large open birdwatcher
roof on the Harmonica, there was no doubt in my mind
that sooner or later water will enter the cabin and
hull area. Bailing with a coffee cup has worked before,
but I've found a hull drain plug at the stern transom
is so much easier!
Once again I found what I needed at Duckworks
Boat Builder's Supply. Listed in the
Duckworks Web Catalog, in the Drain Plugs section,
I found a one-inch Stainless Snap Handle Drain Plug,
SD-530075 for only $4.21. Yes,
it's true I could have gone to a local Boat Supplier
and bought any one-inch drain plug. But, finding a
good quality stainless steel one would be more difficult.
Since I was going to install the drain plug in a
wooden transom I knew that I wanted to install a brass
tube to provide a smooth opening for the drain plug
to lock into. At Duckworks I found a one-inch internal
diameter Brass Drain Tube, SD-520210
for $1.22.
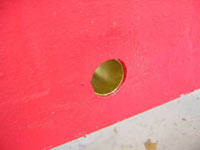
Using a one-inch sized bit I drilled a hole in the
aft side of the stern transom. Here is a photo showing
the drilled hole along with the Brass Drain Tube and
Stainless Drain Plug ready to be installed.
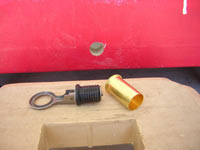 |
Photo 1: Drilled
hole |
I carefully applied epoxy to the insides of the
drilled hole, and then on the outside of the brass
tube, and then inserted the brass tube with the flared
end inside the hull. I then mixed a thicker mixture
of epoxy using wood flour, and applied it around the
flared opening of the brass tube. Luckily, I did remember
to clean the insides of the brass tube, because there
a slight amount of epoxy had found it's way inside
the tube!
| Photo 2: Brass tube
installed |
|
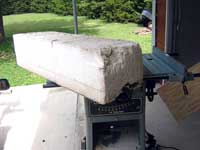
Several years ago I had collected several cast-off
blocks of foam that had been used for boat docks at
a local Marina. For the Harmonica's floatation I decided
to cut one of these foam blocks into four smaller
sections, and install two sections in the bow storage
area, and two sections under the bunks.
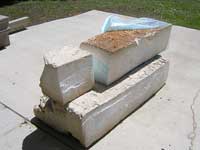 |
Photo 3: Foam
blocks |
| Photo 4: Block ready
to cut |
|
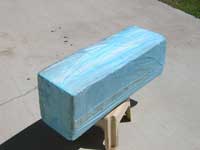 |
Photo 5: Wrapped
block |
After wrapping two of the reduced sized foam blocks
in Glad Wrap Freezer Plastic, I used lawn chair webbing
to suspend the blocks in the bow storage area. I wanted
to keep the blocks off the bottom of the hull to ensure
that any water entering the bow area could drain to
the aft end of the boat without any blockage. The
Glad Wrap was to help keep the foam dry, and reduce
the amount of foam beads flaking off the blocks.
| Photo 6: Bow foam
block |
|
I then installed slightly smaller foam blocks under
the aft ends of the two bunks, again using lawn chair
webbing to keep the blocks off the hull bottom. While
doing this I changed the bunk tops by making the aft
ends of the bunks non-raising. This was done to prevent
the foam blocks from rising in the event the hull
should fill with water! I believe that I installed
a total of about 8-cubic feet of foam, which should
give me approximately 480 pounds of floatation.
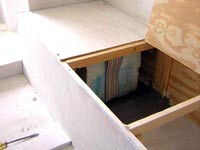 |
Photo 7: Aft
block floatation |
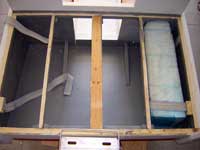
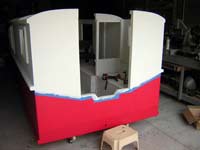
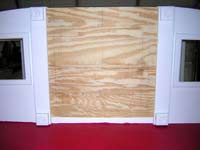
It was time to enclose the bow storage area by installing
the two 3/8-inch plywood panels that had been left
from the hull bottom sheets. If I had not followed
Jim Michalak's plywood layout drawing I would have
spent considerably more money for plywood! Using glue
and ringed nails I attached the panels to the bow
deck framework.
| Photo 8: Bow panels |
|
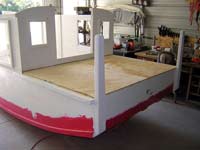
Since I'm well known for my clumsiness I thought
it would be wise to have a sturdy toe rail at the
sides of the bow deck. I had a bunch of 1" by
2" stock on hand so I used that to make the tow
rails.
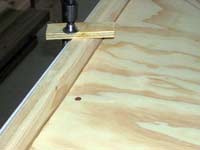 |
Photo 9: Bow
toe rail 1 |
| Photo 10: Bow toe
rail 2 |
|
I was tired of cutting, gluing and nailing wood,
so I started the hateful job of painting the hull.
For some strange reason I really and truly do hate
to paint anything! I tried to bribe my lovely wife
Donna into painting the boat for me, but she said
she would really, really love to do so… but,
she was just "too busy making quilts"! Well,
I was disappointed, but her quilts are beautiful works
of art!
Now before we go any further, I want everyone to
understand that my lofty painting goal is not to have
a boat paint finish that will look beautiful to someone
standing two-feet away! No indeed! What I shooting
for is a paint finish that won't turn your stomach
when you stand some 100 feet away! Or to put it another
way… I'll be happy with an old Chinese Fishing
Junk look… after it's been at sea for months!
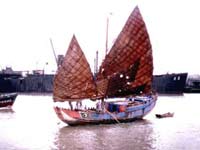 |
Photo 11: Chinese
Junk - This photo of an old Chinese Junk was
taken by Karsten Peterson. Dozens of Chinese
Junks and Sampans can be viewed at his
website |
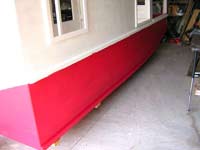
I applied three coats of the same latex red paint
that I had used on the bottom of the hull up to the
center sheer clamp on the sides of the boat.
| Photo 12: Red Paint
sides |
|
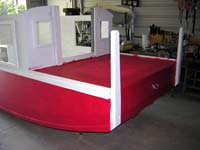 |
Photo 13: Painting
Bow deck |
Using white latex primer I splashed a coat on the
upper half of the outer hull and inside the cabin.
After this cured for several days, I then applied
three coats of Sherman-Williams A-100 External Latex
House Paint to the outside top half of the hull. I
have used this paint for over 30-years on my house's
wood trim, and it has held up great under very adverse
Oklahoma weather conditions.
| Photo 14: Painting
topside white |
|
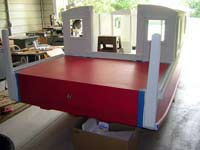 |
Photo 15: Painting
Bow area |
| Photo 16: Painted
Hull side |

|
During the painting process, I would at times work
on some other part of the boat. As far as I know,
no builder of a Harmonica has added forward or rear
hatch doors. I have always thought that hatch doors
would be desirable if a person plans on spending many
nights on the boat. In the event of rain, some method
of closing off the front and rear openings, as well
as the birdwatcher roof opening, would be very desirable.
My plan was to make a sailboat style plywood front
hatch door. I used two 1" by 4" boards to
make side hatch slides, with 3/8" plywood fillers
on the insides of each board. These fillers taper
from the top to the bottom so that the hatch door
will slide down and are held securely. These side
hatch boards were installed on both sides of the front
hatch. Later, if this concept works out OK, than I'll
make similar ones for the rear hatch. Making the rear
hatch door will be much more of a challenge because
of the motor does protrude into the cabin area.
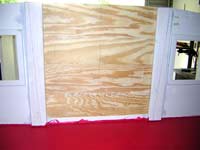 |
Photo 17: Hatch
slides |
| Photo 18: Hatch
door |
|
I will later cut the hatch door into two half's,
and add hinges, so that the door will fold and fit
into the bow storage area. But, before I can do that
I must decided on the style and trim to be installed
on the hatch door. Being somewhat indecisive, I did
what I always do… move on to some other area
of the boat to work on!
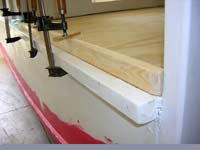
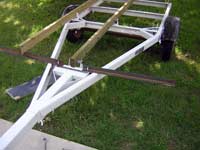
While the white paint was drying I started work on
the Harmonica's trailer. I had previously removed
all the hardware and painted the frame with Rust-Oleum
enamel white paint. The old hardware had also been
painted and was ready to reinstall. At first I was
going to have a 4' by 8' plywood flat bed for the
boat to rest upon, but I finally decided that it would
be easier for me to launch the boat if it was resting
on three eight-foot 2" by 4" board bunks.
As you can see in the work in progress photo, I'm
adding two angle iron brackets to support the ends
of two of the outer bunk boards. These angle iron
brackets will also hold the front boat guides that
will be added later. I will have four boat guides,
two at the front and two at the rear of the trailer.
I have found that trailer boat guides make solo loading
a boat so much easier!
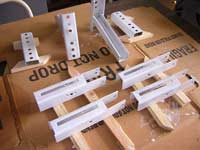 |
Photo 19: Trailer
parts drying |
| Photo 20: Trailer
bunks |
|
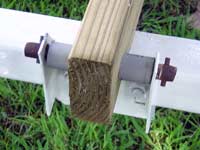 |
Photo 21: Center
bunk holder |
I had planned on having the boat on the water long
before July 2007, but, like many other home boat builders,
many things, bad weather, health problems, as well
as the many mundane chores of daily living have slowed
my progress.
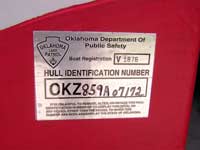
However, on June 21, 2007 my Harmonica was given
and passed a safety inspection by an Oklahoma Highway/Lake
Patrol Trooper! I can now take the completed Inspection
Form to a local Tag Agency, and get a title and boat
numbers for the Harmonica. Once the boat numbers are
applied to the boat's hull the Harmonica can be tested
on the water! Hooray!
| Photo 22: Hull ID |
|
Tune in next month for more daring-do boat building
details…and learn first hand the many ways I
can delay, screw around, mess everything up, and then
delay some more!
GO ON TO PART SEVEN |