| Send
items to chuck.leinweber@gmail.com
for inclusion here next month.
The Treasure Chest
The Treasure Chest is a place in Reports to put those
cool sailing, cruising, motoring, boatbuilding or boating tips
you have. Send us your ideas... We just need a photo and a short
description.
This time we have...
Fairing
When fairing things smooth, two handy tips that will save you
hours of time.
Don't have lights rigged directly over the work. Have them arranged
along the side walls so they hit the work at an angle. This permits
you to see imperfections much better.
Trust your hands, they'll tell you if the surface is smooth,
if it has humps or hollows, long before you can actually see them.
Paul
Pull Saw
I started my cuts just shy of the line and took them to the line
with my razor sharp Lie Nielsen low angle block plane. I abandoned
the technique when I realised how easy it was to cut accurately
with the pull
saw.
Mike
Transom Boarding via a Line
A guy I have corresponded with mentioned that Flying Scot boats
have a line between two rings on the transom that could be used
for reboarding. This is a simple idea and one that is easy to
replicate for any flat transomed boats. I looked it up on the
web.
https://www.flyingscotracing.com/new_scot_images/flying_scot_rudder.jpg
The safety line attached between the two rings on the transom
serves as a place to hold onto if someone falls overboard. I imagine
if it was a bit longer it could allow reboarding after a capsize,
perhaps with some difficulty, but at least it would be better
than nothing.
Here is what I came up with for my Melonseed using some hardware
I already had on the deck near the transom. To use it I unsnap
one end, let the line out through the ring on the starboard side,
and reconnect the snap where desired. This may not be a perfect
system, but it is better than nothing and may get readers thinking
about how they might reboard if capsized.
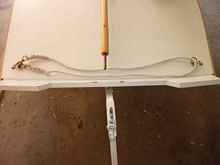 |
The line is stored on deck when not in use |
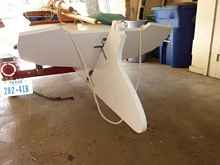 |
Here is one way it could be used. |
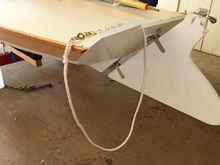 |
Here is another possible way to use it |
After reading on Duckworks about the Mikesboat capsize during
the OBX130 and being impressed at the writer's attempt to pass
along some safety information related to his capsize, I was inspired
to pass this transom safety line idea along to your readers.
Steve
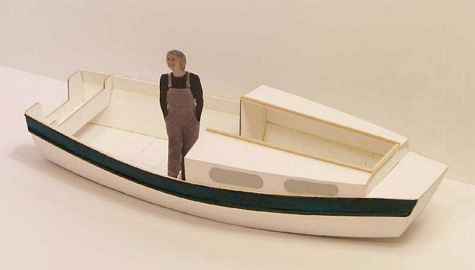
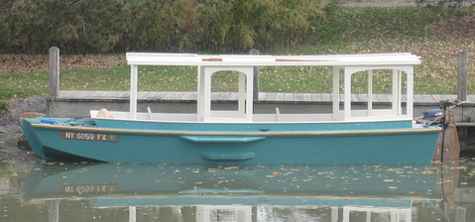
Morten Olsen's
Dutch Pram
I have plans and have built a model of Morten Olsen's
Dutch Pram, a 16ft motor boat similar to Michalak's AF4 but without
the pointy end. The slot top cabin at 6 feet is 6 inches shorter
than AF4. He has several other plans but I especially like this
one due to it's similarity to AF4 in styling. This is a displacement
boat whereas AF4 will plane with sufficient power. Consider it
for inclusion in your boat index. Model photo attached.
https://www.boatplans.dk/boat_plans.asp?id=4
Joe Tribulato - Watsonville, CA
"The water is the same on both sides of the boat"
Apropos the above quote from the Duckworks Site flagstaff, I
attach Sean's new use of his Michalak Piccup Squared design, as
used July 4th, 2010.
Bill Moffitt
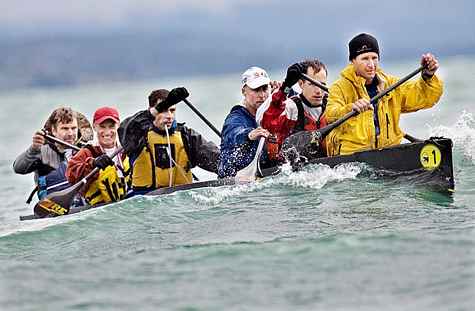
Yukon River Quest
Don't know if you kept up with this one with so
much other stuff going on but the Texas Voyageur placed first
again this year in the Yukon River Quest www.yukonriverquest.com
plus they served as pace boat for Carter Johnson as he drafted
them to a new solo record, even though it was a fairly low water
year.
cheers,
Skip
[This is a boat (above) that Skip Johnson designed
and helped build. Carter Johnson is a holder of several records
including one for the Everglades Challenge.]
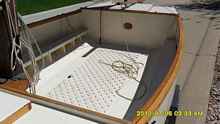
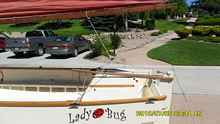
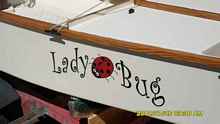
Ladybug
For your amusement, attached are a couple of photos of the Ladybug
I bought from you Chuck with new paint and graphics.......
I didn’t do any of the work except to pick out the paint
color. The graphics came very reasonably from Sidewinder Signs
& Graphics (https://www.sidewinder-signs.com/)
here in Castle Rock. Lacy came up with the designs. Tracy from
Castle Rock Boat Repair did the painting. She put a good workboat
finish on it. I’ll do the mast, yards and varnish this winter.
Meanwhile, I’ll be finding and attacking scuff points.
Sad to say I scuffed it up a bit yesterday at the dock and off
and on the trailer. Another 5 hours on the water with 15 minutes
of light sailing, pounded by large powerboat waves and burned
by the sun. I gotta find another lake to sail on, but they’re
all so far from the house. The mountain lakes are cooler, which
would be a relief from the 90’s at Chatfield Reservoir,
just minutes away but overcrowded with Denver powerboaters. Such
is life.
Jon
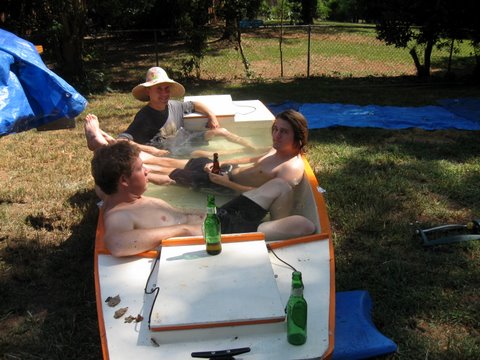
Becky Thatcher modification
There is a short video
on YouTube showing the disturbance at the bow at
about 5 mph, with none seen at 2.5 mph.
This is a heavily modified Phil Bolger/Susanne Altenburger Becky
Thatcher. Becky Thatcher is designed having a sternwheel, driven
by a dual-pedal arrangement. It is 19'-6" X 5', with a 4'
bottom.
Phil Bolger and Susanne Altenburger designed Becky Thatcher for
a proposed, long Erie Canal trip. The boat was built, and you
can read their articles in Messing
about in Boats: V23 N18 Becky Thatcher and V23
N19 Becky Thatcher's Flipping Sternwheel.
My boat does not have the sternwheel, and it has an extra foot
of beam amidship, with further consequences for the hull lines.
The internal structure shows Jim Michalak influences. It's built
of 4' X 10' MDO and is about 20' x 6', 5' bottom. The slot-top
cabin is removable, up or down in 5 minutes, allowing garage access.
Headroom is 4' 11", so that, when I'm sitting on the aft
box, there is just enough clearance for my hat. The boat is powered
by either a noisy Yamaha 3 Hp or a silent Minn Kota 55# (12 volt)
trolling motor. Two batteries are carried inside the center thwart.
I've included a Michalak-like rudder and leeboard guard, toward
rigging a 110 sq. ft. balanced lug. For sailing, I'll replace
the cabin with an slot-top cuddy or just sail it as an open boat.
Thus far, October 2009, we've used the boat mainly for one- to
four-hour day-trips, on the Erie Canal between Pittsford and Fairport,
NY. It has handled well in 1'-2' waves, Lake Ontario out of Irondequoit
Bay, but would be better with a sail. While there is ample room,
we don't foresee any overnight trips.
Tom Andrews Fairport, NY
Cheap, Easy Trolling Motor Remote Steering and Control
Remote steering and power control of a trolling motor doesn't
have to be
expensive or difficult. A few years ago I experimented with a
garage sale
Minn Kota.
I removed the control head and mounted it off to the side on
a transverse tiller, extending the wires that lead down to the
innards. I cut off the tiller handle on the motor head to more
easily connect it to a push-pull tiller with a rubber hose "universal
joint," but if the motor had cost me more than a few bucks
I would have figured out a way to do it without any butchering.
The setup works great, once you get used to a push-pull tiller.
You twist the tiller to control motor speed and direction. I put
a mark on the tiller so I could tell for sure when I was in neutral.
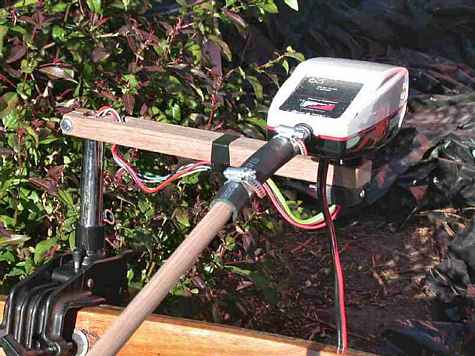
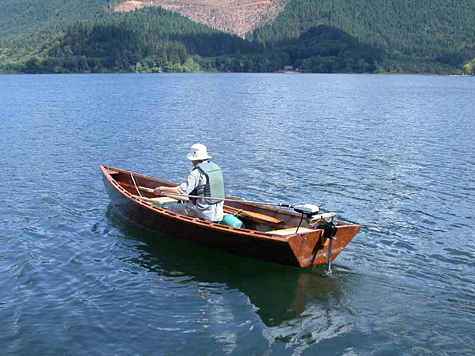

I used the motor before modification on the McKenzie Skiff in
the photos, and with one person aboard the bow was reaching for
the sky! As you can see, with the remote control and one person
(the designer, John McCallum) sitting on the midship thwart she
trims about right, and motors nicely.
John Kohnen
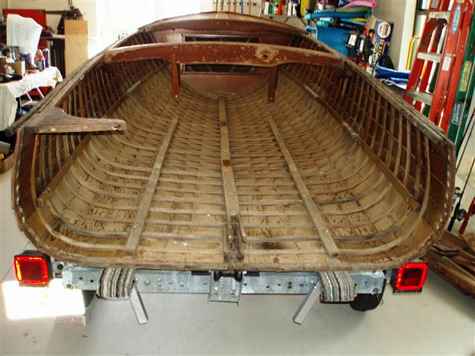
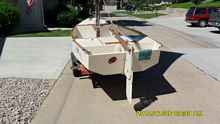
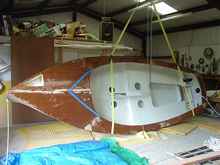
Pathfinder
Chuck, congratulations on another Texas 200! I had to be in Denver
on June 26th, otherwise would have tried to come out to Magnolia
beach. I have looked at the pictures on the website with envy.
I was interested to see a Pathfinder out there this year. I am
curious to know how it performed.
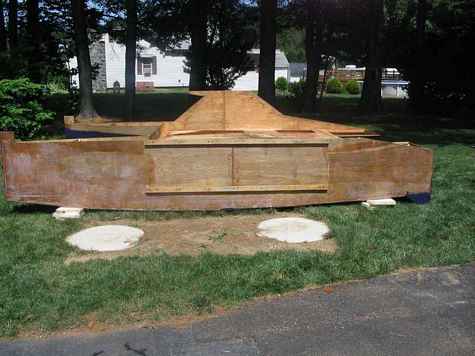
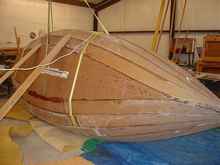
I actually just turned over my Pathfinder tonight, with no help
(I have to mention), and so I'll attach a few pictures. A chain
hoist and a little thought goes a long way. The bottom is pretty
ugly right now, but not for long.
Jon
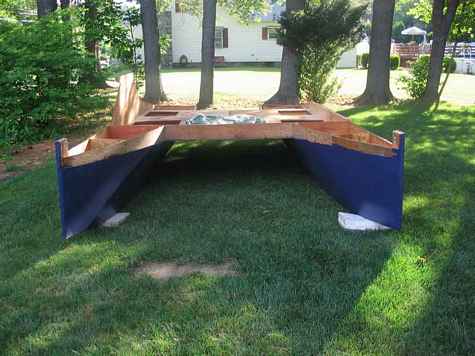
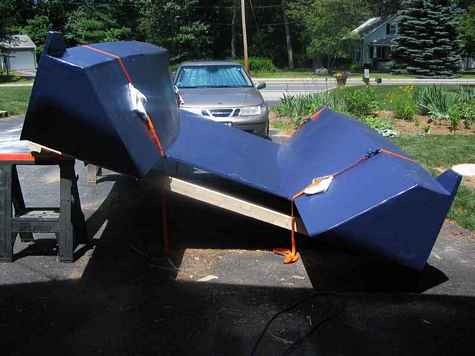
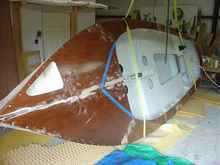
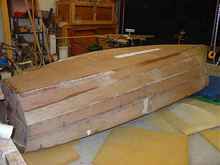
Hot Chili Flipped!
Here are a couple more photos in the Hot Chili saga. She's off
the sawhorses and hard aground. I was forced to remove one cabin
side (which I'll reattach once the cabin is framed in).
If I can get about 3 favorable weather days, I'll be able to have
her nearly completed, save a bit of paint and some rigging/fitting
out. The finish line is near.
Thanks again and another order is pending for glovebox hatches,
cleats, lines etc. Just sorting it all out now.
Stephen Cookson
Rapid build canoe for consideration for the Loire River trip
I thought I'd make a canoe and see what it'd take. I got the
excellent plans for the QuickCanoe 155 if you'd like to make a
lovely, capable, inexpensive canoe, you should get the plans:
https://www.duckworksbbs.
com/plans/storer/qc150/index.htm
I studied the plans and started thinking about the other boats
and canoes I have built. My personal preference for rapid builds
is chine construction, as Stitch-n-Glue has a lot of stops while
we wait for the epoxy to cure. "Idyll hands" and all
that.
I like how quickly I can build a 6-Hour Canoe. I did a pair of
them for the local Boys and Girls Club in three 3-hour sessions.
I like how the Teal uses plywood so efficiently, I had a great
time building mine.
The 6-Hour Canoe is rate to support only 225lbs, which is about
200 shy of what I think we need. The Teal, well, the Teal is more
of a design exercise than a functioning watercraft. I finally
got mine to sail very well, but I've been reluctant to sell it
because it is not a general purpose boat.
https://andrewlinn.
com/080807_teal/annas_start. htm
And the QuickCanoe 155 is optimized for Stitch-n-Glue construction
- no real problem except for the afore mentioned downtimes.
So I borrowed the construction technique of the 6-Hour Canoe,
took lesson from the cut plan for the Teal, and took the design
of the bottom and seat placement of the QuickCanoe 155 and came
up with something I'm calling the Cheap B@stard's Lazy Weekend
Canoe.
Pretty efficient use of 3 sheets of 1/4 or 5mm ply, (1) 16ft
2x8 ripped into (6) 1x2s and the remainder used for stems and
other parts, about
24oz of TiteBond II (one 16oz bottle and part of another), 200
Stainless Steel #8 Flathead Sheet metal Screws, and (16) 2 1/4
Coated Deck Screws. There is no lofting or lining out - the sides
come from straight cuts and the sheer comes from flair. The bottom
shape is determined once the sides are put together (like the
6-hour canoe) It uses external chines for simplicity and durability.
Unpainted, she weighs just under 70lbs. HULLS says it should
displace
479lbs when both the stems touch the water (5" draw) and
when loaded with 600lbs (two fat Americans and way too much gear)
she'll draw 6 1/2" - leaving 7" of freeboard (which
is plenty on a canoe for a river like the Loire.)
Tools used in prep: Tablesaw for ripping plywood and 2x8, sabersaw
for cutting the bow/stern angle, chop saw for cutting the yoke
and temp brace, router with 3/8 corner bit for shaping yoke, the
drill with countersink bit for predrilling holes. Tools used on
site: Sabersaw, battery drill for driving screws, countersink
bit and 1/8 bit for drilling new pilot holes, compound angle chop
saw, power planer, belt sander, orbital sander, (if you don't
like sanding corners), handsaw. Prep Time: 2 hour. You have to
rip the sides from a sheet of plywood and rip the 1x2s, then shape
the stems and yoke, chop the yoke and temp brace, and pre-drill
the holes. Construction Time: about 6-8 hours to completed hull
with decking and seats. Sanding can take as long as you want.
Paint the next day: 2 coats of primer, 2 coats of exterior latex.
Caulk with 3-Hour Shower and you are on the water the next day.
I'll be posting plans soon, but you can see the (unpainted) canoe
here:
https://salem.craigslist.org/boa/1836027979.
html
Here are the numbers - not including the external chines and
gunnels:
Beam at top = 42
Beam at bottom = 31 1/2
Length at top: 184"
Length at bottom: 181"
The sides are straight cut 14 1/2" high. The boat is flared
20° at the
midpoint.
It really isn't anything special - just optimized to minimize
the prep
work and construction while making the most out of the materials.
I'm going to be starting an expeditioning website soon. Part
of the
website will have free plans for "easy to construct expeditioning
boats." Though this design is a little small for 2 people
expeditioning,
it is just about perfect one a single person on a multi-day trip.
I am
considering adding another 4ft (1 sheet of ply for bottom and
sides) to
the length for a 2-man expeditioning canoe, but first things first.
Andrew
Some pics of my new Rushton canoe
I added them to the photos section, under the title
"Rushton's Igo Canoe" - HERE.
She's a SOF modification of Rushton's Igo design
- a more stable hull shape than either the similar Ugo or the
Arkansaw Traveller. 15' x 30" with Western Red Cedar stringers,
steam bent Ash ribs, Redwood trim and a tough, heavy gauge vinyl
skin.
I think she's pretty distinctive, and thought some of you might
like to take a look.
Comments welcome!
Dave Gentry
[Comment of dwforum]
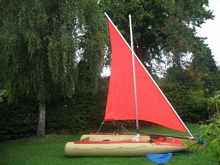
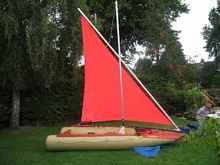
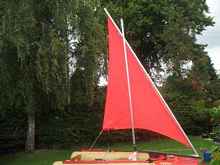
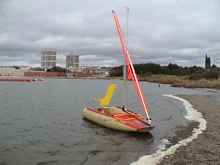
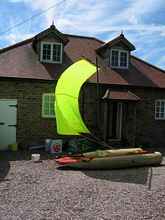
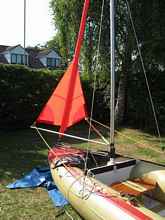
Tinker Traveller
My main expedition boat which you may find interesting
is my heavily modified Tinker Traveller with instant up/down cockpit
cover/self steering and double lateen rig. The first three pics
shows how CE can be infinitely tweaked to balance the boat.
I've sailed this boat to Ireland from Holyhead N. Wales (in standard
sloop rig). Planning to double the Irish sea some time soon.
Mike Pollard
Gunboat in Harbor
The following photos were taken this past weekend
at the Santa Barbra, California Marina.
Any idea of what we are dealing with?
Homeland Security, Navy, Marines, Coast Guard?
Obviously, not totally convert.
Submitted by Bruce Armstrong
Top 10 Places To Float Your Boat
Puddles now has a sliding
seat. The tractor type seat I was using in a temporary mount is
now in a frame with skateboard type wheels.
Curved rails are installed
in the boat:
https://www.flickr.com/photos/ricks_boats/4800190783/in/set-72157615244295923/
The seat rides on the rails like this:
https://www.flickr.com/photos/ricks_boats/4800824558/in/set-72157615244295923/
I'm pretty happy with it so far. I know JW is not so keen on
sliding seats, and I understand that it probably burns more energy
and doesn't do anything to change the hull speed limit on this
type boat. For me, it is a big help to be able to use leg muscles
as well as arms and back. Next will be some type of hold-down
so the seat can be used fixed as well.
It's really hot here in inland California now, hope others are
having good boating or building weather.
Rick
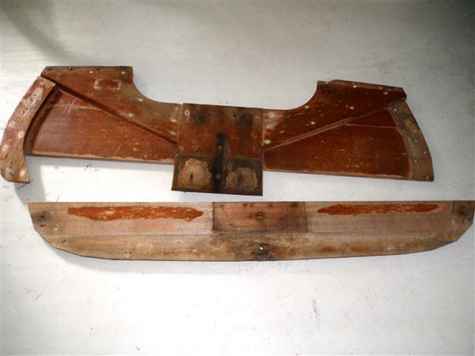
Jim Kelly's 15 ft Lyman
It's motor boats this
time. Jim Kelly's 15 ft Lyman. Look closely and you'll see that
this hull incorporates everything that's hard and frustration
to do in building a boat. Thin light lapstrake, thin small frames,
no major bulkheads, tumblehome in the back and it has a motor
to push it fast enough to water ski! After all these years I've
built, helped build, or watched built just about everything that
floats. I don't think I'd try this one. Have any of you built
anything like this? if so send pictures, and I don't mean a skin
canoe with tooth pick frames or a kayak with fancy inlays, child's
play. This boat probably only weights 200 pounds and with a 40
hp motor will rocket along at 40 miles an hour. Brings to mind
building your own airplane and then flying it, not me. We've been
discussing doing that but our resident pilot is chicken.
David Lucas
Lucas Boatworks and Happy Hour Club
(941) 704-6736
Top 10 Places To Float Your Boat
I have posted some pictures
of my 12 day adventure in the North Channel of Lake Huron, between
Michigan and Ontario, Canada, to Flickr:
(https://www.flickr.com/photos/23898186@N02/).
In late June I hauled Pugnacious (my Long Micro) from Texas to
the UP of Michigan, put Pug in the water, and sailed east in the
North Channel. In 12 days on the water I barely scratched the
surface of what the North Channel offers. I ventured from DeTour,
Michigan, east to Gore Bay (Manitoulin), then north to Eagle Island,
Beardrop, and Blind River, and then SW to Cockburn and Drummond
I. I covered 200 nautical miles in 12 days, including three days
stuck at the dock in Blind River (due to strong winds).
I was very pleased with how my LM handled- at one point I was
sailing in waves so large I could not see over the crests when
I was in the troughs. She scoots right along off the wind, hitting
7.9 knots on the knot meter at one point. I have never been in
my LM in waves this large. Hope you enjoy the pics.
Bill, now in Texas
Long Micro Pugnacious
New "Sea Squirts" Swim-Assist Vests & Life Jackets Offer A Fun & Functional
Twist To Family Water Safety
www.opacove.com
(Eugene, Oregon) - It is a uniquely designed swimming product
that creatively combines unsurpassed safety, comfort and fun all
in one. Sea Squirts are life jackets and swim assist vests created
by Opa Cove to look like different types of fish and mammals in
the sea. The Sea Squirts design includes a first-of-its-kind flexible
fin on the back of each vest. That patent-pending technology of
the FUN fin is not only entertaining for kids as they splash and
swim, it is strong enough to be grabbed, while also holding the
vest neck, to pluck a little one out of the water in an emergency
situation.
"We like to call it the best 'fin-vestment' you can make
to keep kids safe and happy in the water," says Opa Cove
President Richard Barbis. "The great thing about this product
is that in the child's mind they are not wearing it
because they have to wear a life jacket or are learning to be
stronger swimmers, but because they believe they are a shark or
a whale or whatever fish design they are wearing."
Sea Squirts come in several creative choices including: Clownfish,
Great White Shark, Pink Dolphin, Blue Dolphin, Killa Whale, and
Angel Fish -- with new models in the works. The patented Sea Squirts
FUN fish designs are kid-tested and parent-approved. The life
jackets are currently pending U. S. Coast Guard certification.
The Sea Squirts product line is fabricated with quality materials
such as neoprene outer shells, durable zippers & buckles,
and they come with FUN fish character logos on the front that
identify the fish design that the products resemble.
The Sea Squirts swim assist vests are effortlessly effective
swimming instruction aids to help maximize the child's ability
to learn difficult swim strokes at a more comfortable and natural
pace. The swim assists are designed to be adjusted for maximum
or minimum buoyancy to suit any child's level of swimming ability.
The varied buoyancy is accomplished by keeping or removing the
flotation panels that are accessed through a Velcro opening in
the back side of the vest. There are a total of three flotation
panels that can be removed at different stages. For the advanced
swimmers who no longer need flotation assistance, the panels can
be completely removed and Sea Squirts become the favorite dress
up toy for pure fun at the beach, pool, or even at bath time.
In the case of drowning deaths from boating accidents, 90% of
the victims were not wearing life jackets. That's why it's so
important to carry life jackets that kids want to wear.
Until now, all children's life jackets were designed as one-size-fits-all
and therefore had oversized arm holes. As a result, an uncomfortable
groin strap buckled between the child's legs had to be used to
keep the life jacket from bobbing over the child's face. That
discomfort can often lead to a child removing the vest and creating
a drowning danger. Opa Cove has created three different life jacket
sizes with varying arm hole sizes - a solution that please kids
and parents alike. Now the buoyancy of the life jacket is carried
under the child's arms instead of between the legs.
Sea Squirts range in price from $39.99 - $49.99 and are available
at www.opacove.com
For more information go to: www.opacove.com
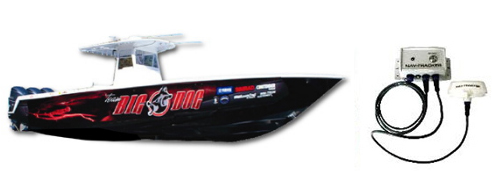
Nav-Tracker GPS Tracking System
To Track Progress of
New York-to-Bermuda World Record Attempt, July 15-16

FT. LAUDERDALE, FLORIDA (USA) - Big Dog, A Contender 37 equipped
with a Nav-Tracker GPS Tracking System from leading boat security
systems supplier Paradox Marine, will shove off from the Statue
of Liberty in New York Harbor on Thursday, July 15, in an attempt
to set a new world record for the 673-nautical mile voyage across
the Atlantic Ocean to Bermuda.
The current world record of 22 hours, 23 minutes was set in July
2002 by a Renaissance Prowler 306 catamaran, shattering the previous
record by over seven hours. Big Dog will
be captained by Chuck Arnold, northeast regional sales manager
for Contender Boats. His crew will include Eddie Winder, President
of Win-Tron Electronics, a leading distributor of marine electronics
and accessories and Les Steward, Contender Northeast VP of Marketing.
For more information about the Bermuda Challenge, visit www.bermudachallenge.com.
Nav-Tracker will report the position of Big Dog every
ten minutes via Google Maps at www.bermudachallenge.com/map.html.
The Nav-Tracker GPS Tracking System keeps owners or captains
informed of a boats location through a GPS tracking service using
the Inmarsat satellite network. The system sets a 500 Meter geo-fence
(radius) around the vessel when armed. In the event of geo-fence
breach or if any of the optional sensors go into alarm mode, the
system will send emails or text messages with latitude, longitude,
speed and heading. It will continue to send messages until the
vessel returns to the geo-fence area, or the system is disarmed.
Optional sensors include door contacts, infrared beam sensors,
deck pressure sensors, engine removal sensors and high water sensors.
There is also an optional 130 decibel siren that can be added
for extra protection.
For more information about Nav-Tracker and other Paradox Marine
boat security, monitoring and tracking and surveillance products,
visitwww.paradoxmarine.com or call 1+954.565.9898.
Paradox Marine - 1200 NE 7th Avenue
- Ft. Lauderdale, FL 33304
Caframo Kona Low-Draw Weatherproof Fan
The Kona from marine fan manufacturer Caframo is a powerful but
low-draw weatherproof fan designed for exterior use in the most
demanding marine conditions. Featuring a watertight motor and
constructed of extruded aluminum, UV stabilized plastic and stainless
fasteners, the Kona is ideal for the wheelhouse, dash, an exposed
bridge or cockpit where splash and spray would spell disaster
for other fans.
View
Kona video (Downloads)
Designed and tested with the latest in 3D parametric and computational
fluid dynamic software for maximum airflow and efficiency, the
blade and grill of the IP55 (Ingress Protection) rated Kona combine
to deliver an airflow rating of 266CFM on high speed. But the
battery-friendly 3 speed fan draws only 0.21 amps on low, 0.26
on medium, and 0.37 on high.
Two mounting options for the Kona are available – a cam-lock
suction cup for portable use anywhere on board and a bracket for
permanent mounting. Available in white or black.
More info: www.caframo.com/marine or call 1+800.567.3556 (toll
free in the US and Canada) or 1+519.534.1080. Caframo - RR2, Wiarton,
Ontario - Canada N0H 2T0
New Epoxy Redefines Epoxy Repair - QR 2400 (tm) EPOXY
Pittsfield, NH - Progressive Epoxy Polymers, Inc., an internet
supplier of epoxy resins/coatings, urethanes, fillers and thickeners
for
commercial, residential and marine use, introduces new epoxy product
-QR 2400 Epoxy.
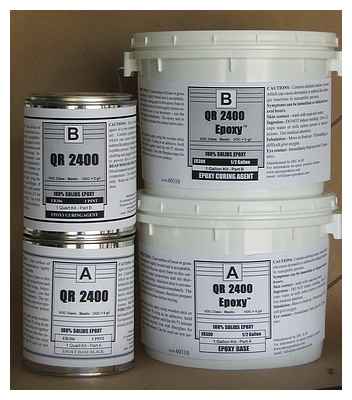
The new QR 2400 (tm) is a normal to slow setting two part epoxy
that forms a tough rubber-like surface, unlike regular epoxies
that set to a hard, brittle surface. QR 2400 includes Kevlar (tm)
pulp in the formulation for internal strength and 'body'.
Unique properties of QR 2400 include its ability to be applied
and used underwater, making it idea for leak repair, especially
where movement or flexing precludes a hard brittle repair product.
Thickness is about that of spreadable butter. Mix the black part
A with equal amounts of the dark brown part B. Potlifie after
mixing is up to about 70 - 80 minutes depending upon amount mixed
and ambient temperature.
QR 2400 was formulated for non hazmat shipping, making it easy
and problem free to air ship around the world for emergency repairs
above or below water.
It can be used with fiberglass cloth to create a flexible, fiber/fabric
re-enforced wrap or skin around pipelines, pilings, etc.
QR 2400 is available in 1 gallon units ($120) and 1 quart units
($50 which includes UPS ground shipping in the lower
48 states). QR 24 is also available in 10 gallon units (two 5-gal
pails) be special order.
Visit PEP's web site at: www.epoxyproducts.com
data and msds at: www.epoxyproducts.com/datamsds.html
contact: Paul Oman - info@epoxyproducts.com
The Mark Steele Challenge
to build
the smallest RC Model Schooner
on Planet Earth
!
There are two classes (a) Smallest RC Schooner
and (b) Smallest freesail schooner.
This Entry
Form to be emailed with 3 different close-range photos
of the entered model out of the water and/or on the water sailing,
to:
windlingworld@xtra.co.nz
(attention Mark
Steele)
by 15th November 2010. There is an award for each
class and winners
will be advised by email in early 2011, and photos and details shown in
an
article in a 2011 issue of
Marine
Modelling International
after that in Duckworks
Magazine and The
Model Yacht.
******
|

-wr-wr.jpg)


