| A Micro-Shanty
Style Houseboat as built by Bill Nolen
Part
1 - Part
2 - Part
3 - Part
4 - Part 5 - Part
6 - Part 7
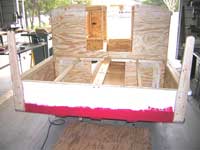
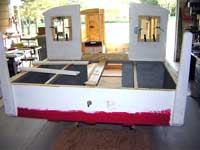
After all my hired hands had collected their money
and fled the scene I pushed the boat back into its
barn. My, the boat sure looks different with the bottom
resting in its proper position! For the first time
I was able to envision this square plywood box actually
being a boat!
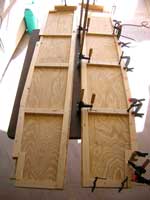
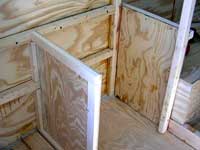
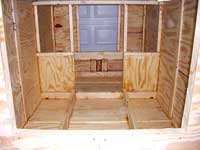 |
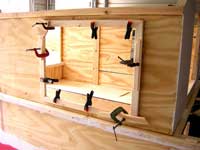
Looking aft |
First order of business was to apply PL Polyurethane
Concrete & Masonry Sealer in all the seams on
the insides of the boat's hull. PL Concrete Sealer
comes out of the tube in a very heavy mixture, but
was easy to press into any gaps in the seams using
a wooden stick or plastic spoon.
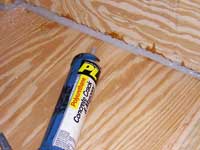 |
PL concrete
sealer |
I had read that PL Concrete Sealer would bubble up
as it cured, however this did not happen to any of
the seams on my boat. The mixture cured to a rubber
like texture, that I believe, will remain flexible.
The plans for the Harmonica call for a flat roof
that has an open slot in the center of the roof. This
open slot is commonly called a "bird watchers
roof" and in my opinion is a very desirable feature
of this boat. However, I have never been an admirer
of the flat roof!
Besides, in the back of my one-cell brain, I had
been thinking that an old style Gypsy paint job and
décor would sure look nice, but the flat roof
would have to go! So, I cut out some 2" by 4"
spacers and placed then on the roofline to see how
a rounded roof would look like.
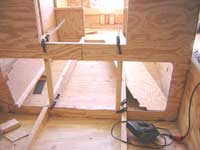
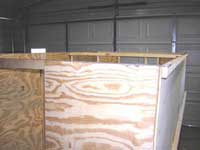 |
Flat roof |
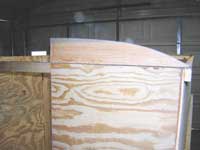 |
Rounded roof |
Well, what do you think? I decided that I liked the
rounded look much better! Plus, the rounded roof gives
slightly more headroom to any sitting passenger. I
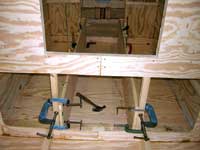
applied a bunch of PL Polyurethane Premium Construction
Adhesive to the top of the bulkheads, and using clamps
attached the wooden spacers to the bulkheads.
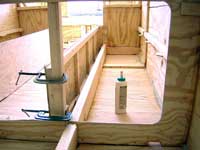
I then turned my attention to the seats/bunks of
the center cabin area. The Harmonica plans show that
the 2" by 6" hull stiffeners are used for
the bottom of the seats/bunks, thus the seats/bunks
height would only be 6" from the cabin floor.
After doing quite a bit of measurement, and consulting
with people who had built Harmonica boats, I decided
that I would be able to raise the seat/bunk height
to 14" and still have sufficient headroom with
the round roof.
Ripping some 1/4" plywood sheets into 14"
panels, I measured and cut two of these panels into
6' 6" lengths. Laying the panels on the cabin
floor I measured the locations of the 1" by 4"
cross braces and the notches needed to clear the 2"
by 2" bulkhead boards. To cut the curving surface
of the hull's floor on the plywood panels, I dug around
in my wood scrap pile and found the discarded bow
ends of the 2" by 6" stiffeners and used
one for a guide.
I then cut the panels to fit the floor and bulkheads.
After assuring that the panels would fit, I then cut
and attached, using Titebond lll glue, 1" by
2" boards to reinforce the panels. At the top
of the panels I moved the reinforce board down 1/4"
to allow space for the top plywood top or lid to fit
after the panels are installed.
 |
Bunk sides completed |
Prior to installing the seat panels I discovered
that one of the modifications that I had hoped to
make wasn't going to work! I had modified bulkhead
#2 by cutting two side opening instead of the center
opening as set forth in Jim Michalak's Harmonica plans.
I had thought that by extending the bunk area into
the bow storage area I would be able to use about
18" in the center of the boat for an area for
a Porta-potty and cooking cabinet. However, by raising
the bunk height to 14" instead of 6", there
just wasn't going to be enough room for my feet to
slide into the storage area! So I had to remove the
plywood web in the center of the bulkhead and install
two 2" by 2" braces. After the glue on these
braces had cured I was ready to install the bunk panels.
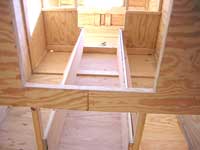
 |
Center ply removed |
To determine the seat width that would provide some
comfort and still leave room in the center aisle I
moved the seat side panels around until I found a
location that would give me a seat width of 21"
and be fairly easy to attach to the bulkheads and
stiffeners. If a person was planning on spending many
nights sleeping on the Harmonica, the width of the
seats could be increased by several inches and still
have sufficient room in the aisle.
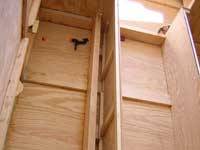
 |
Seat assembly
1 |
This location required that I insert spacers between
the seat panels and the hull stiffeners.
 |
Seat assembly
2 |
After I was happy with the location of the seat panels,
I apply PL Adhesives to the panel surfaces and clamped
the two panels into place.
 |
Seat assembly
3 |
I then cut 2" by 2" boards to fit on the
hull sides across from the two panels. These boards
will provide a surface for the seat tops to rest upon.
To attach the boards, I first marked their proper
location on the boat's hull, and then drilled 1/8"
holes from the insides of the hull. Later I applied
a heavy bead of PL Adhesive to the boards and held
them in place while my son applied wood screws from
the outside of the hull. These screws will be removed
after the adhesive cures.
After the adhesive cured I cut small plywood tabs
and glued the tabs to the bottom of the 2" by
2" boards and the seat panels. These tabs will
align and support the seat cross braces while the
glue cures.
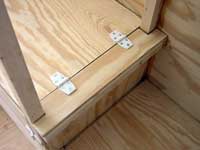
 |
Seat assembly
4 |
Using 1" by 2" stock boards I cut and installed
cross braces by gluing and clamping the boards to
the small tabs, thereby adding braces to support the
two seat panel tops.
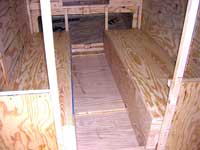 |
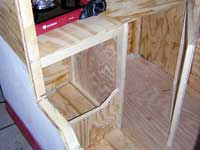
Seat tops installed |
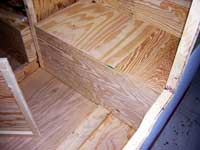
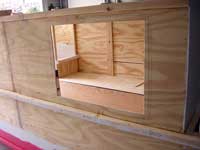
Since I could not use the center area of the boat
for the Porta-potty and stove, I elected to add a
cabinet to the aft end of the Harmonica to house these
items. However, first I had to decide on which side
of the boat did I want to place the operator's seat.
After much pondering on the choice I finally decided
that I would place the operator's seat on the starboard
side and the Porta-potty and stove cabinet on the
port side. Using scrap boards and plywood I first
made the Operator's seat enclosure, and then the framework
for the port cabinet that will provide a surface for
the single burner stove, and a enclosed cabinet area
to contain the Porta-Potty.
To make the use of the Porta-Potty easier I made
the cabinet top over the Porta-Potty swing upward
where a simple latch holds it in place. I also made
the door to the Porta-Potty enclosure swing open towards
the bow of the boat. With a small curtain sliding
from the starboard side, a small measure of privacy
might be attained. To add a neat look to the cabinet
raising and swinging doors I searched our local Lowe's
and Home Depot for just the right looking hinges,
but failed to find anything I liked. Looking through
the Duckworks Boat Builders Supply's Web Catalog
I found just the right hinges for my Harmonica's doors!
White Nylon
Door Hinges, PN: SD-202531,
which was a real bargain for only $1.78 each.
 |
Operator's seat |
 |
Porta-Potty
area |
 |
Porta-Potty
cabinet 1 |
 |
Porta-potty
cabinet hinges |
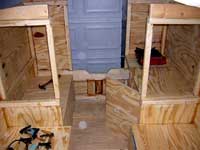 |
Aft end of
cabin |
Having the rough-in work finished on the port cabinet,
I turned my attention to the bow area of the Harmonica.
Okay, so I do have a limited attention span problem!
Once I get tired working on one area I've found it
best if I work elsewhere for a while! My quality of
workmanship doesn't improve, but I feel so much better!
I used two 2" by 4" boards, rounded on
the edges, for the bow upright boards. Other Harmonica
builders had advised me that since the bow uprights
are bolted on the insides of the bow transom it would
be wise to attach these boards before the bow deck
sheeting was attached. Thereby reducing the need for
me to force my pudgy body into the bow storage space!
I used three 1/4" bolts to attach the boards
to the framework of the bow transom.
 |
Bow upright
boards |
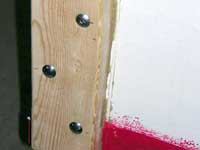 |
Bow upright
bolts |
Deciding that the boat's bow eyebolt should also
be installed prior to the deck sheeting, I attached,
with glue and wood screws, a long 2" by 4"
board bracing along the insides of the bow transom.
I then drilled the hole for the front eyebolt. I used
large fender washers on the inside 2" by 4"
brace to provide addition holding strength to the
eyebolt.
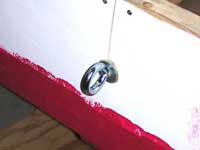 |
Eyebolt |
I decided not to install the deck sheeting until
I installed the foam flotation in the bow storage
area. Since the foam blocks were stored elsewhere,
and it was raining, I started cutting the window openings
in the boat's side panels. Using the plastic sheets
that I had bought at Lowe's as a guide, I marked the
outline of the sheets, then I measured 3/8" inside
the guide lines, marked that area, and then drilled
holes in each corner of the new lines. I used a jigsaw
to cut the window openings.
Prior to this time I had considered several ways
to construct the windows. My first thought was to
buy used RV trailer windows and install them. However,
I quickly learned that securing the right size of
windows was difficult, and frankly, the cost of $30
to $40 per window, plus crating and shipping costs,
was way too costly for my billfold!
I then discussed, with other boat builders, the various
methods of making sliding opening windows, windows
that opened upward, and fixed in place non-opening
windows. I finally decided that fixed non-opening
windows, while certainly not my first choice, would
be OK for my boat since the bird-watcher style roof
should provide sufficient ventilation in the cabin
area.
 |
Front Side window |
 |
Front Side window
framed |
 |
Front two windows
framed |
The windows are framed with 1" by 2" boards
in such a manner so that the 1/4" plywood boat
sides provide a surface for the plastic window sheet
to fit against, and hopefully provide a watertight
seal. More details later when I install the plastic
sheets and internal window frames.
In the next part of this long-winded-drawn-out article,
I will be installing the foam flotation blocks, completing
the painting (well, most of the painting anyway!)
and who knows…maybe even install the rounded
roof panels, and give the hull it's first taste of
lake water?
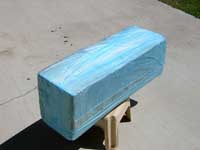 |
Wrapped foam
block |
GO ON TO PART SIX |