 |
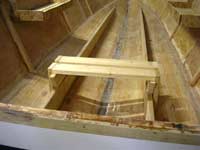
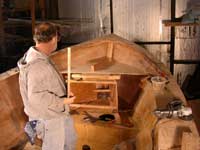
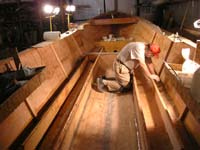
Once Jim's Tolman Jumbo was safely right side up (see turnover), he got busy building a seat that would slide along the stringers while he filletted and taped all the interior seams. |
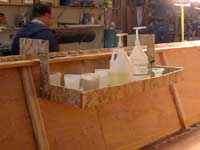 |
He also built a couple of handy caddys to hold epoxy, filler, tape and tools to minimize trips in and out of the boat. |
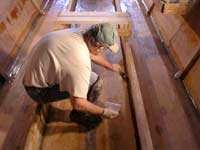 |
Jim is getting pretty good at making fillets. Here he works on the stringer/bottom joint. |
 |
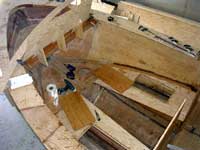
In this shot, you can see the crash bulkhead. This protects the boat from flooding if it holes from hitting a hard object on the waterline at speed. The hole is for an inspection port. On top of this Jim has built a temporary structure to hold the bottom of the anchor well until the epoxy sets. |
 |
Here the bottom of the anchor well has been glued in place. The 2x4 on top of it is temporary to hold it straight while the glue sets. |
 |
Next, Jim glues in the anchor well rear wall. All of this assembly will be glassed and taped above and below and will be very strong. The front wall of the cuddy cabin will take off from the back of the anchor well, but with an angle toward the rear, |
 |
Jim heard from other builders that the floor of the cabin needed to be a bit higher on the Jumbo model to keep water drained at all times, so he added three inches to the nominal floor heigth. Here he is smoothing the added piece ahead of glassing the whole stringer (glass at left) |
 |
Back to the cuddy, here you can see the lower parts of the bulkhead that separates the pilot house from the sleeping quarters below. These are filletted and taped in place. |
 |
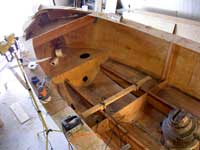
Two 50 gallon belly tanks will go there between the stringers. Jim is installing supports outside the stringers to hold the cabin floor. There will be horizontal beams across the tanks to hold up that part of the floor. |
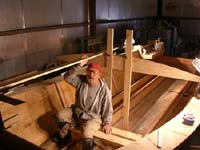 |
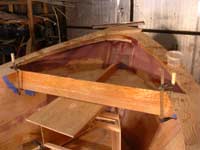
Jim spent a little time mocking up the cuddy roof. There is some complex geometry involved and decisions to be made about heigths and angles. Both ergonomic and asthetic considerations are involved. |
 |
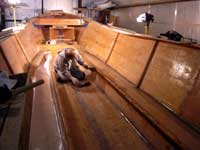
Jim finally got tired of walking over the stringers while working on the cuddy, so he took some time to cut out the plywood that would become the floor. It's not installed, just lying across the stringers. |
 |
As Jim sweeps, you can see the cuddy bulkhead and the forward cabin wall. The latter will be marked to the proper curve later and removed to be cut, then reinstalled. |
 |
In addition to the two belly tanks, there will be two side tanks. One of them is visible on the left in this picture. |
 |
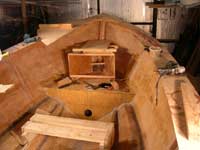
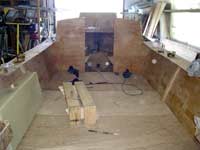
I climbed a tall ladder to get this overhead perspective of the interior of the cuddy. You can see the two access ports to the area below the V berths and their covers. You can also see three temporary supports holding the forward cuddy wall at the proper angle and postion. |