Trilobyte 16: Building the Prototype
by Dave Zeiger
https://www.triloboats.com
A Hapless Visitor is Pressed into Servitude
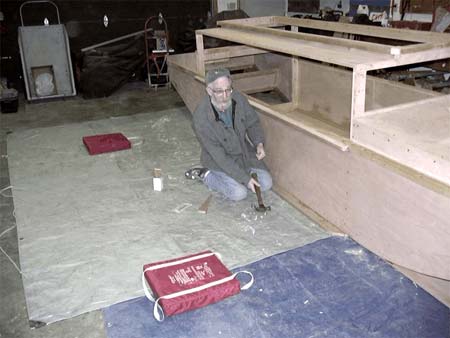
Alaska. February. An unheated garage. Available for seven days. Build a boat? Sure!!
But not just any boat. Trilobyte 16 is designed as a week’s build for a semi-skilled couple (measure, hammer, saw, smear). Stripped to essentials, it was looking like three days was possible (ok... they’re 12 hour days). We’d have to correct and flesh out the plans, document and shop for materials during the week (did I mention we don’t have a car?).
Eight sheets of ply, one of acrylic, a pile of framing, glue and fasteners later...
...well, it took us seven days.
We used Gorilla Glue throughout, hoping to manage a one-glue, fast kicking system. Turned out to be expensive and hard to clean up at quick-build speeds (it kicked already?). The draft design had a lot of difficult-to-clean interior angles that have since been eliminated, our 4" Makita angle grinder with sander adaptor died minutes into the first day, and we were building a ‘keeper’. The upshot? We ended up losing two days (!) to hardened snot-noses. Half a day for the hatch and its supporting structures. Hours on a stupid gangway design. Half a day for a transom rebuild (unnecessary after all). Hours posing parts for pictures. Hours painting with brushes (hey, pads work great and way better than rollers for this kind of job!). Half a day of false starts on oarlock kludges. Half a day on unforseen shopping (you get a shopping list). If you’ve subtracted it out, you’ll notice we’re under three days... we had oars and launched without a rig.
...so, a nice and tidy three days!
Remains to be proven, but I think we’re in the ballpark. Plus, Anke and I, while nice people who’ve been persistent through some large projects, are not Mr. and Ms. Efficiency. We’re pretty gabby and prone to long breaks. I’m deliberate to the point of sluggish, myself. Overly cerebral in my approach to the material world. We’re probably about the middle of the road (we know a guy (singular) who built a Micro in a week, for Pete’s sake!).
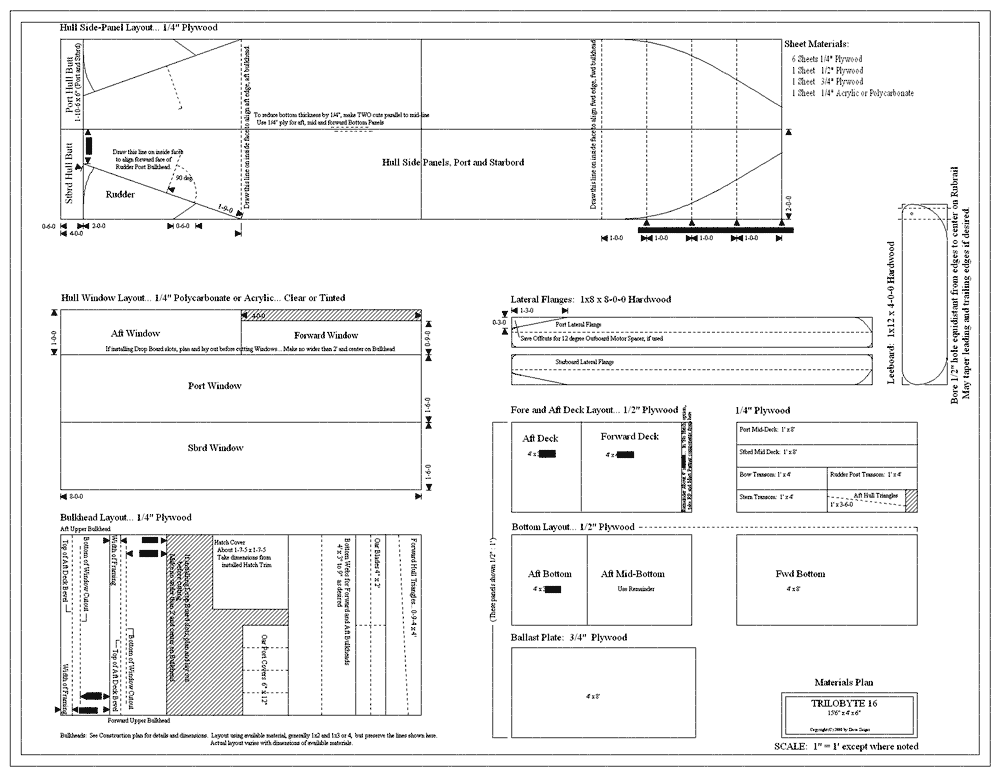
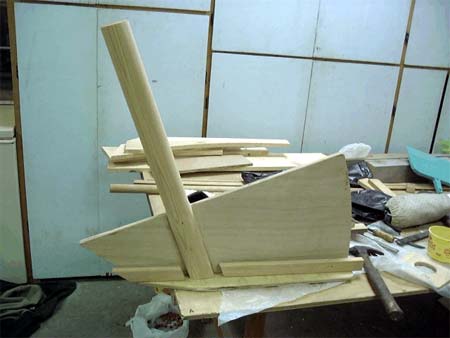
After Birdwatcher qualities, design priority was to expedite the building process. ‘Super Quick Build’ is achieved by starting with ‘instant boat’ layout (direct on ply panels, no jig). Plywood dimensions and their simple fractions determine main component dimensions. This eliminates a great deal of general measurement and cutting. A further consequence is that a ‘self-rectifying’ design emerges, i.e., make the edges meet and the boat is pulled into perfect alignment. ‘Physical landmarks’ take the place of much of the layout. The barge hull has no plan view curvature (constant beam bow to stern) and the planking is laid outboard of full ply width panels. This eliminates all longitudinal and edge cuts. The barge mid-body is a flat run, eliminating mid-body layout and cutting (incidentally yielding a flat (sleep) area (vs. the sharpie’s rockered curve) and constant headroom). Three of the five thwartships members have been standardized for ‘mass production’ and the other two stress similarity.
Materials/Layout Plan... Note straight lines and minimal layout
(click image for larger view)
The result is a very quick build. The following account skips expendable features (hatch, drop boards, toe rails, motor mount, cabin heater) as one might when building on the go. I’ve also edited out dead-end approaches, corrections and rebuilds cluttering the prototype Times given are accordingly corrected as per the time logs we kept. The builder’s guide (comes with the plans) goes into detail and includes a lot of little tricks.
Before building ‘in the field’, you might try one at home (or at least a model). Pre-fabricate any of the little dinky pieces or big fabric pieces that’ll give you stress out there. The build time doesn’t include shopping, site finding, preparation or clean-up. Try not to have a hard deadline breathing down your neck. Remember, it’s not a race. Have fun. Breath. Eat. Drink. Cuddle (if you’re that kind of team). Line ‘em up and knock ‘em down. Did I mention fun?
Here we go... Day One:
Layout and cut all panel pieces.
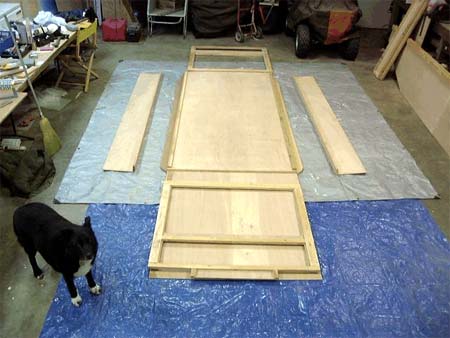
Frame the transoms and rudder post bulkheads (these three identical), fore and aft bulkheads and assemble hull panels (with bow nailers), bottom assembly (full panel glue job) and upper decks. Bore screw holes around all windows. Glue together the rudder halves (not nailed, so need clamping pressure... save until last to keep clamps free). We laid out together, then one cut and the other framed (cutting framing stock as needed) which worked well. This will take about one of your days... sweet dreams!
Day Two:
While drinking your jumpstart beverage, review the Builder’s Guide for this phase. We’re now switching to Gorilla Glue or equivalent for the faster set, full waterprooficity and automatic (non-thickened) gap filling . It’ll foam until it starts to harden, though, usually about 20 minutes. Clean interior angles behind yourselves with rubbing alcohol in multiple passes. It’s easy to sand off open surfaces, so these may be skipped. Corners can be dealt with using some combination of a sharp knife, a right angled riffle rasp and a fold of your most durable sandpaper (spent disk pads work well). If you’re quick building, skip as much of the interior as you can stand.
Bevel, glue and nail the transoms into place between the side panels. You can skip the bevels and fillet, but I don’t think you’ll save any time. Ditto the rudder post bulkhead (no bevels).
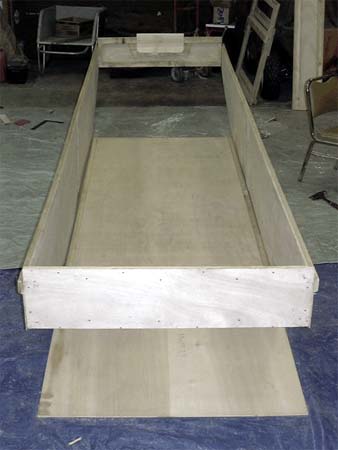
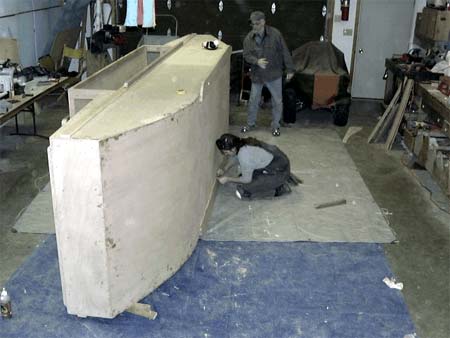
Pick up the hull by the transoms (gently, now) and set into position on the bottom assembly, aligning the aft hull side angle apexes (apexi?) with the ballast plate’s aft edge. Make sure about this, and watch the moving drama of self-rectification unfold from this point onward. The ballast plate serves as the nailer for the sides. At this point, the cabin hull is complete, but you have a bow flap. Turn the hull over onto 4x4 or larger blocks (to spare the beveled transoms... they don’t need to be more than roughly true). Sit on that flap (gently guiding it into the rabbet formed by the bow nailers and the bottom of the bow transom) Nail from aft toward the bow. Trim the overhang, if any.
Roll her back to her feet. Install the fore and aft bulkheads at the ends of the ballast plate (which serves as nailer along the lower edge. Send the partner who’s best with a hammer forward as the up-curving bottom will crowd your swing.
Install the cabin decks spanning the bulkheads.
Install the forward and aft hull triangles into the rabbet formed by the rubrail and the lower hull panels.
Lunchtime! ... I fixed you this nice meal and you can’t take your eyes off that boat!!
Ok. Nailers (use TiteBond for these) are set ½" below the upper and lower aft hull edges (for the quick build, we’ll skip the hatch and its beams). Install the fore and aft decks, fitting them gently between the hull panels. With no hatchs, they are tensioned spans and don’t require beams. Trim. Roll her on her side and install the aft bottom panel (this can be deferred to make rudder installation less cramped).
Layout, cut and install the mast step. This is a centerline plank-on-edge just forward of the forward bulkhead, spiled to fit the bow curve. Spiled, as the bottom will ‘saddle’ slightly at installation. Sorry about that. Thwartship holes are drilled along its length. The mast will have a matching slot to straddle the step, with its own thwartship hole. Use a lynch pin to lock the base into place on the step. You’ll be able to adjust the sail’s center of effort within a fair range.
Cut the hole for and install the mast partners. This a good candidate for pre-fabrication if you’re building in the field. The dream team uses a series of holesaws in a drill press. We settled for a brace.
Assemble the rudder and its associated mountings. The waterproof version takes a bit longer to make, but isn’t too bad if you’ve got the holesaws. Otherwise the area aft of the rudder post bulkhead is free-flooding via the rudder post entry. Again, prefabrication is a virtue.
Layout and cut the oar ports and install their closures (more pre-fab candidates). Install locks on the lower rubrail and affix to hull.
Install the windows with a silicone caulk (won’t wash out if it rains), screws and finish washers. A good poke with a scratch awl gets ‘em started without actual pilot holes. Don’t be stingy with the caulk and don’t over-tighten.
Install the snap studs to match the fabric cover you undoubtably made at home.
Build or buy some oars. Ours are small spruce trees, fat end inboard, with a handle whittled at one end and a 1/4" ply blade at the other. Nobody steals ‘em.
At some point in here, you’ve probably spilled over to the third day. Be thinking about your finishing choice, and try to coordinate passes with the day’s end. Say you choose latex primer and paint (look for short dry-times, typically 1 to 2 hours, in exterior ‘house and trim’ grade). Prime at the end of day two, touch-up and topcoat end of day three. If you are slam-bammin’it, oil inside and out on day two and again on day three. Paint later, if ever.
By the way, you’ll notice that she’s getting heavier by the hour. All this flipping around can be handled by one moderately strong person... two’s a snap. Respect the various degrees of fragility (decreasing as you go), and handle at the hard points. We set up two boat cushions to catch a slip, but had no problems going to the balance point, switching sides and easing her down. We got rougher later with no harm done.
Day Three...
The last day is spent finishing up the above, and getting the rig (sail pre-fabbed) set up.
Okay! A cup for the gods, a cup for the boat and the rest of the bottle for yourselves... you’ve earned it!! Now turn in, ‘cause you’re sailing away in the morning!
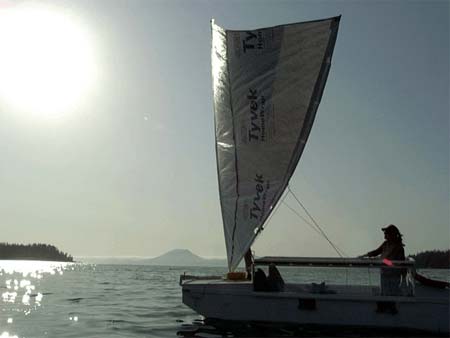
Yup... That’s a Bona Fide Volcano
Finalized plans available at https://www.triloboats.com.