
 Custom Search
|
| boat plans |
| canoe/kayak |
| electrical |
| epoxy/supplies |
| fasteners |
| gear |
| gift certificates |
| hardware |
| hatches/deckplates |
| media |
| paint/varnish |
| rope/line |
| rowing/sculling |
| sailmaking |
| sails |
| tools |


| join |
| home |
| indexes |
| classifieds |
| calendar |
| archives |
| about |
| links |
| Join Duckworks Get free newsletter CLICK HERE |
|
|
| Centerboard Slot Gasket |
by Tim Abbott
- Mentor, Ohio - USA |
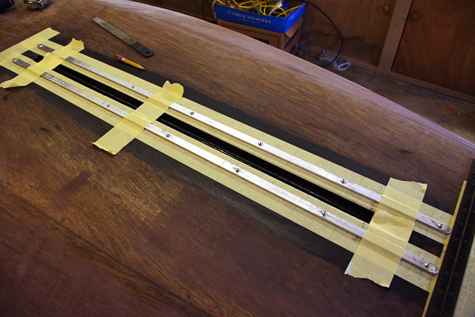
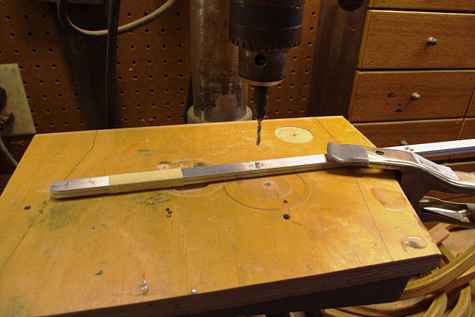
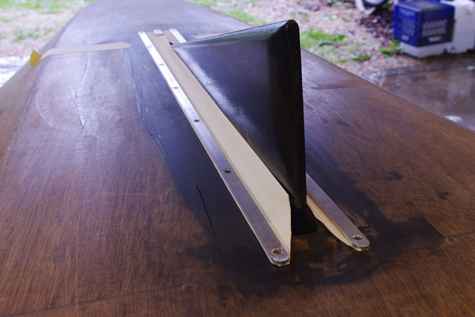
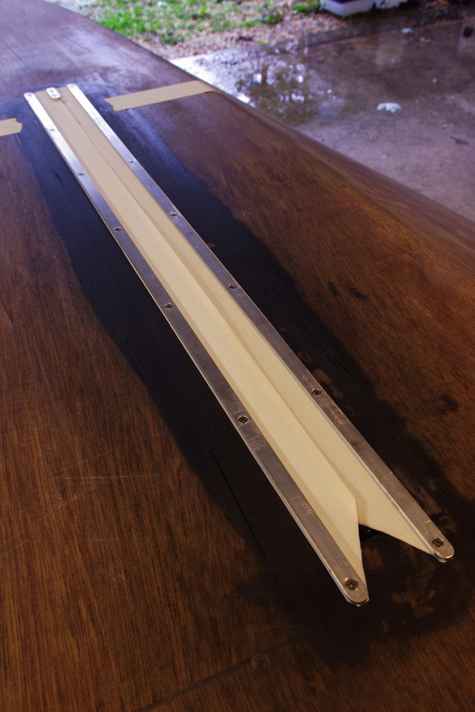
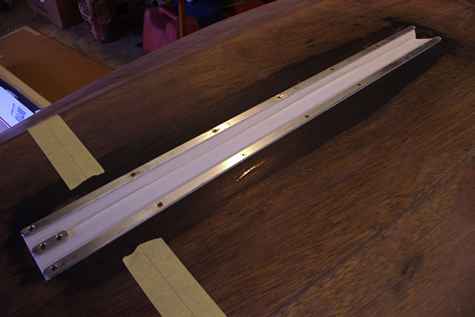
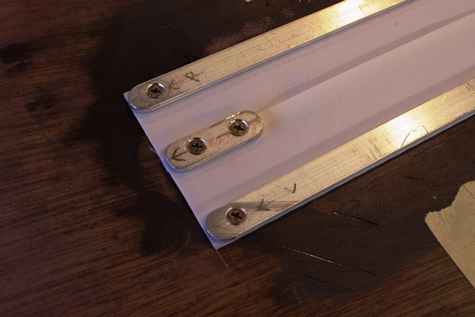
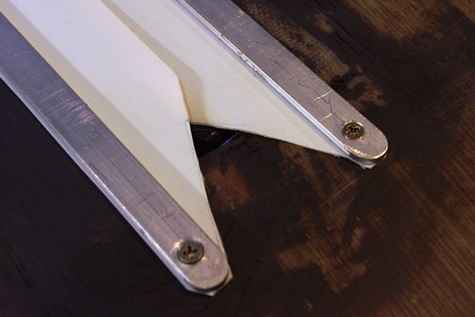
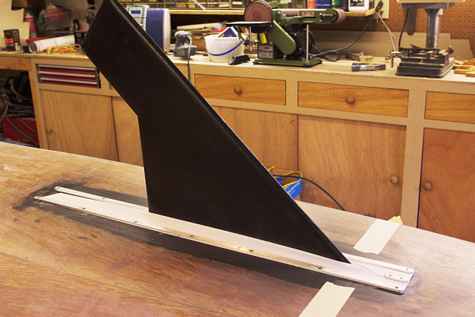
Since I wanted my Gunning Dory rowboat to sail also, a centerboard trunk was installed. With this I worried, maybe too much, about drag from the open slot when the boat is used for rowing. So I decided that I had to install a slot gasket to minimize that drag. Chuck Leinweber at Duckworks was kind enough to help me out with some Dacron sail cloth for the gasket, and I have in return promised an article on how I went about doing the job. I want to stress that I am no expert on the subject - this is the first time that I have even attempted it, but with a bit of internet searching and studying I feel confident that the job is really fairly simple, and that my example should serve well enough for others attempting the same project. I started by marking out where the trunk logs are located and then marking those screws so I don't hit them when drilling for the gasket strips. I chose 1/2" aluminum strip that is 1/8" thick for the strips, and 1/2" X 6 stainless screws to hold them down. Of course part of the job was drilling and countersinking the aluminum strips for the screws - easy enough with the aluminum. The sail cloth was cut to 3-1/4" wide in my instance, and folded in half lengthwise to double it up. The fold goes to the inside of the slot. That puts the cut edges under the aluminum strips. I overlapped the gaskets about an 1/8" over each other in the center of the slot. At the back end of the slot the gaskets are cut at a 45 to leave a little triangle cutout there - the idea is that something of a venturi effect is created when the boat is moving to suck water out of the trunk. Even though the board went up and down with no binding whatsoever, I cut a small slot across the width of the slot at the front of the board to close up that gap a little when the board is deployed. The screw holes going through the sail cloth were made with the point of a nail heated up on a propane torch, and the sail cloth was cut with a new utility knife blade in my knife heated on the same torch. This is to seal the edges so they don't fray. I glued the sail cloth to itself where it is folded lengthwise so there is no space in between that fold that could balloon and fill with water and create unwanted drag.
The whole job was quite easy and enjoyable, and really seems to have taken no time at all, especially since I was stopping to take pics along the way. The gasket will hopefully help keep down the drag from the open slot, as well as keep little rocks and dirt from getting in the trunk and jamming the board. My board is a rather close fit in the opening so this is important in my instance. It only takes a small amount of sail cloth to do these gaskets - in my case a piece 7" X 36" was big enough. I'll have plenty to replace them when needed, but I don't think that will be real soon though. The aluminum strips look like they will protect the cloth pretty well. I hope this little attempt at a how to article was helpful to some, and that I was able to explain how I did it well enough for it to be of use to you. Tim |

To comment on Duckworks articles, please visit one of the following:
|


 |