Please also see my earlier article on Greenland Paddles.
I have been paddling and modifying sea kayaks for 8 years now. I have also been making and using Greenland paddles for several years as well. I was researching a new set foot braces with rudder controls when I came across the "Duckworks Boatbuilders" website. While on the site I discovered Carbon Fiber Greenland Paddle Ferrules and my mind began to race ahead on how I could make a Greenland paddle and fit the ferrule onto the loom without a wood lathe.
These ferrules are exceptional in quality and price. The 1.5" Greenland paddle ferrule is my personal choice for a and the 1.2" standard ferrule would be ideal for those with smaller hands and a smaller diameter loom. The standard ferrule has 0° and plus/minus 60° offsets for feathering a paddle but Greenland Paddles were never meant to be feathered, so only use the 0° offset with a Greenland paddle.
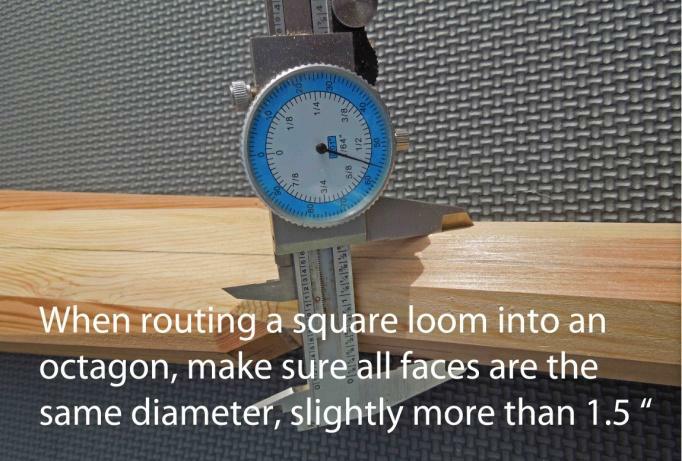
Basically, I glue-up my blank (see Glue-up Scheme diagram) with a square loom that is slightly larger than 1.5" O. D. of the ferrule. After basic shaping, I use a chamfer bit in a router to cut a 45° chamfer on the 4 corners of the square loom changing it into an octagon. The 8, 45° corners of the octagon are much easier to shave into a cylinder than the 4 corners of a square. A spoke shave is the ideal tool for this task. Following are some photos and a few things I learned about making a breakdown Greenland paddle.
If you have never made a Greenland paddle before the best place to start is Brian Nystroms book Greenland Paddles Step-by-Step.
I wrote an article based on that book and my own experiences that does not include adding a ferrule to break the paddle down for easy storage and transport. This article is an addendum to "How I Make Greenland Paddles".
Starting with a square loom that is at least 1/16 of an inch larger than the ferrule O. D. is the first key. Rip the blade edges to width as you rip the square loom to size so that they match when you glue-up the blank.
Glue-up the loom 7" shorter than the desired finished loom length because the ferrule will add 7" back when installed.
Slowly "sneaking up" on the final shape/diameter is the second key, Go slowly!
Carve the blades to final shape before chamfering the loom to an octagon.
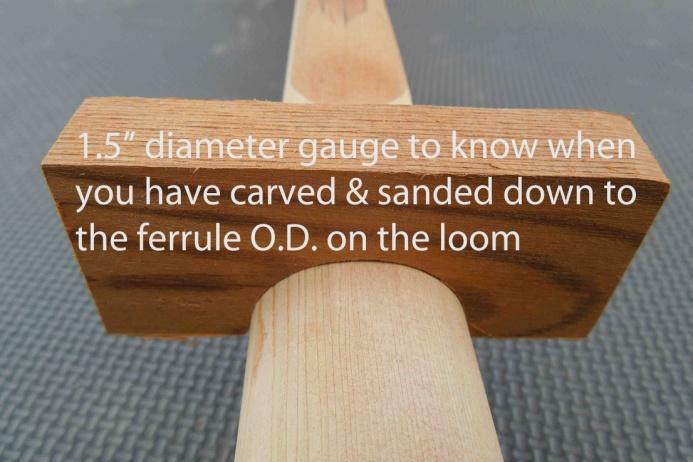
Make a 1.5" circle gauge to check for shape and size as you carve the loom from an octagon to a cylinder. Include sanding in this process so that you don't get the loom too small.
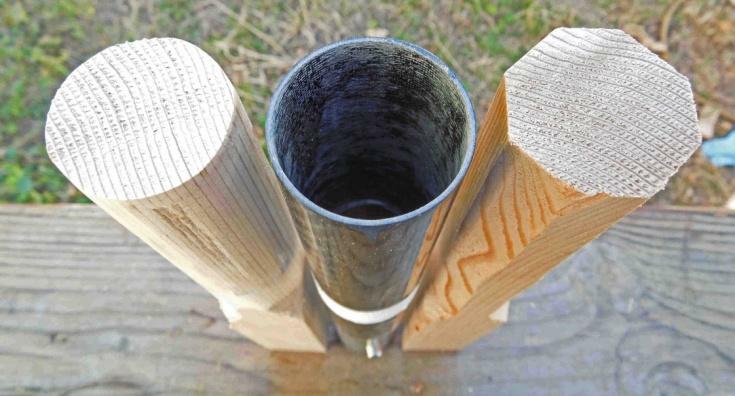
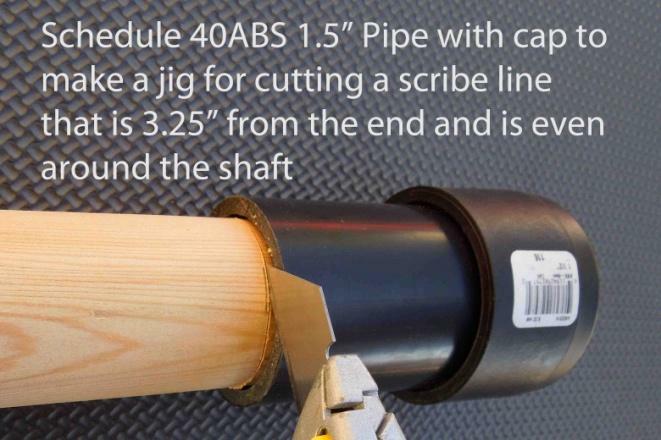
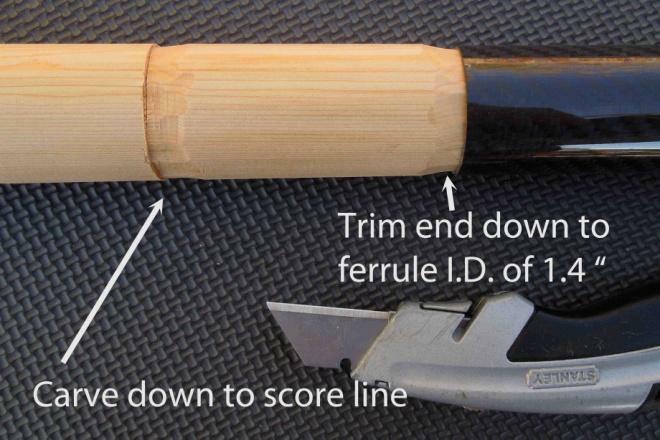
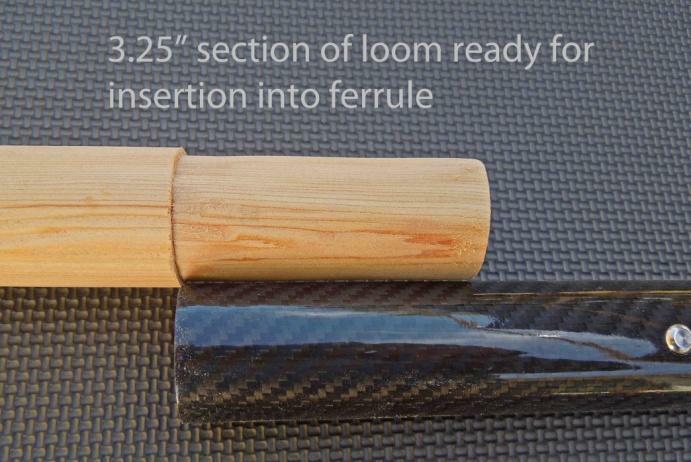
After the loom is carved and sanded to the final shape and size, it is cut in two at the center. Then carve each end down to a 3.5" long, 1.4" diameter cylinder to fit into each end of the ferrule (Making the ends just a 1/16 of an inch shorter than 3.5 inches will insure they fit without bumping into the inner sleeve when installed.). Make a jig to score the paddle accurately when carving. Scoring the paddle gives a stop to carve down to. I used a box cutter with a new blade for carving.
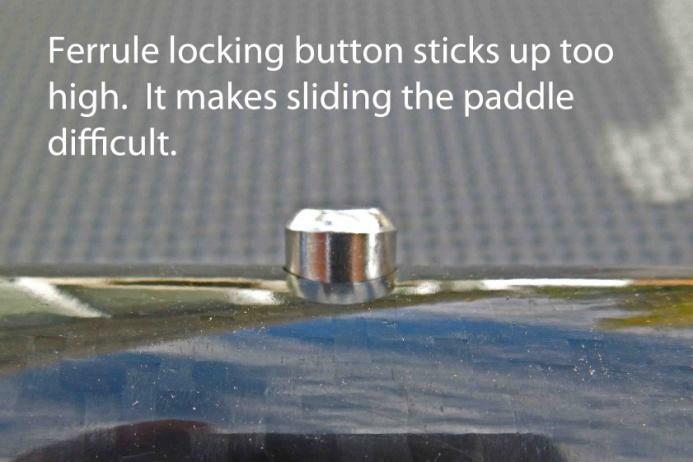
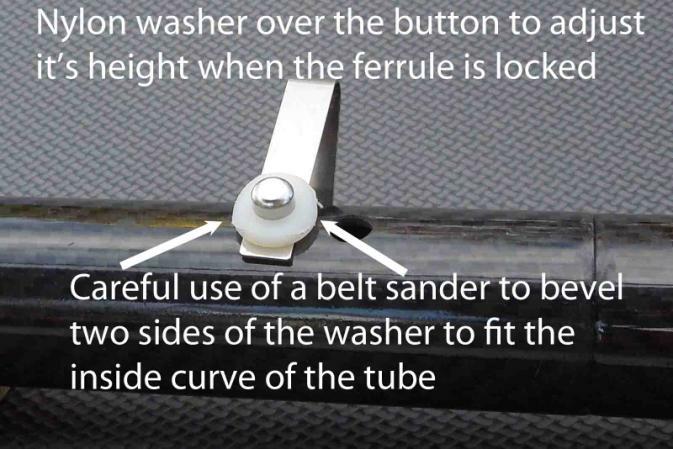
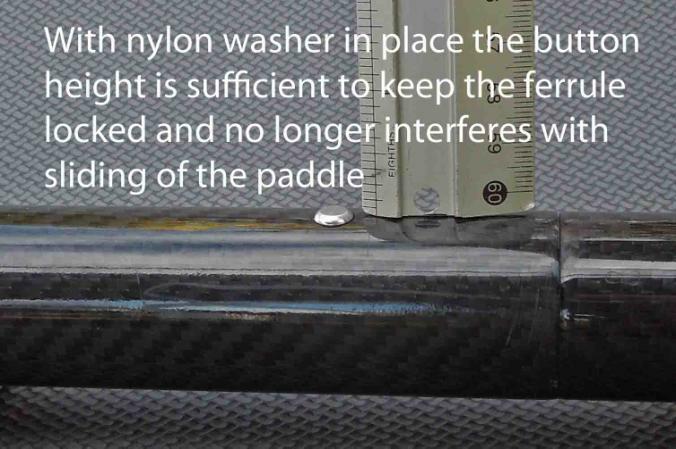
The ferrule locking button was much too high, which made sliding the paddle uncomfortable. Removing the button spring and placing a beveled nylon washer over the button and reinserting into the ferrule takes up the space, lowering the button when locked. The button is no longer noticeable but it holds just as well.
|