
 Custom Search
|
| boat plans |
| canoe/kayak |
| electrical |
| epoxy/supplies |
| fasteners |
| gear |
| gift certificates |
| hardware |
| hatches/deckplates |
| media |
| paint/varnish |
| rope/line |
| rowing/sculling |
| sailmaking |
| sails |
| tools |

| join |
| home |
| indexes |
| classifieds |
| calendar |
| archives |
| about |
| links |
| Join Duckworks Get free newsletter CLICK HERE |
|
|
| June Treasure Chest |
Trouble Shooting FilletsIf you have trouble with fillets, here are a few tricks to try; Mix the epoxy a bit thicker. The mix should be thick enough for a large blob to hang off the end of the stir stick without drooping. Adding more 406 Colloidal Silica to the mix will make it more workable. If a fillet starts to slump or is otherwise bad, form it with a smaller stick and form the final fillet later, after the first fillet has cured. If you have a void or bubble in an otherwise good fillet, leave it to be filled later. Clean the tip of the fillet stick between passes. The important thing is to clean up well with the chisel stick before leaving the scene. Remove all the residue left on either side of the fillets while the epoxy is wet, not later when it's hard. This is an excerpt from the e-book, "Epoxy Basics" by Russell Brown provided with permission from the author. Sailmaking Clamps
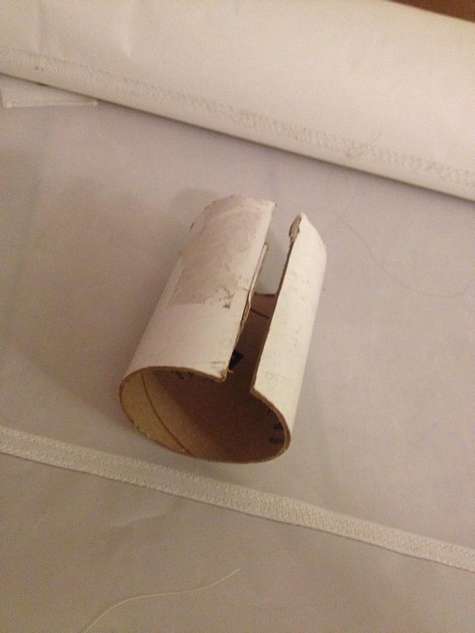
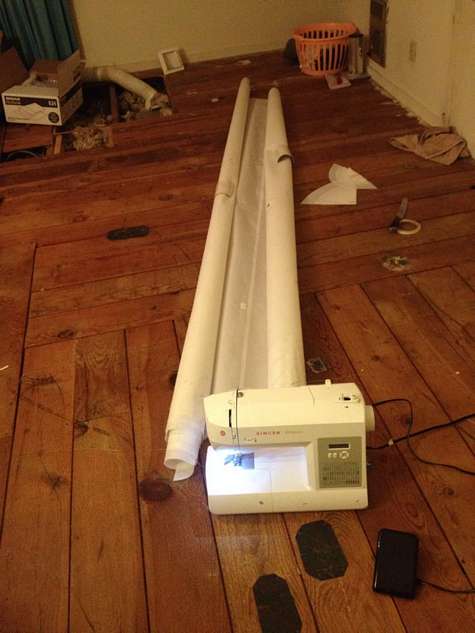
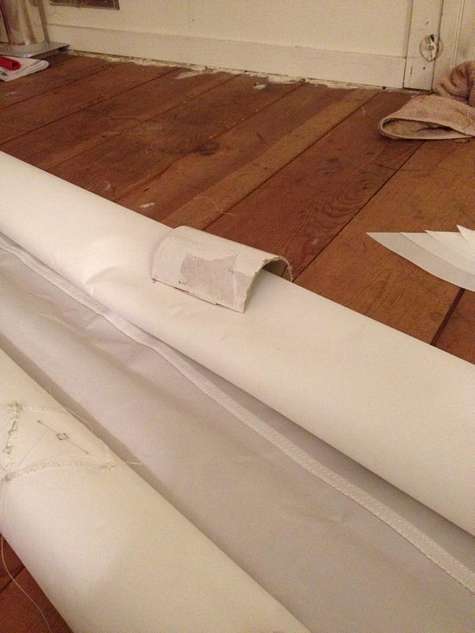
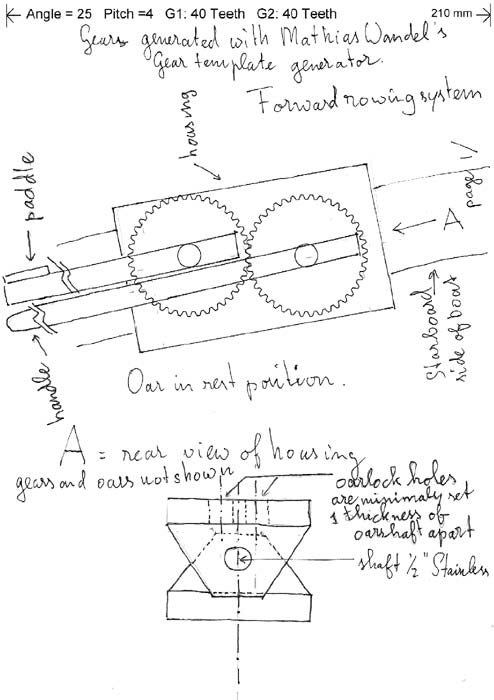
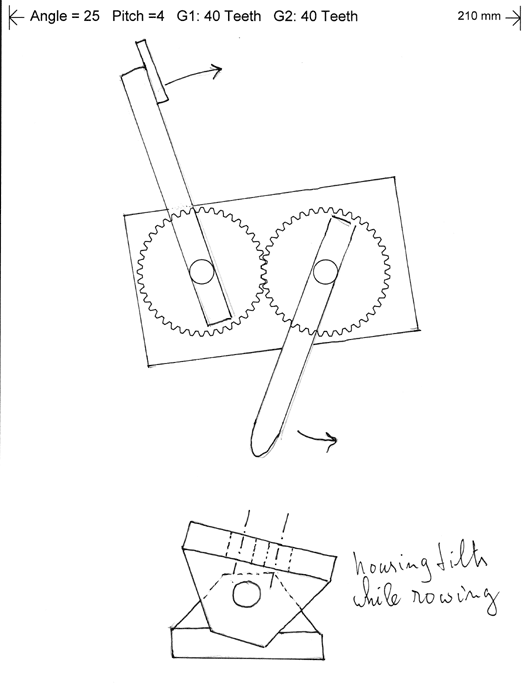
Wesley Brooks' brilliant clamps for Sailmaking. These cardboard clamps, cut from a mailing tube, are a huge aid in sail sewing. MIK Storer Forward Rowing SystemThis is a very simple idea for a forward rowing system. I think the drawings speak for themselves. The housing could be made of 12mm (1/2'') nylon and tapped and bolted together. Or for those who have a welding machine, steel could be considered.
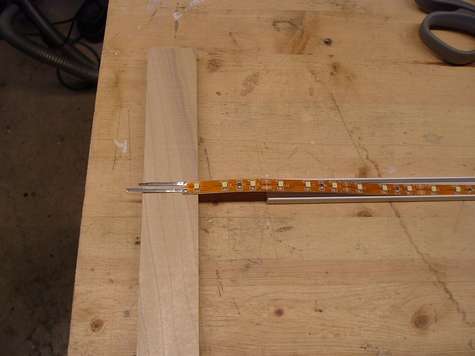
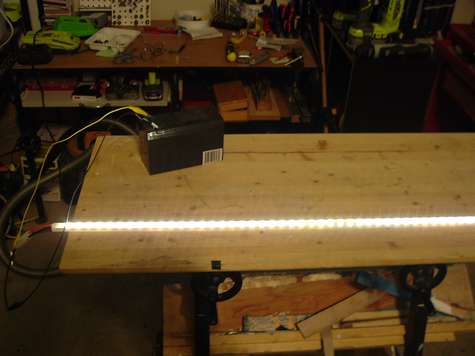
I did not suggest a means to fasten it to the boat, because of the vast variation of boats. I will post a video on Youtube soon. Gerrit Jan Brethouwer LED Lights for CabinsAfter reading Gary Blankenship's article on using LED's for cabin lights I would like to add my experience. In addition to putting LED's into conventional light fixtures, you can use flexible LED light strips as cabin lights. I have found this a very effective way to light a cabin as shown in the photograph. These are 12 volt strips that can be cut to any length and can be purchased in either the warm white or bright white colors. The warm white resembles the color balance of an incandescent bulb and is much preferred by my family.
The first option is to purchase these strips already encased in a clear silicone rubber that makes them waterproof. I have found these in 1m lengths at a web site called SuperBright LED. They cost $27 + shipping per strip. Their big advantage is that they are waterproof and flexible, and can be attached to a curved cabin ceiling. Their disadvantage is that it is difficult to attach the strip on the cabin ceiling because no glue or double sided tape will stick to the silicone. One has to carefully use ½ staples every few inches to attach it. Note: The web store also sells small clamps to attach the strips, but these are also made of silicone rubber and very difficult to install in against a ceiling. They provide 3/8 by #2 screws that are way too small for my fingers. Another option is to purchase a solid strip about ¾ inch square that is encased in aluminum and can be attached like any other fixture. A third option, which was not available when I first installed the LEDs four years ago, is to purchase a 16 ft strip of flexible LED's in the color you want. Amazon sells a product from Hitlights at a cost of about $13 for 16 ft. This strip is not waterproof, and you will need to attach wires to very small contact points if you cut the strip into smaller pieces. The strips however have a tape on the back that can be used to attach it to a surface. I have been experimenting with the LED tape from Amazon and think I have come up with ways to adapt this product to my boat. Solution 1: How to attach wires to the very small contacts on the strip? One of the reviewers of the product on Amazon said you need to be an expert electrician with a very fine soldering iron to attach the wires. Well. I have come up with a better solution. I happened to have some left over "tabbing" wire from my experiments with solar cells. Tabbing wire is a 1.5mm or 2mm copper strip that is coated with solder already. All I had to do was cut a 1 inch piece, put some soldering flux (using a flux pen) on the contact and put my soldering iron on the tabbing wire and the contact until the solder melted. The other end can then be attached to a wire. Finally, I encased the tabbing wire using liquid electrical tape so the two connections would not accidentally create a short.
Solution 2: How to make the LED strip waterproof? Here again, my experiments with building solar panels helped me. I placed the strip of LED's in a flexible plastic U-channel (in this case a plastic channel used for sliding doors in cabinets) and sealed both open ends with a dab of plastic glue (I used GOOP). I then filled the channel with a clear silicone rubber sealant that is used to encapsulate solar cells on panels. The silicone is relatively expensive (about $25 for 16 oz on E-bay or on Amazon) but I needed only 50 ml for a four foot section of LEDs. The result is a waterproof flexible LED strip of whatever length I want.
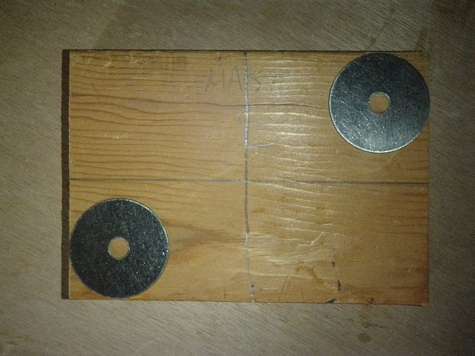
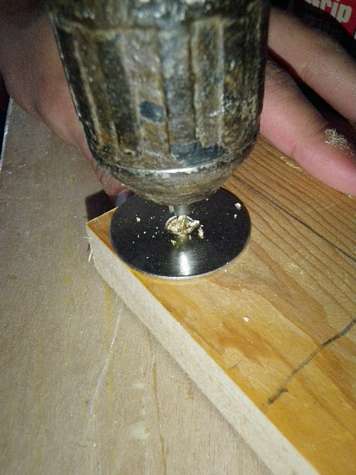
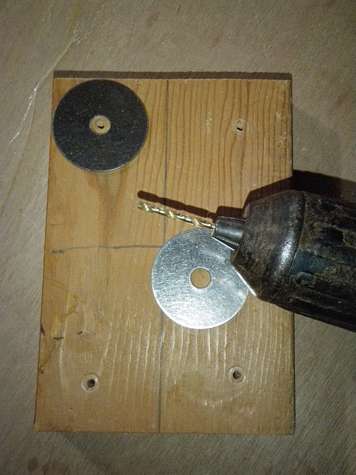
I hope someone else can profit by my experiments. Tom Hruby Quick Corner MeasurementsHere is a quick and easy way to drill uniform looking pilot holes for mounting a piece of wood. In the case of this illustration backing blocks are being built for some fair leads. The holes didn't need to be exact just uniform in appearance and far enough away from the edge of the wood that the fir blocking did not split. Using a large fender washer (1.5" dia) aligned with edges of the wood, holes were drilled for the mounting screws. Align large fender washers along edge of wood blocking. One washer will do the job.
Place drill bit in center of washer and drill pilot hole. Use a piece of scrap wood under your work so the drill does not damage a finished surface.
Finished produce, four pilot holes drilled with no measuring or marking. Quick and Easy!
John D Goodman (Builder of a Goat Island Skiff, Hapscut & ChevyDuck.) Clever Way to Test for Water Leaks
First test float - success She draft 4" with me and stripped just like you see her here. She may be a wee on the heavy side I think. Dan Beach Rollers
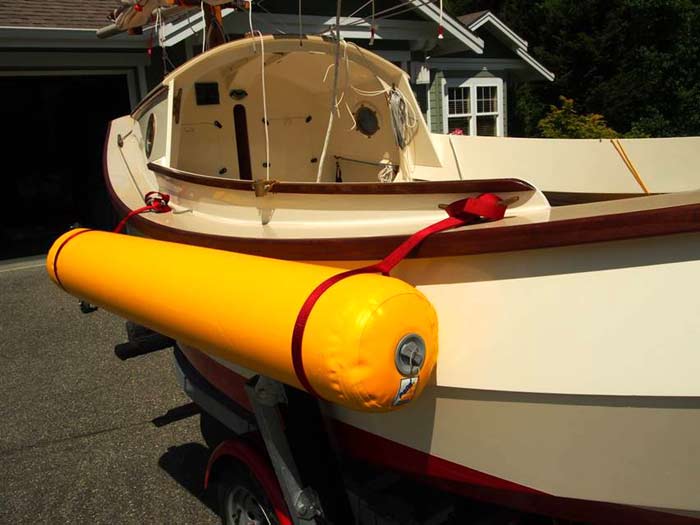
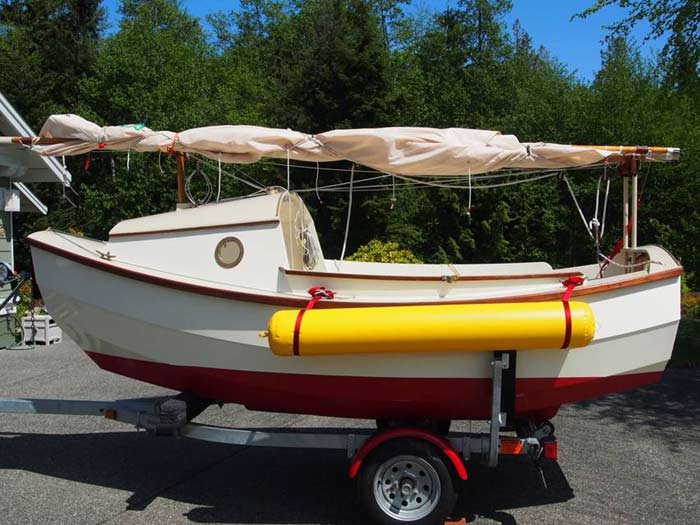
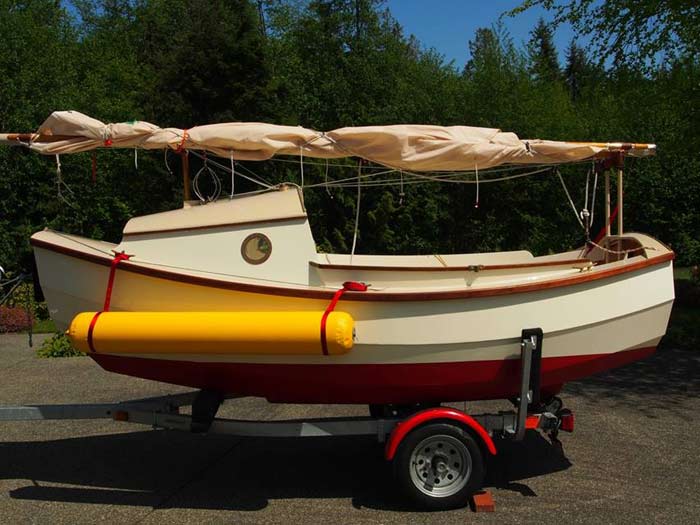
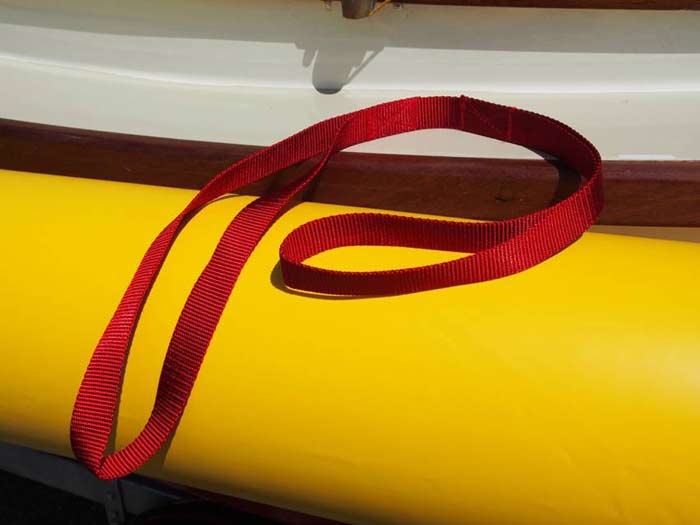
Thanks for the Beach Rollers Chuck. I have yet to use them for beaching but that will come soon enough. Meanwhile, my First Mate Mary sewed up some 1" webbing to make two joined loops (about 27" circumference each, both identical) that fit around the slightly inflated roller. Then, after inflating, the roller can be hung from deck cleats to make fine side fenders for raft-ups and difficult docks. Two five foot rollers give ultimate protection on one side of the 12' SCAMP. In the photo showing a roller hung in the aft position, the trailer vertical guide bunk is interfering with the hang. I'll probably end up buying a third one for beach work. Simeon SCAMP #11, "Noddy" Port Ludlow, WA. A Village in the Woods, by the Bay Might Work, Might NotA painter friend of ours said that when you fill a depressioin on a wall, give the fill to the job in a quick swipe rather than a slow careful fill. It works on walls to give a neat fill and it might work with epoxy on a boat? Mike John |


To comment on Duckworks articles, please visit one of the following:
|


 |