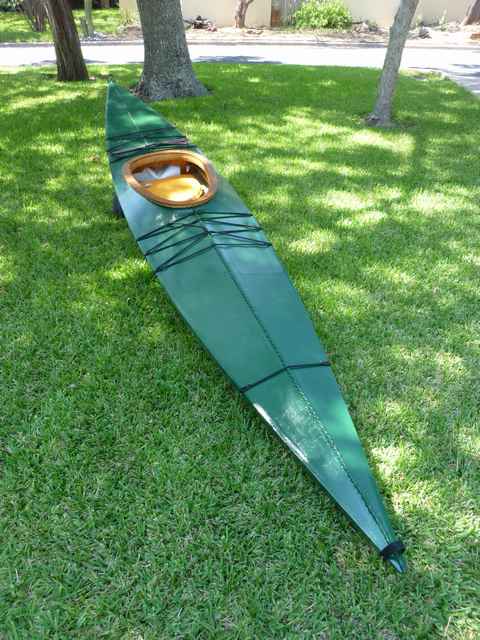
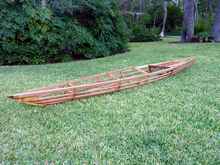
| I recently built a skin-on-frame Sea Bee 13 kayak from Tom Yost’s plans (www.yostwerks.com). The build of this ‘fuselage frame” boat involves a simple strongback to which two notched plywood bow and stern cross sections are attached. Stringers (chines, keel, deck ridge, and gunwales) are attached to these, followed by more cross sections which are not attached to the strongback. After stem plates are attached at each end, and floors put in, skinning with nylon or polyester fabric follows. This is then covered with paint and/or other material. A cockpit coaming is attached after skinning. An upper visible coaming is supported by a lower half which is glued to the boat before skinning.
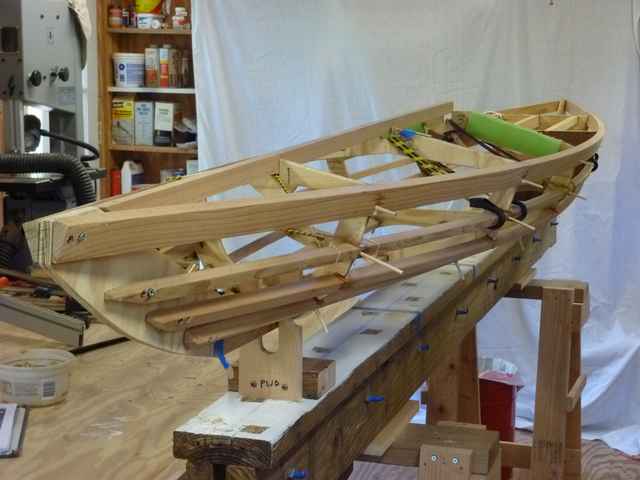
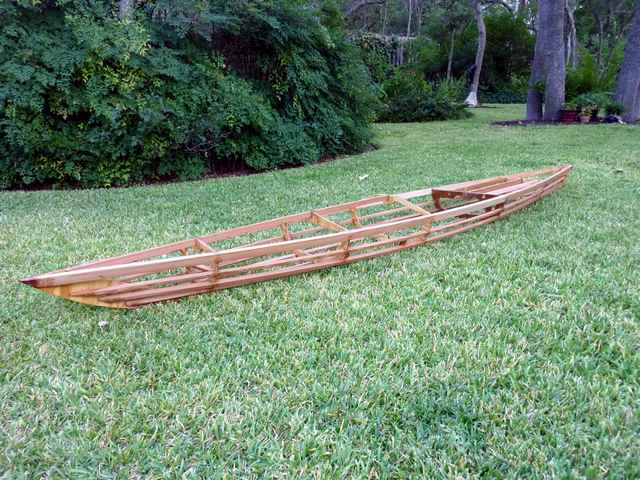
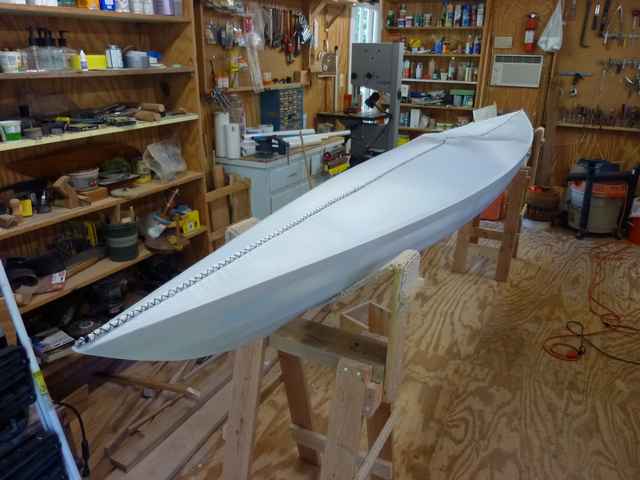
Construction was relatively simple and is well-detailed at the Yost website. I used half inch exterior plywood for the cross sections and Douglas Fir for the stringers. Glued dowels and some 40 lb. test Dacron fishing line secured the various stringers to the cross sections and end plates. Epoxy was used sparingly in various locations, supplemented by spar varnish to help make the cross sections more water resistant. Here is a shot of construction in progress and a second shot of the finished frame after being coated with Watco Danish oil.
 |
 |
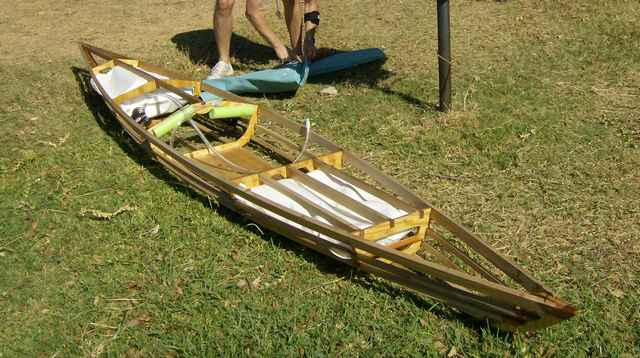
I next added inflatable bow and stern float bags (construction details on the Yost site) as well as some surplus noodle floatation at the very ends. A simple seat and backrest were installed. The finished frame without skin but with float bags installed held me up in the water, though in this condition the boat was much too tender to paddle and certainly didn’t keep my dry! Adjustable foot braces came from Duckworks. I put some foam noodles on the cross section at the front of the cockpit for comfort when paddling with knees elevated.
My goal of ending up under 30 lbs. was not reached. The basic frame came in at 19.5 lbs., with the completed boat at 37 lbs. Float bags, the type of cockpit, type of wood for stringers, number of paint coats, and other things I added contributed to the extra weight. It is easy to carry on my shoulder at the balance point with one arm inside the cockpit.
Stitching/Skinning
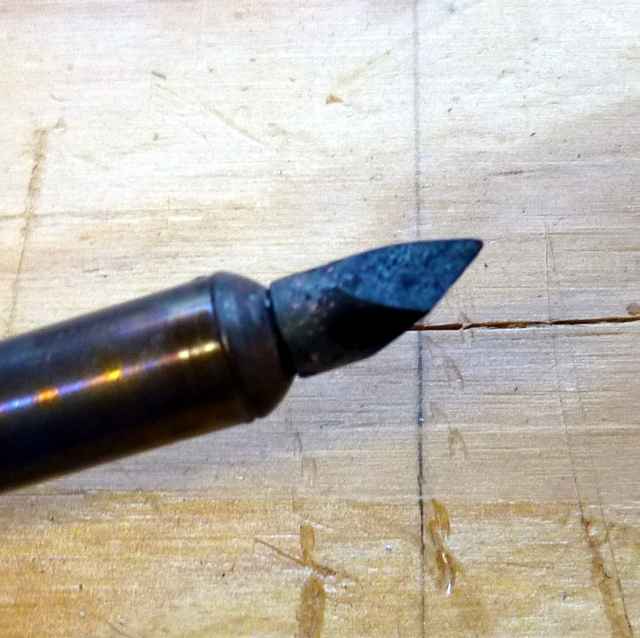
I stitched my 8 oz. polyester fabric (supplied by George Dyson) around the hull using advice from the Skinning with Polyester videos by Jeff Horton at www.kudzucraft.com. There is also help at the Yost-Skin-On-Frame-Boats Yahoo group. I cut/heat sealed the fabric edges using a small ‘chisel tip’ soldering pencil - inexpensive and more precise than a hot knife, though a bit slower to use.
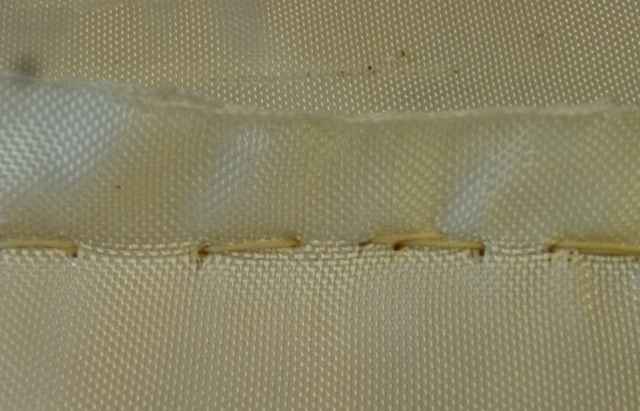
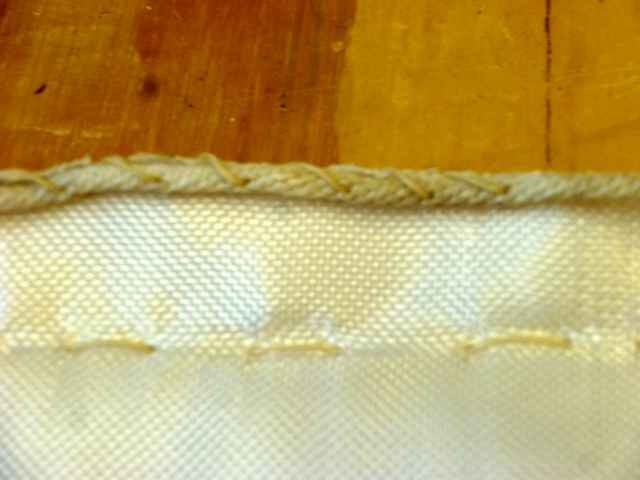
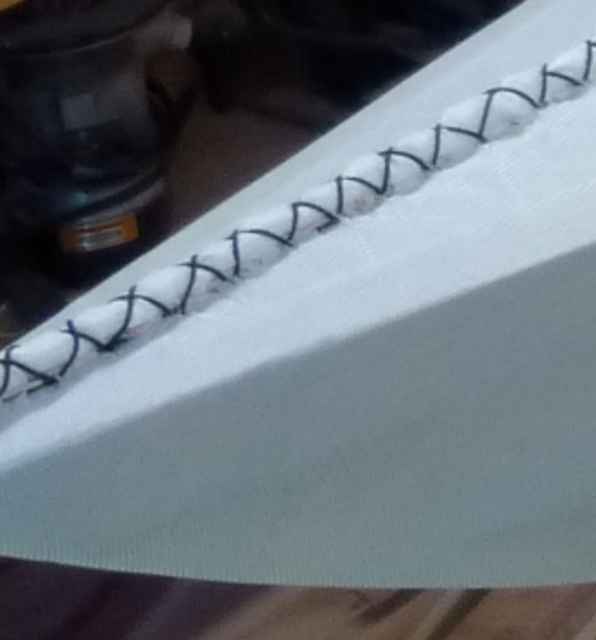
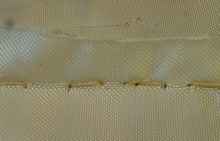
Starting at either side of the cockpit, I used tan-colored waxed polyester thread to do the initial running stitch to join the fabric snugly along the deck centerline, as Jeff Horton’s videos shows, then trimmed the fabric to a 1.5” width above this stitching. The first photo below shows this on a fabric sample. Rolling the 1.5” width fabric tight prior to whip stitching was difficult as the fabric slipped when being rolled. To remedy this I stitched some small diameter nylon line along the top edge of the fabric to start the roll (second photo), which made getting a tight roll somewhat easier.
 |
 |
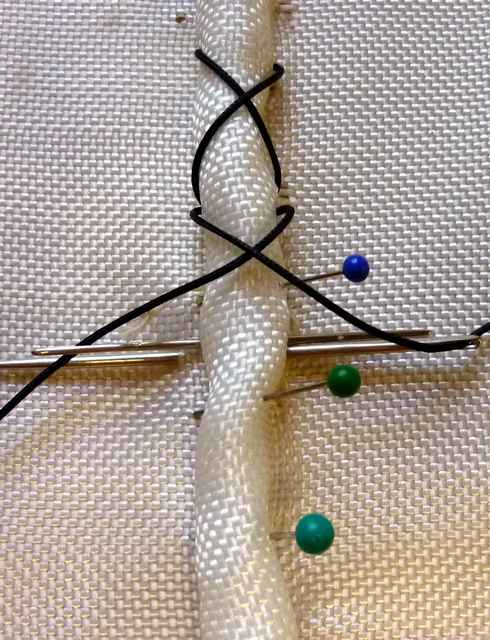
Inch by inch I rolled the fabric down to the deck centerline, holding it in place with sewing pins every inch or so to keep it from unrolling. This made doing the stitching that holds this roll in place relatively easy, pulling pins out as I stitched toward each end. I finished this rolled seam using 40 lb. test black Dacron fishing line in a variation of Jeff’s whip stitch. My ‘double whip stitch’ involved two straight needles at either end of a length of Dacron line. Ten feet of line was enough to stitch 35” of seam, which was then tied off and another piece of line added to complete the seam. Longer line lengths can be used, but 10 feet was easily managed.
Initially the line passes through the fabric at the cockpit where the running stitch starts, with both halves of the line of equal length, and then the starboard line crosses to the port side and vice versa, each entering the fabric from the same position at opposite sides of the seam to complete the initial stitch. I spaced my stitches ¾” apart. After 15 or so stitches I tightened up each stitch sequentially and then held this stitched section tight using a hemostat before stitching another few inches toward the end of the boat.
Finishing it Off
Next I used a hot clothes iron set to the highest setting to heat shrink the fabric ‘skin’. It was easy not to burn the fabric as long as the iron kept moving. I went most of the fabric a few times.
An optional step I chose was to coat the skin ‘garboards’ and adjacent bottom ‘strakes’ with PL Premium Construction Adhesive. This is an inexpensive way to add to the skin’s abrasion resistance and thus minimize or prevent any puncture damage. The weight and type of skin as well as the type of paint and any abrasion resistant coating affects the puncture resistance of SOF boats, which are not as easily holed as many folks believe.
My first attempt at coating parts of the bottom with PL Premium was not successful, as I applied it too thick which led to excessive bubbles (some of which were over ½” in diameter). I bought more fabric and re-skinned the boat (guess I like sewing!); my second attempt at coating was more successful. I applied it as thin as I could with a plastic scraper that is generally used to help coat fiberglass with epoxy. I cut the scraper into two narrow pieces to have more control as I worked the PL Premium into the fabric. It took most of a tube for the amount of skin I coated. This process took about 90 minutes and occurred in 88 degree weather as I opened shop doors to allow cross ventilation which the tube said was needed for safety. I worked as fast as I could, applying very thin beads to areas of perhaps 15 to 25 square inches at a time before spreading it around and working it into the fabric.
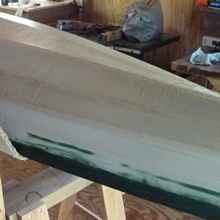 |
Even so, there was very minor (pinhead sized) bubbling in some parts. The high temperature may have led to the bubbling. After about 45 to 55 minutes the PL Premium already applied was well set up and thus this would have been a better place to stop. Touching up a few bare spots at that point left some areas less smooth than I wanted. (PL Premium is like rubber when dried and can’t be sanded smooth, thus using it as a coating led to a rougher, yet tougher, skin than paint alone provided.) Had I stopped coating the bottom after about 45 minutes rather than continuing to apply PL Premium until I’d done all I thought was needed, I could have used a second tube to do a neater job of touch up later on once the applied PL Premium was more fully dry. Over time after the tube was opened and the tip cut to allow a very thin bead of material to come out, the material hardened at the tip and thus became increasingly difficult to squeeze out, though using a length of coat hanger wire to re-puncture the tip helped somewhat. Finally I painted the bottom of the boat with two coats of Rustoleum oil based paint (the top half was painted earlier).
Once it was all painted I added shock cord deck lines (again from Duckworks) and went paddling. Fine tuning the back support was needed. It is quite stable and fun to paddle. See you on the water!
|