
 Custom Search
|
| sails |
| plans |
| epoxy |
| rope/line |
| hardware |
| canoe/kayak |
| sailmaking |
| materials |
| models |
| media |
| tools |
| gear |
| join |
| home |
| indexes |
| classifieds |
| calendar |
| archives |
| about |
| links |
| Join Duckworks Get free newsletter CLICK HERE |
|
|
| The Canoe Named "Perseverance" |
by Stephen Ahern
- - Starksboro, Vermont - USA |
| designed by Andrew Linn www.andrewlinn.com I've been keeping a "sort-of-build-log" for this 15.5 foot, SOF Canoe: "Willamette". This is as complete as I can remember it. I've made several alterations to his plans, (seats, spacers, decks, (low cost) materials, protective strips, etc) and they should be included in the build-log. I feel with the free plans that Andrew has made available, and my pictures and movies, this should be enough, for anyone to start building, their own SOF canoe... Willamette. LOG: Building the Willamette Skin on Frame Canoe
|
 |
 |
 |
 |
 |
 |
 |
 |
 |
 |
 |
Still to do: " Place (and glue) the breasthooks (triangle block) in the canoe stems to hold the gunnels and the decks all together. " Install the inner gunnels, and skin the canoe. " Install the outer gunnels. " Test float canoe
Don't remember any additional Dates: (but I guess based on the pics).
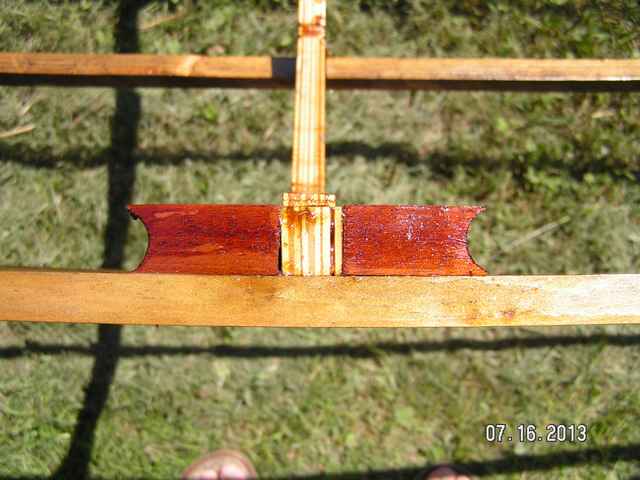
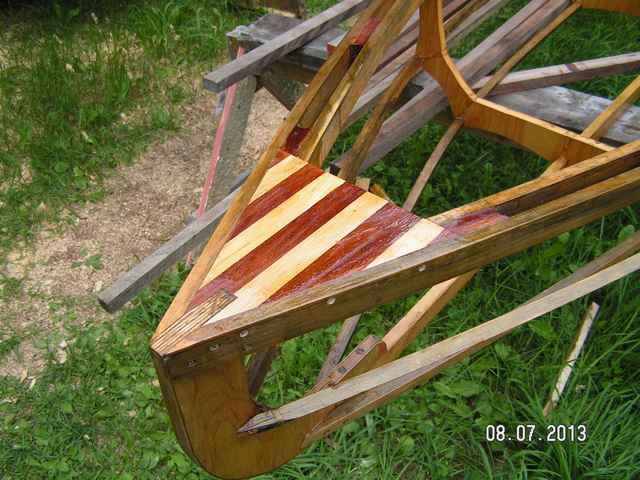
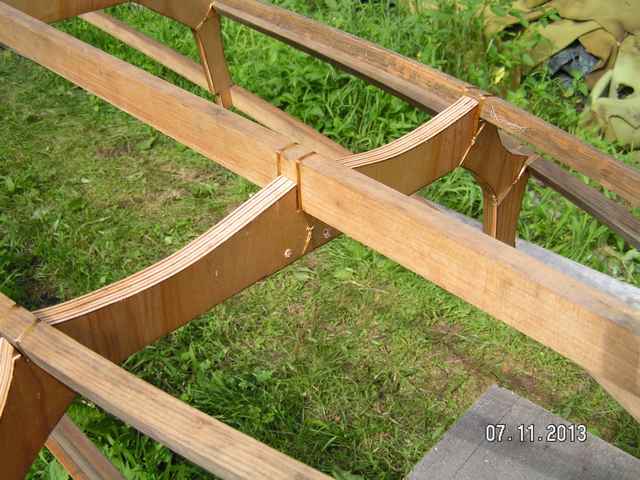
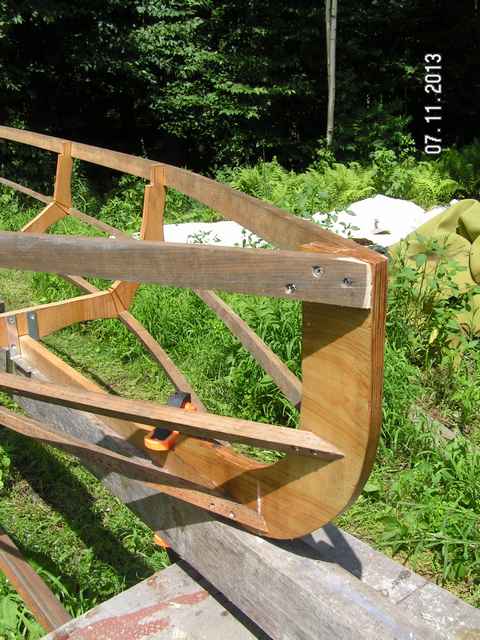
Glued and screwed (with SS screws) the breasthook/decks on/into the canoe, cut out sections of the inwales and the part of the end spacers (with the pull saw), to make the decks, FIT. Had some trouble with the cutting and had some cracks that were filled with sawdust and then I applied "super glue" to hold the sawdust in place. Looks great!
The bow deck is longer than the stern deck, (since this is a two person boat, the bow is where the front person sits and the stern is where the back person sits); IF, it is used as a one person boat, you sit on the "front seat" backwards/facing the stern; and the decks switch.
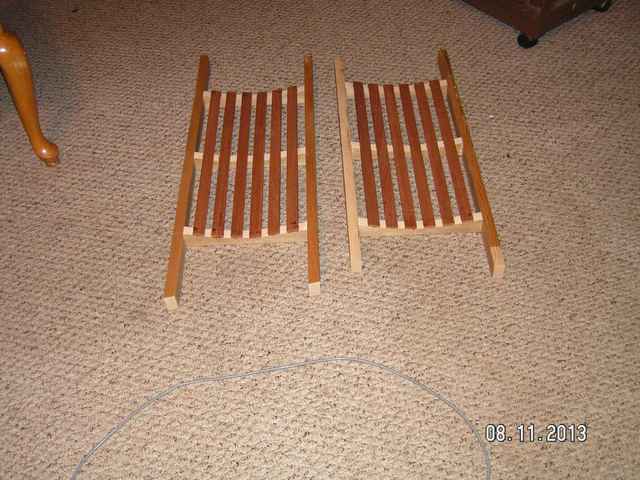
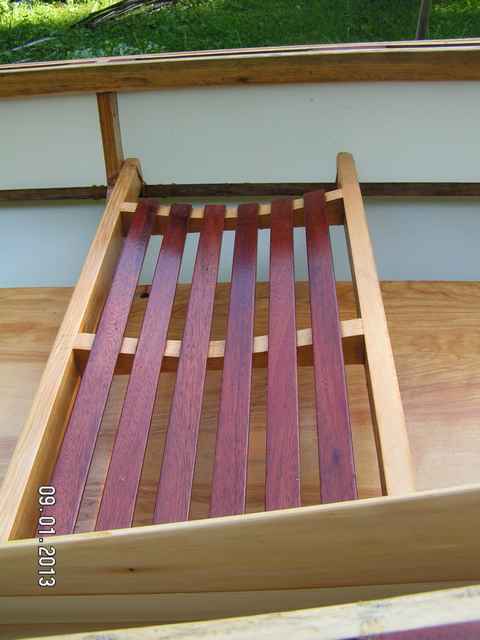
I made some seats, out of 1 X 1.5 X 32 inch sticks and some slats that were 1 X 3/16 X 20 inch. Three 10 inch sticks were cut into a curve, ¾ inch down from the top edge (at the middle of the stick), and a curve was fashioned from another "batten" to make a dandy curve: from end (1.5 inch) to middle (3/4 inch) to end (1.5 inch), to hold the slats in a curve, from the front of the seat to the back of the seat, make my butt fit just fine, very comfortable to sit on. Maybe I will be able to paddle for a longer time.
The seats were coated with spar-varnish, and the slats (made from mahogany) really look sweet. See the pictures of the finish canoe.
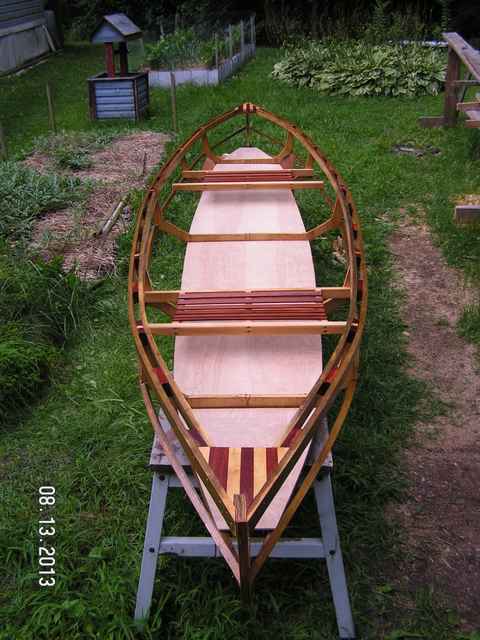
I also cut out the floor boards from 1/8 inch underlay plywood, using a "sheet rock knife", it was a long process just to cut the two end sections. I switched to the pull saw and that was a whole lot faster and made a smoother finish on the "brittle ply", IF you look at it funny, it would splinter along the edges.
It happened on the first canoe I built. I used the "electric jig saw" and the smoothest blade was just too rough and the plywood splintered on all the cut edges, I had to use a block plane to make them look better, it was too much work. And the floors never looked as great as they could have.
The pull saw, followed the curves just fine, and didn't splinter, I was able to make the edges "square" with a few passes of the block plane.
Next: I'll have to drill four hole in each floor board, at each corner, to allow tying with sinew, to the bottom three stringers/keelson. First, I'll coat them with spar-varnish, three coats should be enough. Then once the floors are dry I'll tie them in. At the same time, I'll need to drill holes and varnish the seats; two more coats of spar-varnish should finish them. Once dry; I'll be tying them onto the second stringers beside the mid-frames according to the directions (one seat on the mid-frame's edge facing the stern, the other seat on the opposite mid-frame's edge facing the Bow).
Then when everything is tied in-place, I'll flip the boar over and start the process of placing on the fabric: stretching, stapling, and then shrinking with the heat/hot gun. Once that is completed; I coat the canoe's skin with spar-varnish, attach the rub-rails and the Bow and Stern protection plastic strips, cut from plastic electrical conduit.
Soon, I should be able to take the boat to the lake and try it out.
Friday, August 16, 2013:
I coated the bottom of the floor boards, with oil-based Spar Varnish. 2 coats. they were dry enough to flip, so I gave the front/top of the floor boards 2 coats of spar-varnish. When the tops were dry, I drilled 4 holes into each board (to tie), I also drilled 4 holes, into each set of seat supports. Granted it was very late in the day, and the bugs were out and biting. Time: 1 hour
Saturday, August 17, 2013:
OK, time to do something. wandered out to the shed, brought out the floor boards and the seats. I cleaned up the holes by sanding with sand paper wrapped around a pencil. I noticed that the varnish had dripped onto the bottom of the floor boards (as well as the seats) so I scrapped off the drips, using my 1 inch chisel. I put TB3 glue into the holes of the floor boards and the seat supports to seal the wood against the moisture that will eventually get in there. I used a small paint brush to apply the glue. I tied in the floor boards, looks great, I got pictures. It is afternoon, and the boat is done. well the floors are tied in and the seats are also tied in. I didn't need to drill two sets of holes per seat support; the supports next to the frame did not need holes. I could not access the hole to tie in as I tied in the other support. (see pictures) Time: 4 hours
Sunday, August 18, 2013 NADT
Monday, August 19, 2013:
Got out of work early, had to do a computer repair (no money). Used the 3X24 belt sander until I broke and jammed the belt into the sander, trying to sand flush the blocks to the gunnels, took out the block plane and finished the job. Made the gunnels all flush with each other and the blocks, and the decks/breasthooks. Covered with two coats spar-varnish, the place I planed and sanded, as well as the floors and seat top strips. It looks beautiful. Time: 1 hour
Wednesday, August 21, 2013:
Turned over canoe, coated bottom of floor boards with spar-varnish in the morning, went to mow a whole bunch of lawns, and got back to mow mine (rats). Turn over canoe, scrapped off the drips from this morning's varnish job (used an old store's plastic "savings" card. Work great, waiting for everything to cure. Time: 30 min
Thursday, August 22, 2013:
Today, I looked at the boat frame (several times); And, I thought maybe I should skin it. So maybe I will, in a few days. Time: all day
Monday, August 26, 2013:
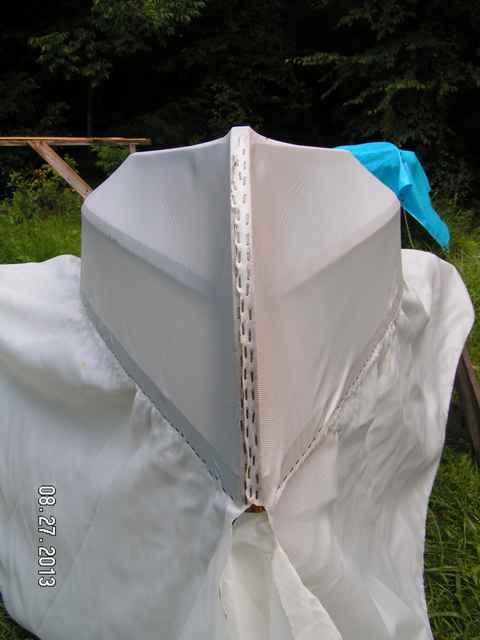
Shaved off the spacers sticking out under the gunnels, it is smooth now. Varnished what I fixed, and noticed there was an issue with the keelson so I fixed and varnished that. Then let it dry and this evening Stephanie and I, hung the skin, stretched and stapled. The stems were finish the same way as the first, put to the side and staple-cut off the remainder, then fold over and staple and cut again. The skin is almost done, I still have to cut off the left over cloth leaving about 1 inch to fold down. Pictures will be taken tomorrow - it is now raining. Time: 2 hours
Tuesday, August 27, 2013:
Today, I just took pictures, the canoe sat out in the rain last night, and now it: "weighs a ton". Time: not too long
Friday, August 30, 2013:
Today, I gave the canoe the second coat of Spar-Varnish. One more to go, (tomorrow). I also, coated the double bladed kayak paddle with two coats of Spar-Varnish, one more to go. I will have to get some finer sandpaper, maybe 120 grit or 200, just need to make the paddle smoother on the blades, the handle can stay a bit rough. Time: 1 hour
Sunday, September 01, 2013:
Today was a great day, we flipped the canoe (still only has two coats) and added the rub rails. (I got pics to prove it). I didn't like the way the ends meet at the bow and stern, so I added a blunt point, using some cut-offs from the rub-rails. They still need to dry (were glued on with TB3) before I get a chance to "work the ends" to make them round and good looking. The bow end is a real issue for me, the Starboard rub rail has a "cut" in it, and it shows at the very end. I'll have to fill it with sawdust and glue and hope against hope it will look OK, maybe I'll paint it (ugg)! Time: 3 hours
What I Would Do Differently
The materials would have been better IF (I always say this) I would have purchased the "real thing" marine ply. I do like, that I used our local wood, from the sawmill down the road (across the highway, down another road, around a corner, etc - within 1/2 mile from my house).
I have lots more answers, BUT it is 11:30PM; and, it has been a long work-day. (12 hours at IBM.)
The Outcome
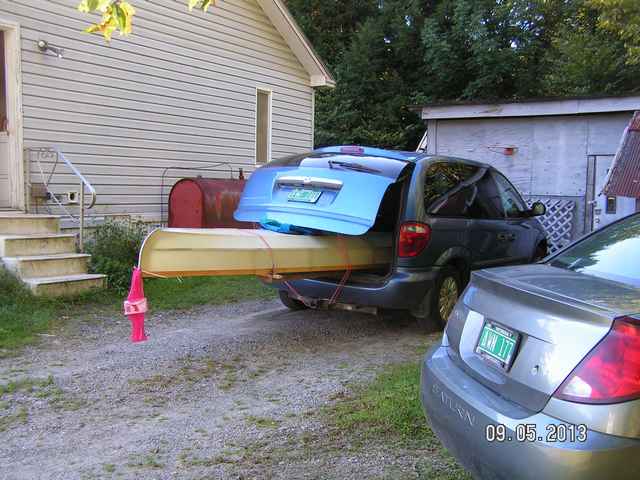
At this point we named the canoe "Perseverance".
Time to show some movies of the canoe in action. Taken in Williston, Vermont, USA, on beautiful, Lake Iroquois. Several friends joined us for the launch, Ted, Sue, Abbie, Stephen, Alan, and two dogs (you've got to have dogs for a canoe's maiden launch. We used a bottle of water from our well for the Christening. And most of us, took the canoe for a paddle. It was a fun time had by all.
Plans for Willamette Canoe and Yaquina Canoe by Andrew Linn.
|

