
 Custom Search
|
|
| sails |
| plans |
| epoxy |
| rope/line |
| hardware |
| canoe/Kayak |
| sailmaking |
| materials |
| models |
| media |
| tools |
| gear |
 |
 |
| join |
| home |
| indexes |
| classifieds |
| calendar |
| archives |
| about |
| links |
| Join Duckworks Get free newsletter Comment on articles CLICK HERE |
|
|
| Simple Weatherproof Sea Chests |
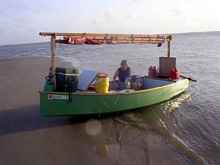
by Rene Vidmer - Allentown, Pennsylvania - USA |
Or what to do with all that scrap lumber after you've built your boat. WhyI am often out for weeks at a time on my little AF4b (Jim Michalak), and so need plenty of storage space. Rather than building it in, I opted for individual chests in the cockpit that could be re-arranged as needed to trim out the boat. Also, with removable boxes, you don't have to empty out your cockpit lockers when laying up, just off load the locker. The original solution was a store-bought cooler and a rugged looking plastic chest from Walmart. The cooler held up well, but was thirty years old and looking a bit tatty, and the Walmart chest leaked at the hinge and developed a large crack in the lid from being stood on one too many times. So, with Winter ahead, I decided to replace them both with homemade sea chests. What I hoped to accomplish: These chests would have to be: 1. weatherproof; 2. lightweight; 3. strong enough to be sat or stood on. SolutionsGoogle "Sea Chests" and you'll come up with a bunch of photos, some quite handsome with their dove-tailed joins, but all with a fatal flaw (for my purposes). All of them have their hinges located where water will find it's way inside.
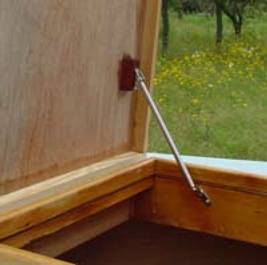
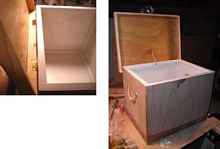
Keeping the Water OutNow, your not going to believe this, but I spent several nights lying awake, trying to visualize how to lip the lid on all four sides and still be able to hinge it. Luckily, I came across a photo in Duckworks of a deck hatch (lipped all four sides) that Chuck Leinweber had fitted to his boat (below). I asked him how he had hinged it, and he led me to a solution. After building the first chest, I came up with another solution, so there are at least two.
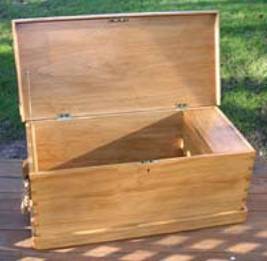
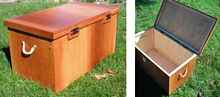
Saving weightInstead of using traditional sawn board, or even 1/2" or 3/4" ply, all of which are heavy, I built these chests with 1/4 inch ply with 3/4" square internal pine frames. I figure the weight saved to be at least 50% (weight is critical in a small flat-bottomed boat). StrengthSince these boxes will be stepped on when embarking or disembarking (ok, getting on or getting off) and sat on frequently, the top lids were reinforced on the inside with a layer of fiberglass and epoxy. Also I painted the bottoms and 2 inches up the sides with a coat of epoxy, as these boxes are sometimes sitting in a pool of water. Anyway, here are the finished products, not handsome really, but I used scrap wood and hinges I had laying around, so they didn't cost anything.
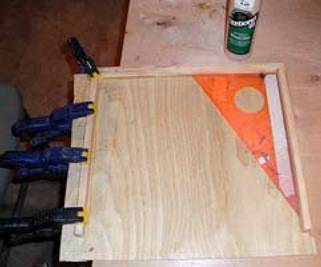
No nails. No screws. Just draw the rectangles, cut them a bit oversize, glue and clamp frames, and trim to frames with a router (edging bit), or with one of Duckworks' Japanese pull-saws.
|
 |