I've been using rope fenders on Wee Lass since the day it was launched; they're easy to make, look good, and serve just as well as their plastic counterparts. Fenders work well to protect the rails, but I also want to protect the pointy end of the boat. I'd seen some photos of bow pudding, but had no idea how to make them until I picked up a copy of "The Splicing Handbook" by Barbara Merry. The instructions Barbara Merry provided are detailed enough so that you can make a decent looking pudding on the first attempt. That being said, my first effort had some flaws, but the second was a keeper. The pictures that follow are essentially a condensed version of her instructions.
I'd heard the term "bow pudding" in use before, and knew what it was, but had no idea how "bow pudding" got it's name. Some names are relatively easy to figure out, like fenders being used to "fend her
(the boat) off the dock." Likewise, halyards are the lines used to "haul the yard" up the mast. But how bow pudding got it's name was a mystery to me. So I consulted The Gospel According to Saint Ashley (aka "The Ashley Book of Knots"). Ashley states that a pudding was formerly a pad used to protect a mast where it is crossed by a yard, and then later referred to any sort of soft fender. So bow pudding is essentially a fender for the bow.
The photo below shows rope fenders used along the rails. I get more comments on these fenders than I do on the boat itself. If you can tie a crown knot, you can make these. By the way, instructions on how to make fenders are also in "The Splicing Handbook" (we'll cover these later).
Now to do something about the bow.
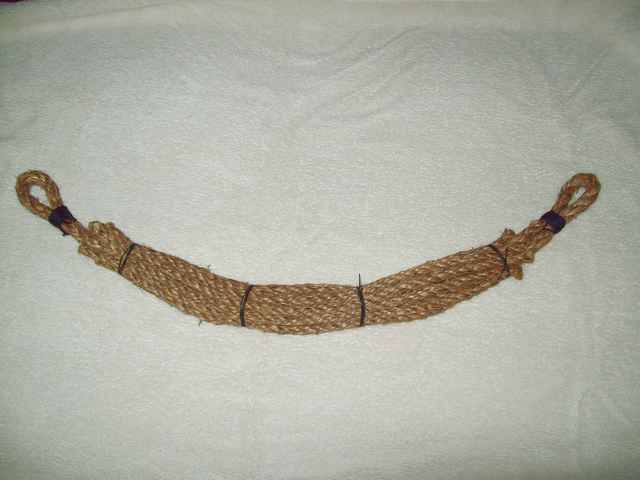
Start off by cutting a section of line, short splice the ends, and clap a couple of round seizings with small stuff to make the eyes. Easy peasy.
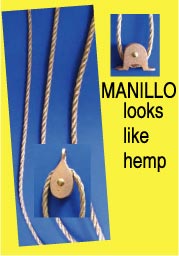
Next cut off several pieces of smaller line to wrap around the core; this will give the pudding some bulk. The core here is 1/2" line, the filler pieces are 3/8". After spacing the filler pieces evenly around the core, tie off with small stuff using constrictor knots. Another set of hands might be helpful here. The author says to use dark-colored polypropylene for this step, as it won't rot. She's probably right, but I didn't see any at the hardware store, and this was a first-time effort so I went the cheap route and used manila. My ropework projects are like my boatbuilding; start out using the cheap stuff first, then once I get past the learning curve, spring for the good stuff.
Add another row of filler pieces; this one a little shorter than the first. The idea here is to have a taper from the center to the ends. Again use small stuff and constrictor knots to hold in place. Second verse, same as the first.
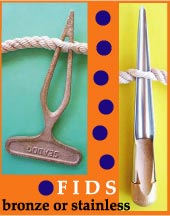
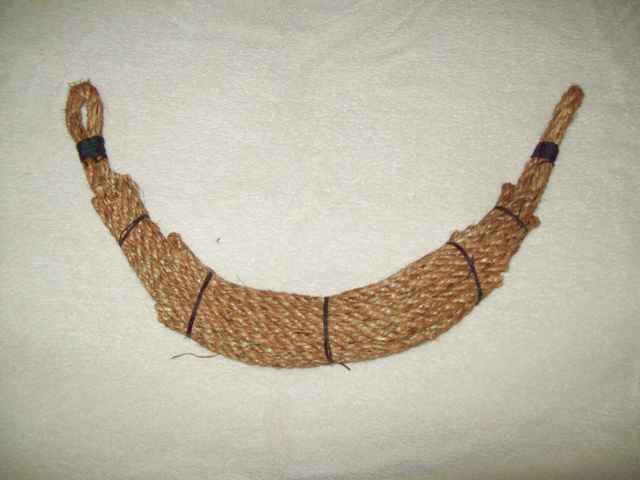
Now comes the fun part. We're going to start from the center and work our way towards either end. The type of knot is called "needle hitching." You don't need a needle for this task, but a Swedish fid is kind of essential. Starting is the hard part, after that it's pretty easy. But Barbara gives good instructions, and you can get it right on the first try.
All done with the hitching. Barbara says you'll make about a million hitches. She's not far off. Think about it. I've got three strands that are each 24 feet long. How many hitches can you tie in 72 feet of rope? Yeah, that's a bunch. The Swedish fid paid for itself on this project.
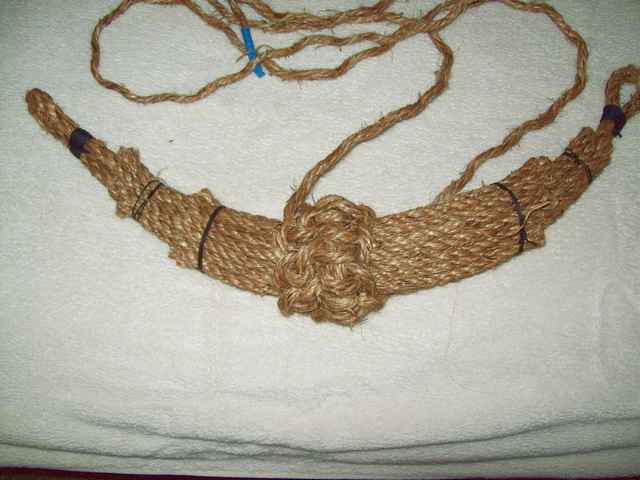
Finally, we'll tie a turks head at the center. Again, not a tough chore. I've got turks heads all over my boat. To make it stand out better, I suppose it would have been better to use a different type of line. At first I thought the turks head was just for decoration, but that may not be the case. One wag stated that in theory, the pudding sees the most wear in the center, right where the turks head is located. It will be a whole lot easier to replace a turks head than make a new pudding. Makes sense to me.
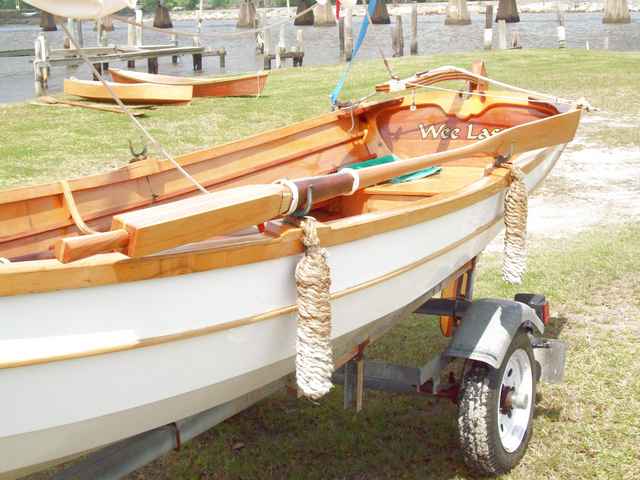
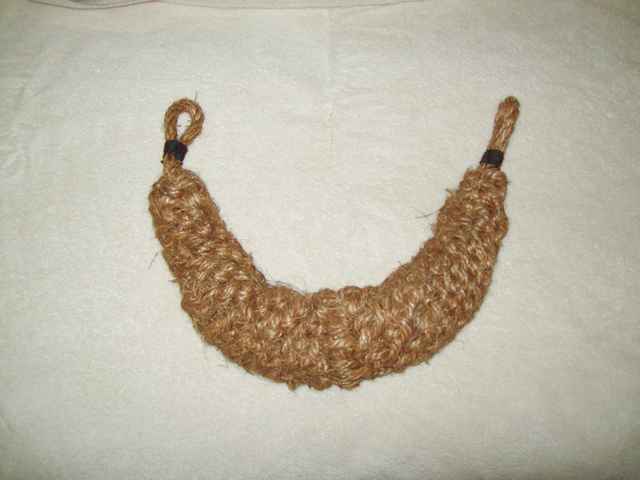
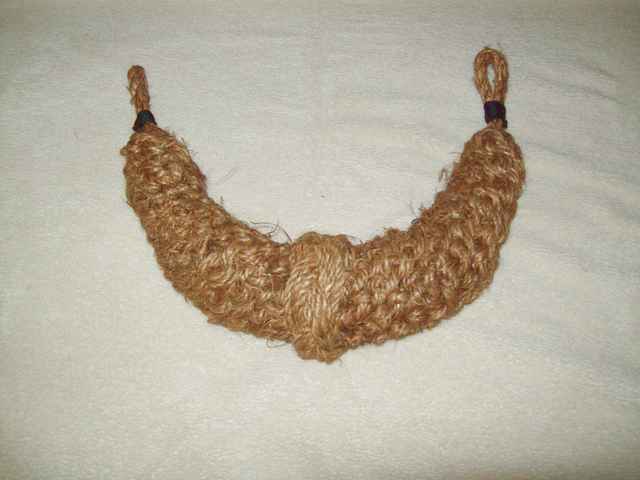
Mounted on the boat. Not bad for a first effort, but it really needs to be made a little smaller in diameter and hang a little lower. And up close, it's got a "hairy dog" look from all the loose fibers.
Hanging the fender lower is an easy fix. But getting it smaller in diameter means we're going to make a new pudding. Getting rid of the "hairy dog" look ideally means using something other than manila, which tends to have a bunch of loose fibers. In the original pudding I unlaid the strands from a 24-foot section of 1/2" rope and used the strands for the hitching. The strands tended to untwist as I worked them, and that probably also contributed to the problem.
For the new pudding we'll use 1/4" line for everything - core, filler, and hitching. I bought a 100-foot roll from the hardware store and when the pudding was finished, I had about 2 feet left over. Since I'm using smaller line to make the eyes, I decided to serve the eyes with small stuff. Probably not essential, but it looks cool, and that's important.
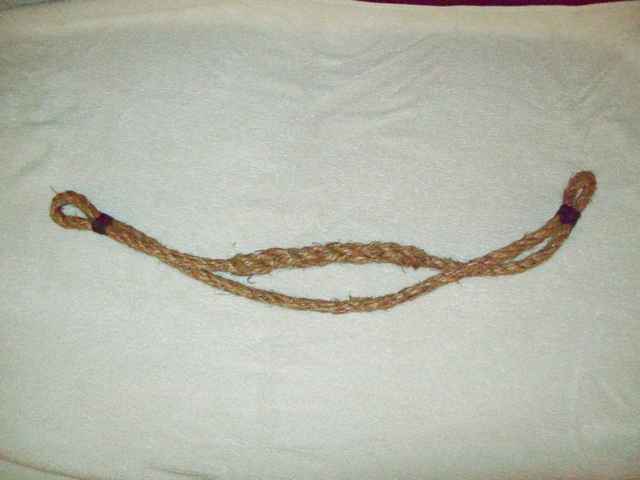
A comparison of two puddings. The lower one looks much neater than the first one.
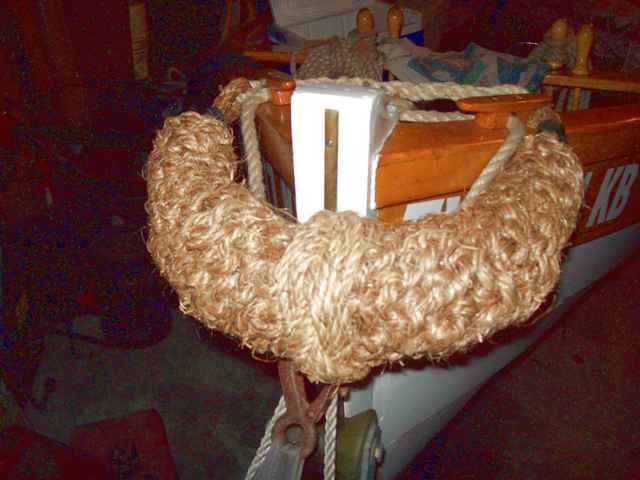
Mounted on the boat and ready for use.
We mentioned rope fenders at the beginning of the article. Instructions for fenders are also in "The Splicing Handbook", and again are well-written and illustrated. Barbara gives instructions for two sizes; I'm using the smaller ones on my boat. For each fender I'll need 21 feet of 1/2" rope. Cut the filler pieces, then middle the remainder and clap a round seizing to make the eye. In the photo below I'm using the Swedish fid to tie a flat knot in the crossing turns. Barbara also shows how to tie the flat knot.
Similar to the bow pudding, add the filler pieces and secure with small stuff and constrictor knots. I'm making two fenders here; one fender by itself is pretty useless.
Next we'll take the two pieces of line coming from below the filler pieces, unlay them, and end up with six snakes.
Pick one strand as #1 (it doesn't matter which) and start tying a crown knot working counterclockwise. It's hard to tell how to tie the knot from the photo, but Barbara's instructions and illustrations are much better.
In this photo, I've come over the bottom and I'm working my way toward the top. Cinch the knots tight as you work each row, for a neat, even appearance.
I've worked my way to the top, and am finishing off. Using the Swedish fid, take each strand and work "over one, under one" for about three rows, similar to making an eyesplice. Prior to getting the fid, I'd take all six strands, gather them around the base of the eye, and seize with a common whipping. The approach shown below is much neater. Again, buying the fid was money well spent, I got it for less than $10 at the local boat store.
The completed fenders.
|


-l.jpg)
-l.jpg)
-l.jpg)
-l.jpg)
-l.jpg)
-l.jpg)
-l.jpg)
-l.jpg)
-l.jpg)