
 Custom Search
|
|
| sails |
| plans |
| epoxy |
| rope/line |
| hardware |
| canoe/Kayak |
| sailmaking |
| materials |
| models |
| media |
| tools |
| gear |
 |
 |
| join |
| home |
| indexes |
| classifieds |
| calendar |
| archives |
| about |
| links |
| Join Duckworks Get free newsletter Comment on articles CLICK HERE |
|
|
| December Treasure Chest |
Send
items to chuck.leinweber@gmail.com for inclusion here next month. |
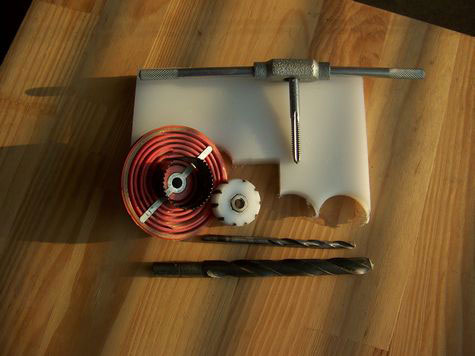
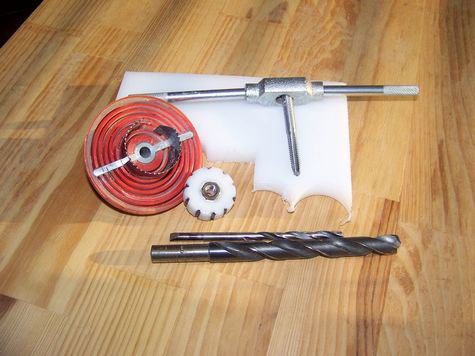
ThumbscrewsPreambleI built an Oar Mouse from the dimensions given on this website a couple of years ago. I cut it in half and made two halves which I bolt together. Hence the thumbscrews. I all so made a 4 foot center section so that I can assemble the boat as a 14 footer or an 18 footer. I modified it by adding a small pointed bow, making the transom suitable for a trolling motor mount, making a sliding seat and outrigger oar locks for rowing, side decks, a chamber in the bow with an access port, mounting for fish finder and fishing rod and an aluminum adjustable boathook mast for a sail for going downwind. I have installed a removable able comfortable bucket seat for when I use a double paddle and/or the remote switchbox for the electric motor. ThumbscrewsThis is about making thumbscrews to your needs. I have a two section row/paddle boat and I wanted to make a simple way to join the two halves without tools. I made them from ¼-20 stainless nuts and ½ inch thick poly plastic (think kitchen cutting board material). I get my material at TAP Plastics from their bin of cut-offs, which they sell inexpensively by the pound.
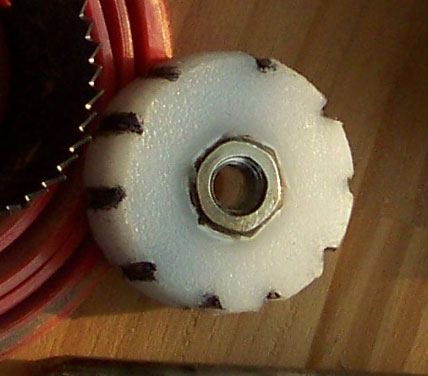
I used a simple hole saw that uses a ¼' drill bit pilot. I replaced the pilot drill with a smaller ¼-20 tap drill bit (#8) with the shank wrapped with tape to build the diameter up to ¼" and clamped it into the saw body. Absolute precision isn't needed for this application. I drilled through the plastic half way from each side. I then counter drilled part way into the plastic, the depth equal to the thickness of the nut, with a drill bit the diameter equal to the dimension across the flats of the nut (7/16). Then I mounted a ¼-20 headless bolt into the drill press and threaded the nut on until the nut was flush with the end of the threaded portion of the bolt. I heated the nut with a propane torch for several seconds and then pressed the nut into the plastic until it was flush with the plastic surface. The drill press keeps everything perfectly aligned. Note that a heat gun on the low setting will work and that you might want to first experiment with how hot to get the nut to melt the plastic and not burn it. Let it cool. Remove the nut from the bolt and trim any excess plastic that flowed above the nut. Then I used the tap drill to drill through the nut and plastic to reopen and align the hole. Run the tap through the nut continuing through the plastic. Clean up/sand any edges and use a hacksaw to texture the edges of the plastic for a gripping surface, if desired. I drew black lines on the plastic to indicate where I cut. By tapping through the nut into the plastic the two will not separate under normal use. Trimming around the nut allows it to fit flush to the work and the continuous thread keeps it all together. If you do not pass the tap completely through the plastic, leaving a nearly full-cut thread or so you will have made an interference fit for the mating bolt. That will make a self locking feature - nearly vibration proof - when assembled. I did not need that for my joining application. I also make similar threaded nuts of various shapes and sizes for other applications as the plastic taps easily and has very good strength and is corrosion free. You can score the corners of the nut to give more surface area of the plastic to flow into and grab, but I have not needed to do that and I do apply a lot of crankin' sometimes. None have separated yet. Frank Campion Handy Varnish Saver
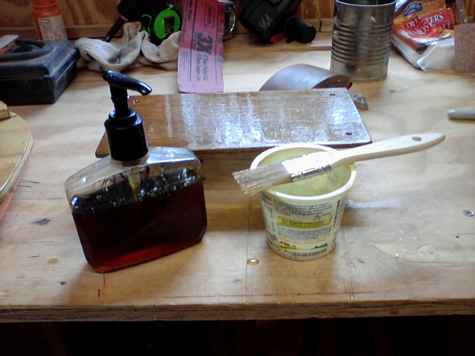
I've been using empty liquid soap and shampoo containers with pumps to store and dispense epoxy resin and hardener into measuring cups, which is quite handy. I've now applied this to storing and dispensing the varnish left at the bottom of the can once the top has thickened too much to be usable. After scraping off this hardened top layer, I strain what is left through a funnel containing a paint strainer (in my case a small cone coffee filter with tiny holes punched through the bottom with the tip of a very small nail) into a clear liquid soap dispenser. (The varnish can be first thinned in a small disposable cup if needed before pouring it into the dispenser.) The beauty of this is that one can see the amount and condition of the varnish before dispensing, the amount of surface area that can thicken in the pump container is reduced as compared with a quart varnish can, very small amounts of varnish can be easily and cleanly dispensed into a cup for use with a brush, and whatever varnish is dispensed comes from the bottom of the container, thus eliminating the need to scrape off any hardened top layer if indeed their is one. I'm not sure how this will work out in the long run, but it sure makes things easy and eliminates much waste of leftover varnish. Steve Electric SpokeshaveOne of the best tools I know of for working on old plywood boats is a small angle grinder (4 inch) with a soft pad and a 40 grit sanding disc on it. Do take care when using it as it can kick, make sure that you use it in such a way that if it does it kicks away from you, but its an unbeatable tool for removing rot patches, preparing for new plywood, shaping, planing smooth, removing paint, cutting away rotten patches and so on. When you are removing rotten plywood, you may find that the rot has penetrated sideways along the internal veneers so you should remove material well past the apparent edges of the affected area, keep going until you are really sure you're well past the edges of the rot. JohnW |
To comment on Duckworks articles, please visit our forum
|

