|
|
| QC155X Canoe Hybrid - Part 2 |
| By Paul Helbert - Broadway, Virginia - USA
|
 |
Part 1
Here is the rest of the construction in pictures
|
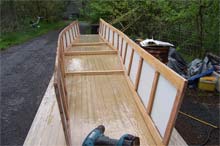
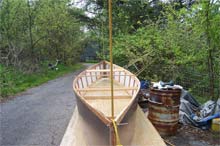
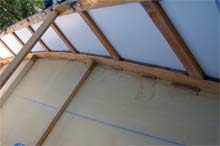
Spacing the sides
bottom width set. |
|
Ready to draw the ends together |
|
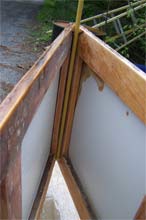
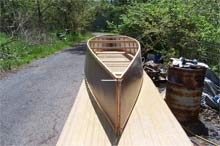
Spacing top
Temporary spreaders and angle of stems set the flair. Bolts and wire ties hold ends together until glued. The slot between the halves can be usedl for sighting against the sister slot in the other stem for alignment. |
|
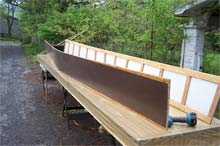
Fiberglass pole
Fiberglass electric fence staves can be used to verify alignment of the stems. |
|
Stems aligned
A pole at each end allows easy sighting. A quicker method is to sight through a vertical stem crack to the crack at the other end. It is just as accurate as the use of the poles. |
|
Temporary spreader
Packaging tape on spreader to keep epoxy from sticking when the bottom is installed. |
|
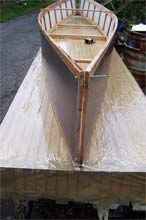
Flipped
Ready to position bottom. Again, sight for alignment before proceeding.
Here the crack (mentioned in alignment) is visible. One can sight through the crack to the similar one at the far end and thereby check that the boat is not twisted. |
|
Tape
Lots of things went wrong during this build. Most were caused by the weather. Strong, hot sunlight caused the tape to let go. If I'd cleaned up the garage and worked inside, this boat would have been finished by this time. |
|
Bow and stern
Stems were drawn together with wire ties and bolted. Tape was run crear around the hull because the hot sun was causing it to let go midships. |
|
IPA Sunday
Any further work on the boat at this time would just be messing.
Vanilla Ice Cream with IPA makes a delicious bittersweet treat |
|
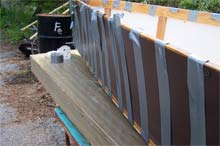
Relief of edges
Sharp edges radiused to about 3/8 inch so that glass tape will conform and lie flat. I usually cut bias strips from 6 oz glass for the chines and stems.
Since I don't totally trust the aluminum to frame joint, I will lap the fiberglass and resin onto the aluminum, and strengthen the chines in the bargain. |
|
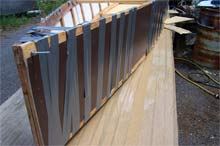
Stitched with epoxy
Couldn't glue it all in one pass due to the temp spreaders, so just stitched it until later. |
|
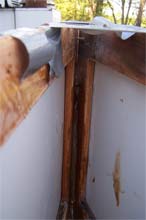
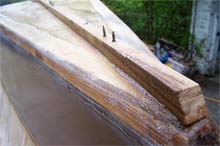
Stem
Stem being filled with epoxy, fumed silica and wood flour. |
|
Holes transmit center line to exterior |
|
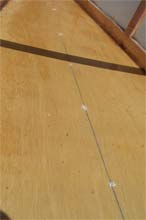
Center line
Holes drilled from interior center line show where to mount keel. |
|
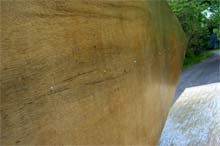
Waves
Hopefully a keel will pull out the waves while adding stiffness to the bottom. I think I got away with 1/4 inch bottom on Sage's Pink Canoe and might have used 3/8 on the William Henry Harrison. This boat is beamier than either of those and this 1/4 inch underlayment is crappier.
For the bottom I would probably use heavier glass, if I had it, for this crummy plywood. I have 2 oz glass, which is what I generally use, so that's what I'll use here. |
|
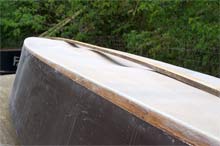
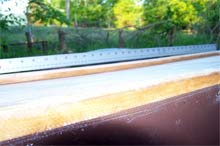
Temp screws line up keel
The 3/4 x 3/4 ash keel removed most of the wave. Photo exaggerates the remaining dip at midships. A heaver keel or a keelson should get all of it, but I'm not convinced that the extra weight is worth the bother on this boat. That dip is only 7mm deep.
I'm not favorably impressed with this 6 oz bias cut tape that I used on the chines. I have always cut my own from woven 6 oz cloth. This stuff is more open, has heavier threads and extra threads run lengthwise which prevent it from being pulled narrow or wide as needed. The open weave and heavy threads cause it to require much more resin than would be needed otherwise. |
|
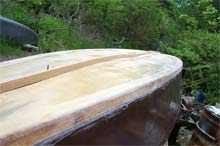
Keel
3/4 x 3/4 ash keel before removal of screws and before easing corners to 3/8 radius. |
|
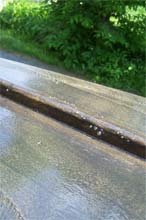
Keel not so bad
Maximum depth is about 7mm. If this were a race boat I might be concerned, but I will leave well enough alone. |
|
Blowing bubbles
This is why it is best to coat epoxy onto wood while the temperature is constant or, better yet, falling. Epoxy was applied in the morning. Warming caused out-gassing from the ash keel. If I were to try a second coat wet on wet, I'd expect the same result. So my options are to move it into the shade (not likely to help much because the temperature is still rising) or wait for it to cure, then sand and recoat in the evening. No bubbles from the bottom because that was previously well sealed. |
|
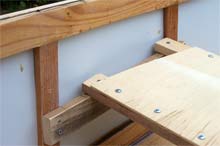
Breasthook
The outwales are not being glued, so the plastic tape is there to prevent gluing them to the breasthooks. They will be glued later. I'm anxious to get on the water and do some testing.
|
|
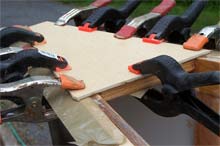
Seat
Screw mounting the seats are adjustable. Once their positions are proven, they can be glued in place and the screws removed. The screws holding the seat platforms will be removed, as soon as the glue that they are clamping, sets. |
|
Buggered!
Yet another problem due to working outside in the spring. I coated the bottom with graphite filled epoxy at sunset. Next morning there were hundreds of bugs stuck to it.
|
|
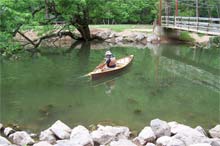
It floats!
We went upstream tandem. Then Sharon got out to take pictures. Handles reasonably well and there is room under the seats for feet, so one could kneel in it, which would give better trim and increased stability. (For paddling solo, I'm using what would normally be the bow seat, but should be more nearly centered as the stern is noticeably lower in the water than the bow). |
|
Handles fairly well tandem
This boat may save some weight. It weighs 60 pounds.If I'd have used western red cedar I might have cut the weight down to 50 pounds. (Michael Storer's Quick Canoe of about the same size weighs 47 to 70 pounds.) A possible advantage is low cost.
While it might be possible to use this construction method to build a decent canoe, I found too many problems and no great advantage over the use of plywood alone. The construction is fiddly, the frames fragile,and the joint between the aluminum skin and frame subject to leakage and rot. |
The method made an okay boat, but it is much heavier than I was expecting. If I'd have used Western Red Cedar, instead of SPF and Douglas Fir, it would have still been heavier than some Quick Canoes. Sealing the joint between the frame and the aluminum skin is not trivial. So, I am not unhappy with it...just don't see any advantage over an all plywood build.
-*****-
|
|
|
|