| To Part One
To Part Three
|
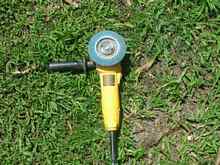
Cutting tool aka Grinder with diamond cutting blade |
Cutting the stuff:
This thing will do the job. It is a small angle grinder with diamond cutting blade. You need to know this will cut your leg faster than it will fiberglass. It can do a finger in less than a second, and when you drop it you'll need to hang from the ceiling or you won't have a leg to stand on when you come down. You may want to use it with second handle screwed on. You may want to keep the blade guard on. But you have been warned. Don't call me if you misuse it. This thing cost me new, less than $60 with blade. I can't buy a power saw that cheap - and they won't cut like this thing can. Forget hacksaw blades.
Also, the same angle grinder with sanding attachment. Better than the old drill add-on for sanding. Never will I go back to that. Faster than anything you have experienced. It can sand THROUGH your fiberglass if you are not careful. But, then again, that may be what you want to do, in a controlled way. I use 50 grit paper. It may not look like a sander, but it beats a quarter inch or three eights inch drill with sander attachment by factors of a hundred.
|
Sander aka Grinder with sanding attachment |
It may be a little slower than the cutter blade, but it can do a number on you if it slips off the work, or jumps at you. Instead of slicing off an appendage (which maybe at the right place and time could be re- attached), this thing will sand it off and leave your appendage mixed with the fiberglass dust on the ground. Again, I warned you. But - this one tool, cuts and sands very effectively. Better than anything I have seen before.
Dust masks. Use them all the time. Old clothes, old shoes, and even old gloves and if you are wearing short sleeve shirts, even in this tropic climate, wear long sleeves, or make some. Saves a bunch of itching!
|
Marking the sides for cutting |
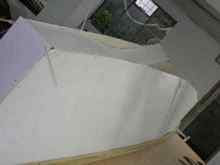
The bottom of the bow and transom were 6" up from keel line. I used a bendy piece of wood to mark the first one. After that, it becomes the pattern for all sides of the two hulls. Watch carefully which side is the inside and which side is the outside!! Majic Marker works great for rough fiberglass. NOTHING is cut to 1/16" or even 1/8" as woodworking skills require. Get them close, match the sides, sand to same dimensions.
Now sand both sides, inside and outside when on the flat table, it is much easier. To connect strongly you will need to sand off the gel coat, and just rough up the cloth side. For my first boat, the bottom and transom and bow were sanded, inside and out. Gunwale was screwed from the inside out to a piece of wood, so I didn't need to sand the inside or outside of the top.
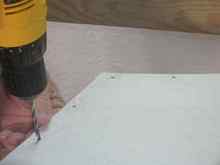
Drilling holes in the bottom of the sides and up the bow/transom. Do two sides at once. You will use something to tie these pieces all together. Make sure you get the front with the front, and the inside with the inside, or else you will have the bow of one hull going in the wrong direction in relation to the transom, or you will have the fiberglass mesh on the outside of the boat instead of inside. (which can be corrected it you just do a bunch more filling and sanding).
Plastic cable ties, tie wraps, re-bar tie wire, brass wire, and I suppose string could all be used to tie the boat together. Duct tape failed for this purpose, perhaps too much fine dust.
Looks kinda ragged at this point, but the trick is to get the bottom pieces to lay on top, NOT as you see in this picture. You'll be glassing the inside first, after lacing it together.
At this point, the yellow string is to help alignment, checking side to side and is the bottom centered. It really needs to look like a symmetrical boat at this point, you start glassing the bottom. It will be hard to change later (but not impossible). Note: top of the boat has a 1"x2" piece of treated wood screwed on, gunwale. That is one piece of wood that stays. Not only is the top of the side screwed to it, the top
(deck) is screwed to it.
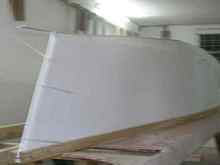
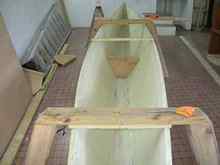
The hull is hanging from the saw horses. Wood bulkhead is temporary but helps check for alignment.
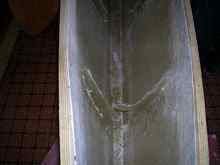
Glassing the inside. I have glassed right over the stuff used to tie the hulls together.
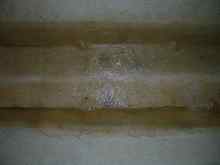
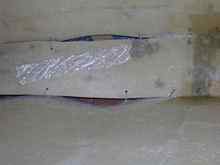
Sometimes it isn't so easy. Gonna need some more tie wires to pull the gaps together. Keep fiddling with it, until you glass it, it isn't set. Even then, it can be changed, with some degree of difficulty, but I have done it! Note: one section is "tack welded" with fiberglass already. I think the flimsiness came about because the sides of this boat #2 were not stiff enough. This is my second boat. The first boat where I used 22.5oz biaxial cloth I didn't have this problem. The second boat I think I was using something like 12-15oz. bixial. Too flimsy. Use the 21-22 oz biaxial with 1.5oz matt.
On boat #2 instead of glassing in place a treated 2x4, rounded for the bow piece, I used a PVC pipe coated with mold release wax. I took out the pipe later. Boat #1 I extended the 2x4 above the deck, and have a very nice place to tie anchor line, dock line, or grab and hold when necessary. I recommend the treated wood bow.
To give stiffness to the hulls, I added some ribs. Pieces of left over scrap, glassed inside about every 16 inches or so. These were cut an fitted as necessary, and not really finished off. The rib pieces were sanded on the side to be glassed, and I also sanded the area they were attach to. I didn't even fiberglass the whole rib in some cases, just tacked it here and there. These ribs can be sharp, I didn't bother sanding them too much in the front and back as I added a deck, and they are not accessible without taking the deck off.
Styrofoam would be stuffed in these areas (bow section, stern section). Got the Styrofoam from stores, left over from shipping. I bagged them together in flour bags to prevent shifting around. Even used shipping popcorn styro chips.
 |