|
THE FINISHING TOUCHES. Number 1, the daggerboard pin
A series of how I did it stories from John Welsford, proud new owner of “May” a modern interpretation of a South Coast English cutter.
|
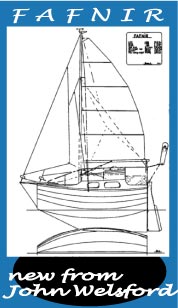
The 18 ft gaff sloop "May" a few minutes after arriving at her new home. Beautifully built and finished, she just needs a few final touches to be perfect. |
I’ve bought a new boat, well, new to me. She’d been designed as a comfortable two berth coastal cruiser, beautifully built in glued strip plank with copper riveted frames and mahogany trim, rigged as a gaff sloop and sailed some before being sold off to someone who tried her out as a racer. A Bermudian rig replaced the “old fashioned” gaff rig, much tuning and experimentation was done and I strongly suspect that she went slower with the modern rig than with her original.
So after a few fruitless seasons she was sold again, this time to a good friend of mine who had her converted back to her original rig, or as close to it as they could get without a sailplan, and had a lot of work done to her to get her as good as new.
My friends circumstances mean that a sailing boat is no longer a good fit for him, he has other commitments that means he cannot get away for long enough to sail her, and so she was offered to me at a very attractive price, in part because my friend knew of my love for the type and wanted her to go to a good home.
At this point I’d only seen photographs, and had discussed issues with her rigging and such, but knew that she was in exceptionally good order, would be a perfect boat for my style of cruising, was not otherwise committed to a boat so I agreed, yes, I’d buy her.
A new boat is a little like a marriage, it’s a big commitment which is often made on anything but logical grounds. I’d fallen in love with her curves. She had a cheeky look from ahead, and a particularly attractive stern, one look and I was a goner!
But, like some marriages, a little down the track and there were quite a few things that I was finding it hard to live with.
One of the first things that came to my attention when bringing my new boat back from her island anchorage was that, apart from being a very pretty boat in top condition, was that many of the small fittings on the boat were not in quite the right place, or were not the right item for the job, or just did not fit my preferences. Often all three.
So this series will take you, dear readers, through the process of getting a lovely little boat from where she was at when I sailed her that first time, to a really comfortable fit for me.
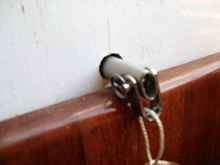
When boarding the boat that day, we sent up the sails, got all organized to heave the anchor up and get under way, but the centerboard which is a vertical lift daggerboard that slots through the keel was very hard to manage. It was in the up position and held there by a little piece of 3/16in copper pin through a too tight hole through the board and resting on the top of the ‘case. It was bent by the considerable weight of the board, was jammed in, afforded little to grip on and did not want to come out.
We got it out, no security line or anything so there was a risk that when needed it would contrive to hide itself somewhere.
Fixing it was an early job.
I had in my workshop oddments bin a piece of half inch od stainless tube. Ok, I had a half inch chuck drill so could make holes that size, and drilled one where the original was, plus two more at different heights so the ‘board could be set at different depths if required. When drilling I waggled the drill about to make the holes an easy fit, eased the corners with a little sandpaper and used a cheap childs water colour paintbrush to coat the inside of the holes with three coats of varnish, well thinned so it would soak into the wood. I coated the stainless tube with silicone car polish as a release agent and slid it back and forth through each hole to ensure that it would be an easy fit.
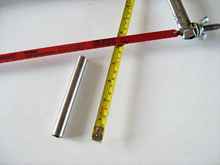
Next move was to make the pin. Its about 85mm from one side of the centercase across to the other, outside to outside so 105mm gave me enough length of pin to accommodate the end fitting I’d make without it sticking out so far as to become a menace to shins when moving about the little cabin.
This larger diameter pin is able to take many times the load of the original without bending, and being of much larger surface area it doesn’t chew up the inside of its hole which lets water in.
I got a shackle with split ring pin rather than screw pin, (From Duckworks magazines' boatbuilders supplies, RL-312-0) and drilled through the end of the tube about 5/16 “ in from the end, I used a drill that gave a fairly sloppy fit as the hole would distort when I flattened the pipe end in the vice, necessary as the shackle was only about 3/8 in across.
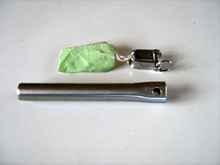
That done, I rounded all the edges with a light file, paying particular attention to the “in” end of the pin, and ensuring that the shackle was free to move. I tied a light line about 2ft long to the shackle and ran that to an SD-081102 Eye Strap (Duckworks again). The eye strap is just the right size to allow the pin to be dropped through the loop when not in use, perfect storage and it can’t escape to hide in the bilge.
There are many places in a boat that can use a pin like this, anywhere something need to be put securely in place but easily released later. For more security drill the other end as well and put a securing pin such as Duckworks SD-193415 through it. Do put a line on it though so it can’t sneak off and hide when you want it.
John Welsford, one little job down and many more to go.
|