Part 1 - One of Those
Part 2 - This Small Space
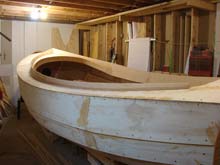
Part 3 - So Where's This Boat of Yours?
Part 4 - Planking Nightmares
Part 5 - It's All Downhill from Here
Part 6 - The Routine
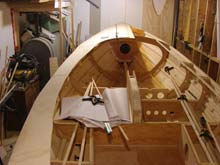
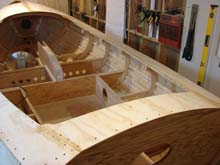
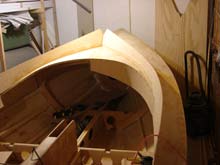
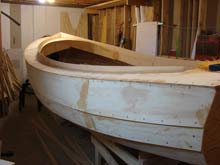
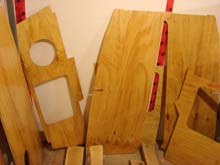
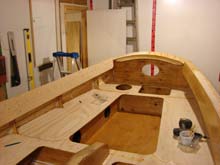
With planking complete it feels like the hardest part is over. Next up, decking. The Kingplank was cut and fitted first. Made from pine it shapes easily. It was laid aside while I cut and fitted the anchor locker glass cloth. I had installed the anchor locker floor just before I installed the last plank on the boat. Two layers of cloth were epoxied in place to take the abuse of an anchor being knocked about. I think I’ll still make a small cradle for the anchor just the same. The Kingplank received several coats of epoxy and then was installed.
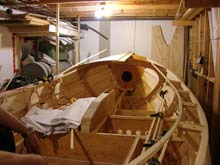 |
I decided to use a ¾”x3/4” batten to run the edge of the deck where it meets the combing/seat back. It was easy to bend yet gave me more wood to screw both the deck top and the combing too. I cut the appropriate size notches and glued and screwed them in place.
click images to enlarge |
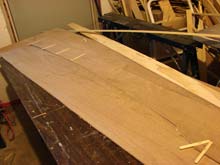
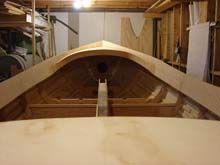
| I had enquired on the John Welsford forum about any possible issues with using 3/8” plywood instead of ¼” for the deck. I received no warnings so that’s what I went with. I took a couple of basic measurements instead of laying an entire sheet onto the deck to mark out. I cut an oversized piece and lined up the edge with the centerline I scribed onto the king plank. |
 |
 |
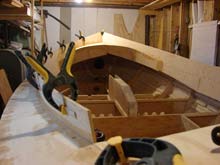
I screwed the edge in place in a couple of places, and then worked my way to the side of the hull with a couple of more screws until I got to the plank edge. Each screw was drilled down enough to bite into the bulkheads and then I moved outward. These screws acted like a press or clamp, slowly bending the ply to the curve of the deck. The same was done for the opposite side. |
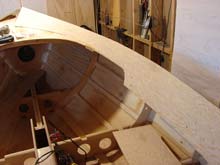
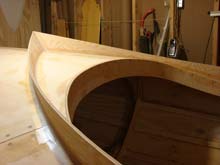
| I cut an over sized piece for the side decks and matched the forward edge to the main deck plywood. I have seen many pictures of pathfinders and most have a deck that went straight across from port to starboard. I wanted to do something different and make it curve and eventually meet the seat backs and coaming. My side deck plywood was left oversize on the inside a fare bit to allow for my adjustments to the curve. |
 |
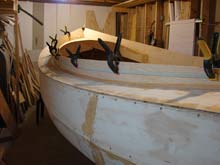
This method was continued to the back of the boat. I left it overhanging to be trimmed later. With all these pieces fitting and looking right, I removed them all and prepped them for epoxy coating. Each piece got 2 coats on the underside. They were then glued and screwed in place.
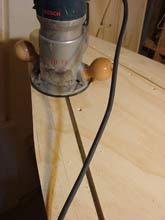 |
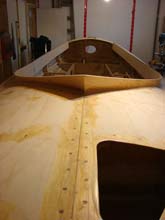
When it had all cured I used my router and a flush bit to trim all the excess plywood from the outside edges and the inside where it meets the seat backs.
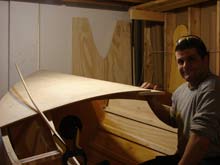
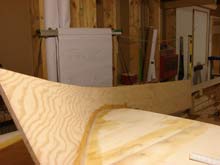
I stopped where I was to start the curve for the deck. The curve was made by simple trial and error. |
| I would make a curve with pencil and batten, look at it then try another. I tried to make it uniform enough so I could bend ¼” plywood evenly to it. Once satisfied with it I grabbed the jigsaw and started cutting before I could change my mind. I placed a scrap of ¼” ply against the curve and was satisfied that it would work. With some prep work I reinforced the underside edge with a layer of 3/8” ply. |
 |
 |
The two layers should be enough to screw the curved piece onto it. |
| At the rear of the boat I cut and fitted a small deck piece with only a slight curve. I wanted to be able to step on it, so I glued a reinforcement beam underneath for good measure. |
 |
 |
The coaming or spray rail. Now this will require some finesse. It’s not easy to strike the balance between practicality and looks, but I’ll give it a shot. The whole coaming is to be cut oversize just like the decking since it was easy to trim after. But first I have to make a rail that matches the decks curvature. I took a scrap of thin panel board and cut a strip about 6-8” wide. I wondered how I could make a template from this and nothing came to mind from the ways I have done things to this point. |
| POPSICLE STICKS! I clamped the rear of the panel to the seat back and held it in place where it should end on the deck centerline. I took popsicle sticks and stapled them in place where they hit the deck spaced about 6-8” apart. Crude but effective. It will get my first template pattern fairly close to what I want. I laid my art class project on the ¼” plywood sheet and marked it all out using the underside of the sticks for reference points. It was cut and laid onto the deck... close, but not quite. |
 |
 |
I shaved off here and there until it fit nice and snug. I trimmed the forward piece where it hits the centerline and cut it with some slope forward. |
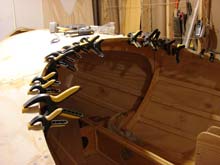
| A copy was made for the opposite side. The other side needed some additional adjustments but in the end fitted nicely. Both were glued and screwed in place. |
 |
 |
I made the rear seat backs by just cutting and fitting a suitable sized piece to the back. It was scarfed along with the forward piece to make a nice joint. The forward curved pieces were short and easy to handle so it took only an evening to test, cut, and test again. The pieces were glued in place and scarfed to the seat back at the side. |
| The whole thing looked a mess once installed but it had yet to be trimmed. |
 |
 |
I took out the long length of fibreglass batten and clamped it to the outside of the coaming in a place where everything looked “right”. |
| I would make a pencil line then remove the batten for a look. I got it looking to what I wanted on the second run. |
 |
 |
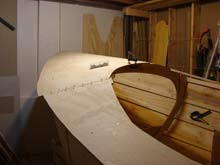
I took the jigsaw to my boat again and cut the line that would make the combing top. (I don’t hold my breath in nervous anticipation like I used to) I took some measurements from this cut side and transferred them to the opposite side. I clamped my batten in place to match the reference lines and penciled a line. |
| It was cut along with the underside of the seat backs in the same fashion. |
 |
 |
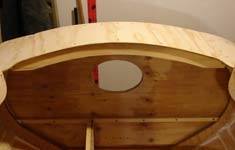
The curve part was just measured down from the deck at an even measurement to give it a proper look. |
| The end result was satisfying. |
 |
 |
It was pretty cool playing with this stuff, not hard work but just tinkering with it to make it look like you want it to. |
| The kind of work a coffee can be kept nearby and tunes playing in the background. Quiet work. |
 |
Yes the day finally has come when I'll need the outboard motor. No not to use directly, but to help figure out where the motor bracket will go. I am using a parallelogram motor bracket for my motor. Its location is important so the motor is in the water enough while in use. Some people have little idea of how motor trim can affect greatly the performance of both the boat and motor. the depth of the blade and the angle is important. I'm no expert but I do recognize the importance of these factors.
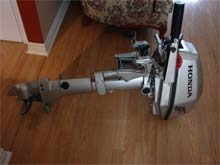 |
I decided on a Honda 5hp 4 stroke longshaft outboard. I know the Honda's reputation for quality and have used them in the past. My family also uses them exclusively on the mussel farm. Very durable machines and very quiet and fuel efficient. |
I wanted enough horsepower to push me through a headsea if the need ever arose. A 2hp I think would be outmatched here. A 5hp also having an external fuel tank means that I have more capacity and no in use refuelings. (spillage on a rough day) I made accommodations at the rear of the boat for this 2 1/2 gallon tank.
The motor was picked up today and though new and exciting, was unceremoniously dumped in the trunk of my car. I brought it home and introduced it to the family (not kidding just ask my wife), My daughter called it "Harvey". No seriously she named it Harvey! I never owned a new motor before and this was a big deal. New boat needs new motor.
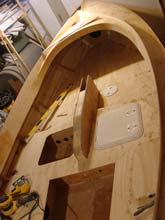
| With the decking complete I could now finish the inside. |
|
 |
I laid down all the floor panels, predrilled all the holes and added the extra support blocks at the planking. |
| It was all removed given two coats of epoxy on its underside and left again. |
|
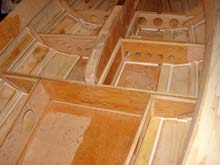 |
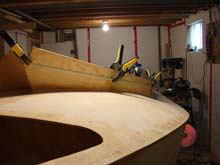
I proceeded to clean sand, and apply epoxy fillets to the joints inside. It sounds like a simple thing, but it took me many evenings of mixing and applying to finish. It was like caulking 4 or 5 bathtubs each evening. Once cured, I gave the inside 2 coats of epoxy to seal it all. |
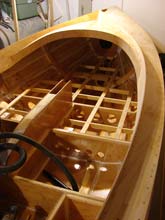
| I remembered to remove the jig screws that held the boat to the jig. I wondered if I would forget that small item. All the floor beams and cross members were glued in place and I added some members to handle my abuse of jumping inside the boat. Hey, it could happen. |
|
 |
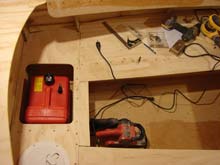
Once set, I cleaned and installed all the floor panels and seats. |
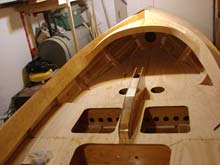
| Done. I finally had those panels that were hanging around my shop out of the way. No party this time, summer is fast approaching and there’s much to do. My father was in town for a visit and not being an idol sort, he came down to give me a hand at the boat. I located all the hardware points and glued reinforcing blocks underneath. |
|
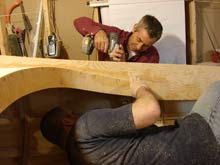 |
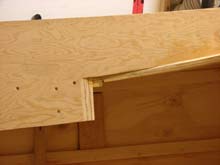
He drilled the holes I marked in the deck and set some screws in them until the glue kicked off, and then they were removed. |
That’s’ as much as I’m doing until the hull is painted. The next evening I got my rigging together in preparation for the roll over, sent out the distress call, lit the bat signal, the whole shebang. It was going to take more than one person to do this. I never gave it much thought, you just roll er over. Perhaps I should make some sort of plan on how to do this before the guys get here and we crush someone.
| What else to do, I went to my thinking seat, no not that one, the boat. I sat in the cockpit and wondered if I would enjoy this boat as much as my first, or the last one I slept on. |

|
I also thought up some way to flip a boat.
Next up, rolling over a 17ft boat within its’ own width. This should be interesting... perhaps even get some laughs on Youtube.
***** |