We chose a Pete Cullar skiff as a “shippy” boat to build and obtained the plans. Construction would require joining the laps with copper rivets. This is typically a two person operation and I wanted to do as much as I could without help. So I developed some tools that consist of a bucking iron, slide hammer and small hammer.
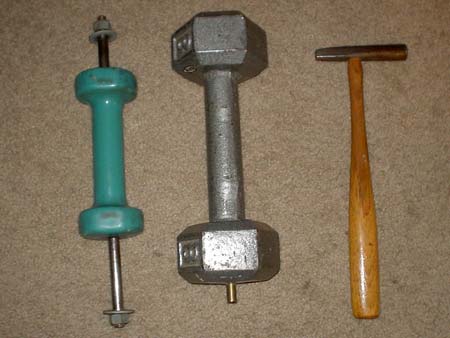
The Hammer
I list this first as it is the most important tool. Without the correct hammer all is for nothing. It must be no more than a half pound with a rounded (ball peen) head. Many light taps are needed or the rivet will be bent inside the wood (crippled). John Gardner’s Building Classic Small Craft has an excellent description of the correct hammer and how to use it. I had to make mine but I’ve seen some usable ones in the local hardware store recently. The hammer pictured weights 5 ounces.
The Bucking Iron
This tool is made from an eight pound bar bell. The only modification made was to add a brass rod. This allowed me to buck countersunk nails.
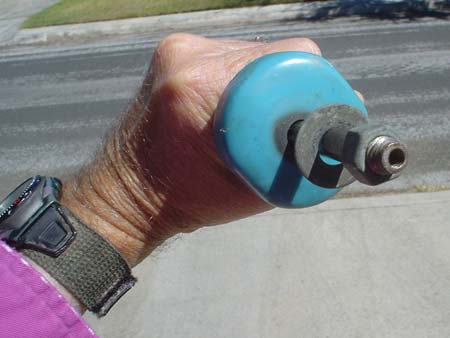
The Slide Hammer
This tool is key to one man riveting of laps. It enables me to set the rove (a copper washer with a hole that is smaller than the diameter of the nail). The rove must be driven onto the nail. Normally one person bucks the rivet while the other holds the set on the end of the nail with the rove on the nail point and then he drives it home with a hammer. A quick count shows that at least three hands involved. Using the slide hammer, the rove is placed on the nail point (spit on it if it will not stay in place), then the slide hammer is used to set the rove. This tool is made from a two pound bar bell that has a clearance hole drilled to accept a 3/8th steel rod about 12 inches long. Each end of the rod has a hole drilled into it to clear the copper nails. One end is for small nails used on the laps and the other is drilled for larger nails that are for the frames. Also both ends are threaded for 3/8th nuts.
General Notes
Only God has more clamps than Norm Abrams. Clamps are a pain. They never are just right. They mark the wood. They slip while you hammer and there’s never enough of them. So use washer head screws set into predrilled holes to join and clamp the laps and always predrill. And always do a neat even spacing on the holes. No matter how you fill and sand, it will show. After you have screwed on both the right and left laps (you must evenly load the boat or it will be distorted), then remove one screw at a time and set a rivet.
Other Uses
Copper rivets can be used anywhere you would use small nuts and screws. They are very secure and are not as apt to snag on ropes, line or people meat. If you ever want to remove one just grind off the head and punch it out.
Copper rivets can be used to butt join plywood. As long as the joint is not glued the plywood will bend without making a flat spot at the joint. Glue can be added after the ply is bent on or when coated with cloth.

Sources
Washer head screws can be bought from McFeelys.
I’ve had gotten use from part number 0812-SRZ-C. They have an unthreaded shank that insures good clamping action.
Copper nails and washers can be obtained from Hamilton Marine. Their online catalog doesn’t provide much detail on dimensions so it would be best to call in an order. Note that the slate nails have a very thin head.
***** |