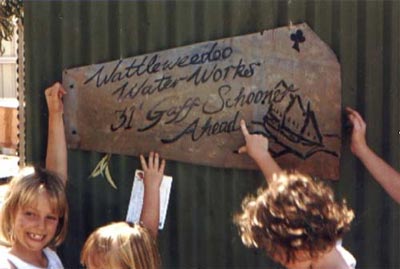
|
click
thumbnails to enlarge |
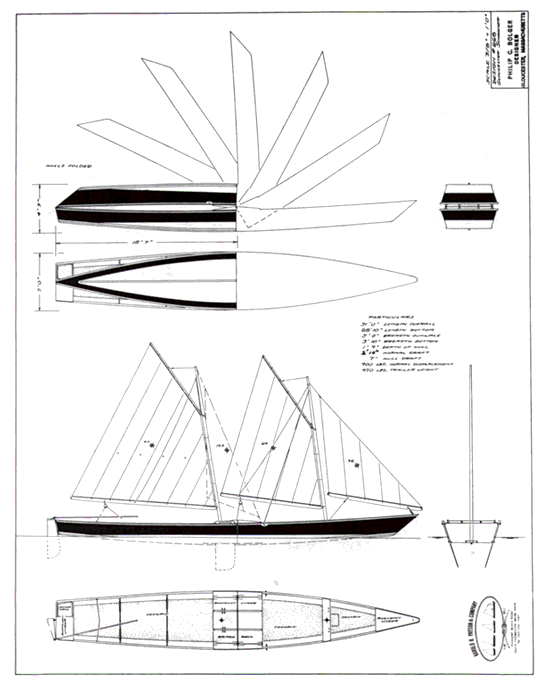
There comes a time when you need to build a boat. You
drive down a road or track and as you crest a rise you
see a lake that screams out Here I am, come and sail
me. This is the tale of how and why a 31 Bolger
folding schooner started its life sailing 400 kms from
the sea in one of Australias driest cities.
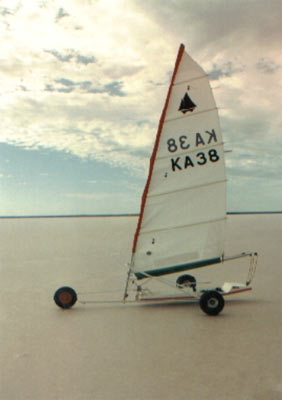
A GEOGRAPHY
LESSON
|
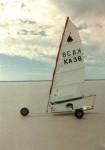
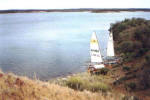
Lake Lefroy with landyacht |
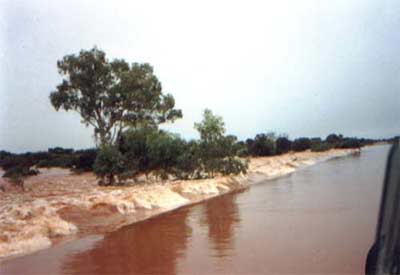
Every 10 years or so inland Western Australia
gets a 25 year flood. Great big cyclones come in,
one after the other, Out of the Timor Sea via a detour
into the Indian Ocean. They dump a few years of rain
in days, or even hours. Our annual rainfall is supposed
to be 6 but we can get local storms of 6 in 1 hour.
The eastern parts of Western Australia are very flat
with ancient river and lake systems that are normally
saline and dry.
|
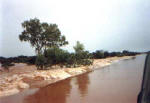
Brown Lake and a flash flood
 |
After such rains lakes up to 10 deep
can appear overnight and live for 1-2 years. The biggest
is Ponton Creek, 250 kms of swamps, rapids and salty
lakes which can flow for 3 months as it drains into
Lake Bunderoo on the Nullarbor Plain. The creek gets
a salty layer of foam up to 1 metre deep in the wilder
parts. The river system was navigated in the floods
of 1976 by rubber ducky.
Our local lakes around Kalgoorlie include
Kopai, Brown, Red, Gidgee, King Of the West, And our
beloved Rowles Lagoon. Most are 1-2 kms across. But
Brown Lake is 1.5 by 7 kms and 4WD access only.
FINDING
THE IDEAL BOAT
I started my search for a boat before
we had internet access, so it was magazines only.
Criteria was:
-
1 Open boat. Reason: When people disappear
into a cuddy cabin they tend to get sick, or suffering
boredom.
-
2 Simple to build of course.
-
3 Suit growing family. The family
was 2 adults and four girls when we started. Add
1 more girl before it was finished. Dont forget
they have friends as well.
-
4 It has to be built in an 18 long
building space, along with running a small business.
No worries.
-
5 Has to be as narrow as the 4WD for
towing, with no protrusions to snag on trees when
winding through the bush. 20 towing length max.
-
6 $6000 Australian to spend
|

click
to enlarge |
All this told me I needed lots of boat.
A cat was out as all the designs were too wide. Couldnt
find any tris under 24. Things were looking grim. We
might have to stick with the Hobie14 and only take a
few kids at a time.
Id given up buying magazines as it had
cut into the budget and was down to reading them in
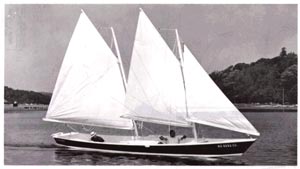
the newsagents. I spotted a story in Watercraft magazine,
which featured a photo of a huge long schooner ghosting
along with a relaxed crew sprawling around the deck.
The caption said 31 folding schooner
I thought Hmmm
.., my wife said Too
big . Oh it folds! OK. Two weeks later the plans arrived.
Shopping for parts involved finding plywood, glues,
and timber by phone and fax, then driving 600 kms to
pick it all up. Just like that.
LETS BUILD
A BOAT
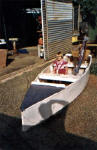
Since I was ready to build the boat, I
had to knock out a few other jobs first., namely a couple
of billy carts and a parade float, repair a car or 2
, renovate a bedroom
5 MONTHS
LATER
|
The
float |
I drove the float into the shed (my 4WD
is inside the float) and pulled it apart. Before anybody
could find a use for the space in the shed I set up
the trestles and started marking out the first sheet
of ply. Bulkheads came flying out in rapid succession.
The forward hull was simply a case of
following the instructions and it turned into a hull
in no time. A handy hint: 4 house bricks in a milk crate
is perfect for holding up sheets of ply when assembling
the hull sides.
It was at this point that I learnt about
metric and imperial(s) measuring systems.
CHECK YOUR
MEASURING TAPE
clamped
bulkheads |
I started school with imperial measurements
and just as I was getting confused we changed to metric
in grade 5. The plans were in Imperial, for which Mr.
Bolger apologised, but said the design was a 1973 one
and not worth redrawing.
No worries. I soon figured out the feet,
inch, eighths, and ignored the little + and all over
the plans. The forard hull was built and looked good
but not right by the tiniest amounts. At this point
the Library found me a copy of Payson's How
to build the new instant boats and he explained
that the + and was + or 1/16 .Oooops.
This explained the unique flare in the
bow.
Have you ever heard of Japanese Inches.
The little buggers have their graduations in 1/10 Inch.
My beautiful new stainless steel metre rule featured
this sneaky variation without telling me. It took 4
hours to re-measure the ply sides of the aft hull when
I did a re-measure of a couple of spots that didnt
feel right.
The offending part of the rule is now
painted over.
After the forard hull was built it was
primed and hoisted into the rafters of the shed and
I started on the spars. This was because my cash flow
was not conducive to the boxes of screws needed for
the aft hull. The booms and gaffs were done in a day
then the search began for suitable mast wood.
|
Junebug |
Kalgoorlie has 2 salvage yards. They both
work on the same principal. As buildings are demolished
anything of real value is shipped out to the capital
city (Perth) and the rest is sorted and left to rot
away due to the absurd prices being asked. I was searching
for 4 of 4x 2 by 15 -16 long. Good luck was the
reply at one yard. In all this mess I found 2 of 4x
2x 14 long Douglas fir, almost clear, no cracks. They
had been part of a roof frame and were very dry on the
outside. With a lot of planing I had just enough wood
left to laminate a 3x 3 mast . The top 16 came from
an off-cut from a 12 x 2 floor support of an old hotel
being renovated. The other 20 of that beam had been
removed by a demolition crew and used in landfill!
The mast was a bit twisted so when I clamped
it about 60 clamps were used, all but 30 scrounged from
local builders and friends. Planing and sanding
took only one day , but what an enjoyable one it was.
Wading barefoot through a thick layer of aromatic shavings
is a rare delight for anybody working with wood. I suspect
finding wood for anything bigger in this part of the
world would be a true challenge. Wood cost for this
mast was AUS $40.00. Not too bad.
A week later the man from the Good Luck
yard rang and said hed found a couple of sticks in
a roof. I arrived to find 2 superb pieces at 166 long,
not too dry, no splits, no twists. He informed me they
would cost AUS $20.00 for the 2 so I paid up and ran
for home real quick.
The next mast was to be 146 and the
wood was easily prepared, glued and clamped the same
day . In contrast this one needed only 30 clamps. The
finished mast is 2/3 the weight of the main mast yet
only 16 shorter.
After 10 months of building the cash flow
dwindled again and I had to walk into the shed each
day and not build boats, but, as if by magic
|
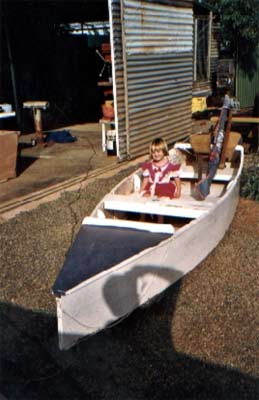
Junebug
with sails |
I was removing an old shed from a property
and when we lifted the roof off there in the crap and
rat poo was the distinct shape of a14 Bolger June Bug
and my job was to remove it. For the next month I was
able to experiment with alternative glues, Bilge Keels,
poly tarp sails( love them), and rudder/tiller arrangements.
The result was a Bilge Keeled, ketch rigged JB with
a Thames Barge style sprit sail main, lug mizzen with
Boomkin, and the fanciest tiller and seats in town.
The boat, with its expanded seating room
was for 4 kids or 2 adults. This made me feel really
good about my choice to build the 31 footer.
Poly tarp sails were both easy to make
and surprisingly good to sail. A couple of hints:
-
1. Have plenty of reinforcing around
the eyelets.
-
2. Dont waste your money on double
sided tapes. Use old fashioned contact adhesives,
but not the Gel types.
BACK TO
THE SCHOONER
|
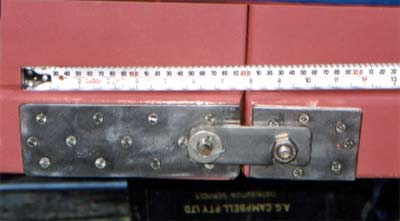
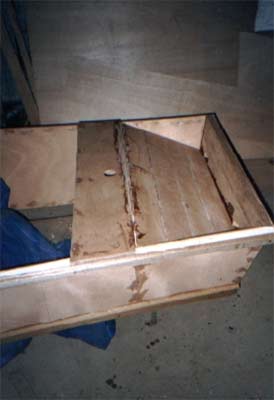
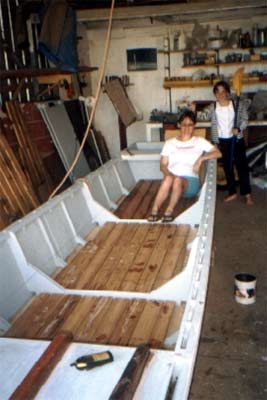
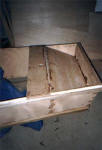
jarrah hinges |
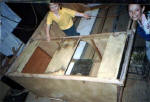
Work progressed slowly on the rear hull.
Having read a bit about the folding schooners failings
in the hinge plate and chine latch areas I started thinking
about how to beef it all up. The for hull had had 20mm
thick ply plates glued and screwed under the decks and
the chine latch area had its scantling doubled.
This was followed through to the aft hull
, particularly as the bilge boards would run through
this area too The boards were beefed from 12mm to 20
mm. All framing in these areas were increased and extra
framing added to the face of the bulkheads. I felt confident
that this would increase strength without adding too
much weight
The chine logs in the midships area were
enlarged to 3 x ¾ over the length of the bilgeboard
cases to fit wider latch plates in 3/16 Stainless steel.
All through bolts were ½ SS instead of the designed
3/8 galv coachbolts.
|

jarrah hinges |
The transom was another area that received
my attention. The designed transom seemed weak in my
eyes so the lightly framed 6mm ply was replaced with
a solid 1 ¼ Maranti slab recovered from an old security
door. It had been the back door of a house, which wed
bought to renovate. Although this is nothing to do with
boats I was told that the owner was a retired brothel
madam, and very ugly to boot, and that the house had
once been a Fire Station in a nearby town.
Just a bit more Kalgoorlie history to
add to the boat.
The transom was the only area to be sheathed
in Epoxy and cloth. This was a very time consuming exercise
and I would dread doing it to the whole boat.
I now felt confident it would be strong enough. In motoring
trials it had a short shaft 8hp motor hung off it, as
opposed to the recommended 4.5.
The boat would be fine with a 4.5 though
as long as you were not it a strong tidal area. I would
prefer a long shaft though. (all hail the designer for
he knoweth best).
18 months into construction I ran out
of ply and money and GLUE.
|
deck plates |
When I purchased the ply the plan was
to buy enough for the forward hull with a few spare
sheets. By very careful cutting and butt-jointing some
of the smaller components I had managed to get most
of the rear hull built as well. I needed 2 sheets for
the aft bottom to finish the job.
Prices had gone way up and the original
supplier wouldn't even ring back, same with my epoxy
supplier.
A pine marine ply was available locally,
i.e. pay the $110 and get what comes on the truck.
I went back to the boat and worked on
stainless and wooden fixings, a couple of 10 oars,
some extra ribs for the floor of the boat. Even some
Baltic Pine flooring that Id rescued from a skip at
a local hotel.
This went on for a few months as Christmas
approached. When my father in law arrived with the kids
Christmas gifts , there in the back of his Ute was a
beautiful sheet of ply, Thank you Norman.
Hed gone out to buy 2 but was caught
out by the Special Discount prices being offered and
could only afford 1. As the 2 bottom sheets had to be
joined BEFORE fitting to the bottom I now had to watch
a sheet of ply slowly twist and buckle and check in
the hot dry Kalgoorlie summer.
|
My
version of a solid transom |
A friend who would be crew came to the
rescue by buying a sheet of the same pine ply and dropping
it in my shed whilst I was out. So that night
it was all on for young and old as the bottom went on.
The keel and bottom runners had been cut and waiting
in the wings for some time. The keel had previously
been a doorframe in a house in a nearby town and came
to me via the towns tip.
The bottom logs are another story. Part
of my job involves cleaning out yards and sheds in rental
properties. Every now and then I have to remove broken
or discarded furniture. The best of all is the Futon
bed, you get a huge bundle of long square or rectangular
slats of really well seasoned and springy wood. In Australia
they tend to be a wood known to us as Ramon? Normally
they are double bed width as a bonus.
Hint - check out the local second hand
stores for these babies. I used wood from 2 beds and
still have a huge bundle of 1 x 3/4 staves.
Anyway back to the boat.
Before the final coats of paint went on
I decided to build the trailer so that I could slip
the hull on and off to get it right, without scratching
the paint.
THE ART
OF BUILDING A TRAILER
Having rung a few trailer
manufacturers it was apparent that that a new one would
cost more than the boat. The problem with shopping for
a secondhand one in Kalgoorlie is that you are nowhere
near the sea, i.e. no boat trailers for sale.
Once again my beloved rubbish tip saved
the day. Whilst dropping off a load of garden waste
I spied an axle with wheels and springs still attached.
I had to actually pay on this occasion, $25.00 was a
bargain though. The heavy gauge angle was in piles around
the yard and whist driving down a track I found a pile
of off-cuts that had literally fallen off a speeding
truck. The 2 biggest pieces of 4channel were just the
right length for the trailer that I had planned.
All the rollers came from the remains
of our old Hobie trailer. I bought a NEW tow hitch.
Time to build was 2 ½ days welding and less than $100.00.
And we were rolling.
Meanwhile painting started again. As the
boat wasnt going to be glassed I opted for lots of
coats of paint. 2 pink primers, 2 undercoats, and 2
gloss enamels. The finished hull in Sunset red was ready
to join and rig.
Funnily, on the launch day photos, the
colour of the boat was the colour of the sunset!
OH NO NOT
THE SAILS!!
Now that the boat was out of the shed
and sitting on the trailer in my wifes carport I had
a large space in my shed . In situations like this it
important to act quickly. If the wife and kids get a
chance to get any jobs in the space I would be doomed.
I gave the floor a good clean and unrolled the polytarps
that I had to hand.
For the next 2 nights I was in the shed
covered in glue and off-cuts creating 3 sails. These
were then led lovingly into the house and stacked next
to my wifes most cherished possession, the Janome.
Shed agreed to sew them after I completed a list of
jobs around the house and a 2 day baby-sit so she could
swan off to a conference.
The experiments with the June Bug had
paid a dividend as the whole process of cutting, glueing
and sewing went very smoothly indeed.
LETS RIG
A BOAT
As I began rigging the boat I realized
where the cleverness of the designed rig was starting
to show. All the rigging was to be 6mm silver rope.
I rang around a few marine suppliers and hardware discounters
and found that the best price was at my local hardware
store. The marine guy tried to convince me that I would
have to use 6 mm spectra all round. I explained that
the gaff sails were only 65 and 95 square ft with 2
lines each, but he wasnt sure what a gaff was . He
didnt recognise the word Marconi either, Kids today!
The boat uses 124 metres of 6mm line for
the running rigging, and reeflines, and Parrel lines.
This left 1 metre on the roll. I would have liked to
leave an extra metre on each of the halyards though.
It took 2 days to cut, whip, and colour code all the
tips of the lines. All the snapshackles were from the
hardware store labeled as dog lead snap clips, in chromed
bronze. Identical to the marine ones but at 1/3 the
price.
It was a real buzz to hoist one sail after
another on new lines and get comments from passersby
as they realized there was a ruddy great boat in a driveway.
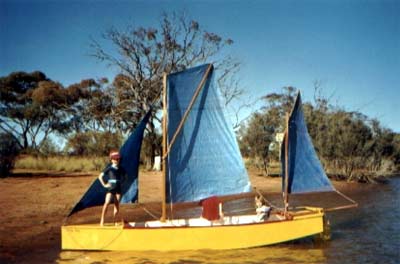
After almost 2 years I was able to step
back and look upon this beast that Id built and start
to realize its potential. When youre at the helm you
have to shout to the kids at the bow to give them an
instruction. This boat was just like everyday life!
|
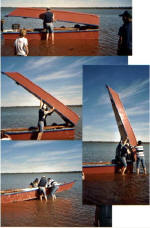
Un-folding sequence |
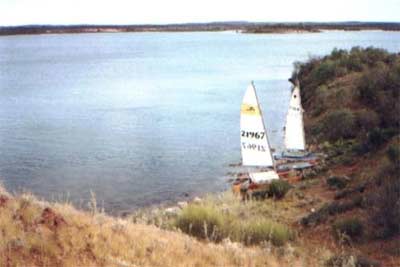
THE LAUNCH
The day of the checklist was here:
Remember all those cyclone filled lakes
that appeared overnight? They were all dry except
for one, Rowles lagoon.
It is 100kms of mostly dirt road to the
north of Kal. And a fresh water lake to boot.
With friends and family in tow we headed
out for the big weekend of sailing. On arriving at the
lake everybody got down to the task of lighting fires
and putting the billy on, but I was in a hurry. I backed
down into the water and shoved the folded boat off into
the water. It immediately caught the breeze and swung
back into the trailer mudguard and 20 seconds in I had
my first hole. This all caught the attention of my fellow
campers who now started to gather to WATCH. I explained
how we were going to unfold it and explained that they
would need to take off their shoes, roll up their trousers
and join me in the 10degree water. With a team of 4
we unfolded the boat and the shear size of her became
apparent to all.
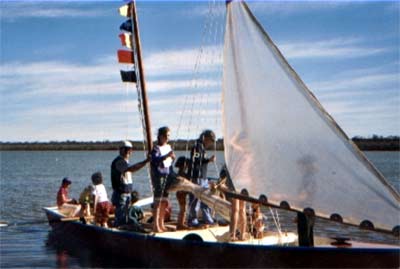
Rigging on water for the first time was
a surreal experience. I counted as many as 11 kids at
any one time, oars were going in, out and around, my
daughter produced a Cornet, and became a brass band
playing Waltzing Matilda of course.
The first Man overboard occurred in
6 of water with the bow still ashore. The kid involved
just climbed back in and got my cushion wet.
I suppose a bloke would start getting
grumpy and snarly at this point, but I reminded myself
that this was what Id built it for.
|
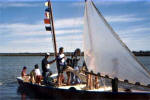
Rigging with Band |
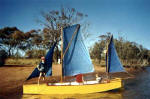
Sailing the schooner was much like any
big dinghy. Just get in and go, but remember how long
you are when you need to turn. The Tiller is surprisingly
light and responsive and has about 2 3 degrees of leeway
when the wind is up.
Day 1 was sailed with Jib and main in
20 25 knots on flat water, with a crew of 3 adults
, 3 kids.
Our family were the only ones camping,
so the next day saw me and 5 kids with jib, fore and
reefed main. Day 3 was superb, same crew with a light
breeze, all sails full and bye.
The wind increased over 2 hours to 15
knots. We all had a ball that morning. I found the way
to sail was to lay in the bow and let the kids do it
all. My 8 year old was the best of the helmswomen, and
was even able to steer up onto the beach area we had
cleared of rocks whist I bellowed commands to lift boards
and lower sails.
FOLDING
BACK UP
This was going to be a challenge due to
the fact that there was only my wife and I to accomplish
the task. In honesty, I wouldnt try it again without
2 strong adults, preferably tall. Whilst we could do
it there was a high probability of someone slipping
and injuring a back or even damaging the boat (heaven
forbid) as it was we took 3 tries to get our stance
and grip right. Whilst aborting the second attempt the
pulley on the traveler/hinge pin dropped into the closing
gap between the hulls, forcing them apart and damaging
the hinge. I am now working on some kind of side mounted
hoist to fold and unfold the boat before launching.
Despite the size and weight of the boat I was able to
push it onto the trailer without a winch.
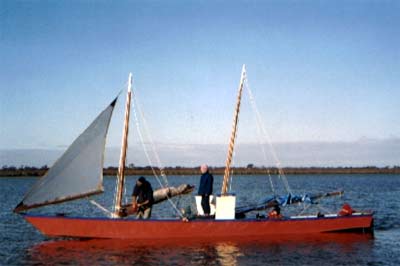
******Setting sail Note size of helmswoman******
|
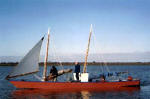
Setting sail Note size of helmswoman |
CHANGES
I MADE TO THE DESIGN
1. I added a slotted inwale to the rear
hull. Initially I was concerned about side flexing
over the long length of the cockpit. Later I was pleased
to see that the inwale was ideal for fitting removable
rowlocks and a great handhold for the kids.
2. I built the bilgeboards at ¾ thick
instead of the designed ½. This was due to experience
with the rudder blade. The first rudder blade was
½ with 6oz cloth and epoxy on each side. It used
absurd amounts of the liquid gold and still had way
too much flex. I didnt even bother to fair it up.
The ¾ MDO rudder as built in only 1 hour and feels
very stiff. It hit a tree stump after 1 hour of sailing
with no damage.
3. The rudder/tiller assembly was changed
to a regular tilt up arrangement with a normal tiller.
The designed set up didnt work very well when we
tried it on the June Bug and I found pushing and pulling
a pole instead of a tiller quite off-putting. The
original design was probably intended for when the
skipper had to be well forard when sailing.
|

floorboards |
4. Extra ribs of 1x 3/4 Ramin were
added to the rear hull (futon bed slats), 2 between
each designed frame. This stiffened the hull sides
and floor quite nicely.
5. I made a series of removable floor
panels of Baltic Pine floorboards (the Australia Hotel
verandah, and the Mt. Lyall hotel top landing). These
get stomped on, jumped on , lifted out and used as
a picnic table and a camp bed.
They are varnished with a light sprinkle of sand for
grip. One effect is that there is now a huge
expanse of varnished wood running the length of the
otherwise painted boat.
WHAT WILL
I DO DIFFERENTLY NEXT TIME
1. ½ ply for the bottom of both hulls.
When I damaged the side of the boat it was so easy
to do. Im very cautious when beaching.
2. Buy all the ply and epoxy when I
start and not as I go along (perhaps even the sails)
3. I think you need to build some strong
points under the decking of the Bow and Stern to take
anchoring and mooring cleats. Possibly some kind of
Samson Posts.
4. More clamps! I had 20 of 3, 8 of
8, 2 of 24. You need more 8 and more 24.
MY TOOL LIST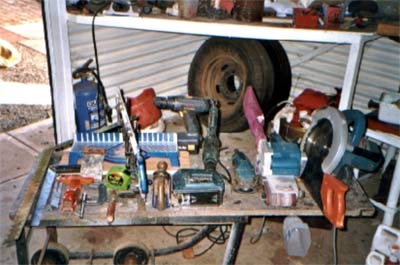
-
4 power plane
-
10 hand plane
-
4 belt sander
-
Handsaw
-
91/4 powersaw
-
reversible 240v drill
-
reversible 14v drill
-
handdrill
-
carpenters hammer
-
¾ chisel
-
3/8 hollow gouge
-
jigsaw
-
mall router (borrowed as required)
-
Hand mitre saw(I was given a power
one after almost finishing the boat)
-
12 drawknife
-
4 grinder fitted with stone grinding
disc
-
1 putty knife
-
3flexible putty knife (little devil)
-
carpenters square
-
bevel guage
-
6 surform
-
26tape
-
1 metre rule
-
100 litre beer fridge
-
big huge stereo speakers in the shed
If you have any queries please feel
free to Email me at:
wattleweedooseeds@bigpond.com.au
If youve ever sailed, seen or owned a
folding schooner Id love to hear from you. Paul Day
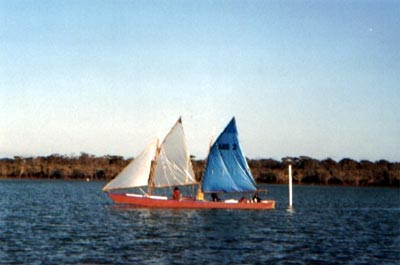
AUS3 Waltzing Matilda Kalgoorlie Western Australia
P.S. Just as well I built a big boat as
daughter number 5 came a long just prior to finishing
it.
 |