 Custom Search
|
| sails |
| plans |
| epoxy |
| rope/line |
| hardware |
| canoe/kayak |
| sailmaking |
| materials |
| models |
| media |
| tools |
| gear |

| join |
| home |
| indexes |
| classifieds |
| calendar |
| archives |
| about |
| links |
| Join Duckworks Get free newsletter CLICK HERE |
|
|
| Mike's Maritime Meanderings |
by Mike Machnicki
- London - England Where to Build - Part Three |
 click for bio |
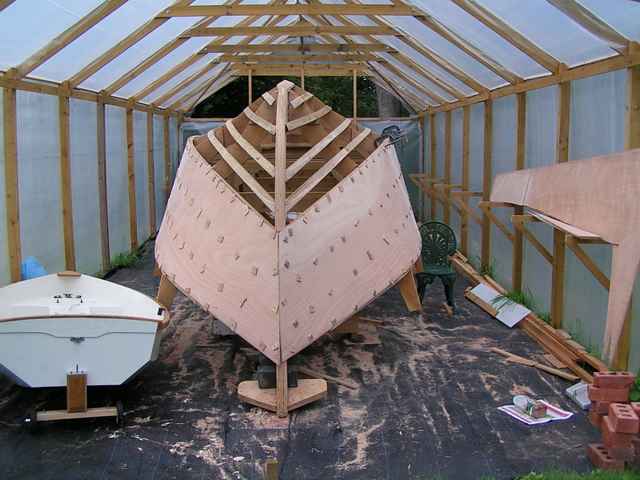
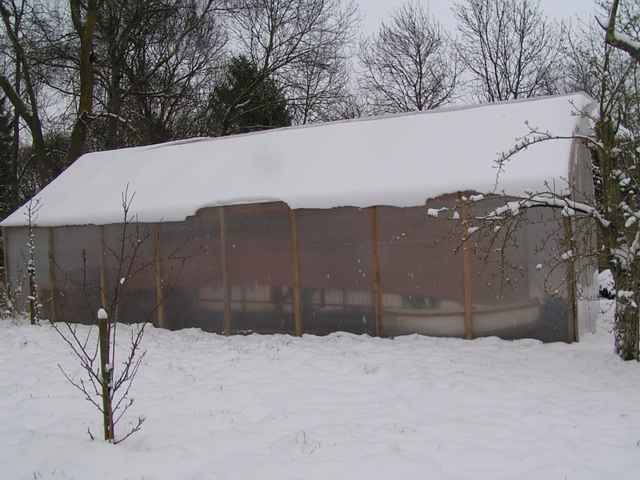
Part One - Part Two - Part Three It is now almost a year since I built the boat shed, at the time I promised third article on how the project worked out through rain, wind and snow. My impetus for building the shed was to have somewhere to construct my boat without paying out a fortune for a factory made unit. In part-1 of the article I explored the options and decided that almost all of them were too expensive, and many of them too permanent for my needs. Part-2 detailed the construction of my own design of boatshed and the design of the features I expected to need. Having lived with the shed for almost a year I can report that it has lived up to my expectations and more. There are a few minor modifications I would recommend, depending on you location and climate, but the basic design and construction has performed excellently. The motivation in having two large doors at the end was be able to get the boat out primarily, and as a secondary consideration to provide extra ventilation, it didn’t turn out that way! If I were building the shelter again from scratch I would have made a full set of doors on both ends for ventilation as it got very hot in the sun. I peeled back the top of the fixed end in the hottest part of summer (see picture below) but it still was not quite enough. Fortunately, this being England, the hot weather did not last too long. In fact we have had one of the wettest years on record and there the shelter did perform better than expected. It kept me and the boat dry with never a drop of rain or condensation falling inside. The ventilated eves worked excellently, giving just enough ventilation, in the correct place, to prevent condensation on the roof, but at the same time make it snug inside at ground level, even when it was windy.
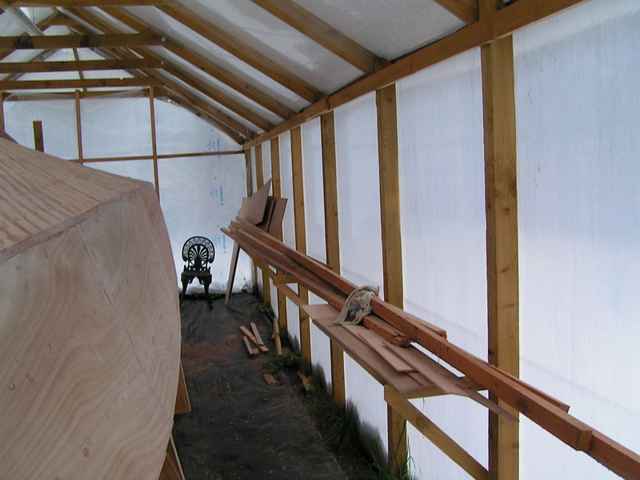
The feature I was not sure of was the water permeable ground cover membrane which gardening centres use to suppress weeds. My concern was that it would not be suitable for working on and particularly sweeping up sawdust. These concerns were completely unfounded, it worked far better than I could have imagined. When the shed was constructed I cut the grass inside and pegged the ground cover down, overlapping it down the middle, and holding it down with large 6” wide wire staples. It has remained in position, with no grass growing through it. The sawdust was easy to sweep up and keep clear. Working on it has been easy and I have never slipped or tripped on it. It lets moisture through so the ground underneath does not become sour, I see a little condensation on the underside of the dinghy where it is in contact with the ground, but resting the front end of the dinghy on a block of wood cured this minor problem. One of the features I was glad I had the foresight to provide was the work bench down the side, ‘What work bench?’ you ask. I know it doesn’t look like one but the bits of wood sticking out on the right hand side with some angled supports below them. Their lack of sophistication suggests a similar lack of utility, but don’t believe it they are the perfect place to work on scarf joints for the side and bottom battens. A good place to store wood and – with the addition of a piece of plywood - a good place to rest tools. What’s more they don’t take up much space at 14” long, and with the bracing are so sturdy that I have even used them as a foot rest on my way down from the top of the boat.
Wind in moderation did not seem to bother the structure too much, it rattled the roof as it came through the ventilation slots at the top of the gable ends but no damage was done to the polythene, despite the fact that it was only fastened at the ends, like an agricultural polytunnel. The only damage done was when the wind came from the back end and blew the front doors open, the retaining wires snapped and one door suffered a broken bottom rail. Which was surprisingly little, considering how large they are and how flimsy the construction. This was easily repaired with a secondary batten and a few screws. Needless to say I retained them better with some thicker wire after that. At present we have about 4” of snow on the roof. I went inside and tapped the roof with a broom to encourage the snow to slide off. Even though I know it will take a foot of snow or more, as the polythene has a five years guarantee, and the structure is strong because I have swung off it before now. This is my standard test I apply to most things, even picture hooks, if it can take my weight it will do the job.
Pros
Cons
Advice
Click HERE for a list of articles by Mike Machnicki |
|