To Part 2
This experimental canoe grows from some of what I have learned from Australian boat designer, Michael Storer, the ultra-light engineering of Herb Cottle, as well as from years of reading the web forums of small time operators, backyard builders and the wonderfully practical world of people associated with paddling, building and sailing small craft.
|
Layout
Chine layout. 20mm deep curve in central 8 ft, with ~10mm rise to stems, to flatten midship rocker while providing lift at bow and stern once assembled. This was the first mistake. The numbers got reversed. Center should have been relieved 10mm and ends up 20mm, but I discovered my mistake too late and decided to keep it as is. |
|
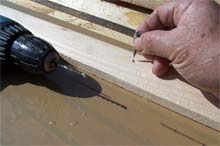
Pre-drill
I pre-drill screw holes to avoid splitting the half inch by two inch (13mm x 50mm) stringers.
Western red cedar would have been preferable, but I had white pine and Douglas fir on hand. Even though the density of these woods will produce a heavier boat, I'm still expecting to finish around twenty-five pounds. Scantlings in cedar would have been lighter even though larger.
Note: The weight of the finished boat is 60 pounds. Much heavier than I wanted. |
|
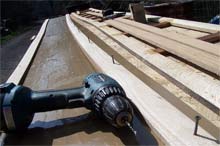
Stringers screwed
Stringers are screwed to the temporary sixteen foot long work table with square drive deck screws because they don't slip (and because I had them). |
|
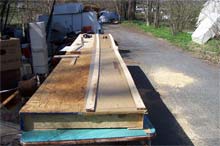
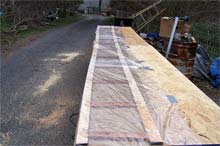
Table
Plastic package tape keeps epoxy from bonding anything to the table. The table is the form for gluing up the ladder frames. The curve along the right side is the bottom (chine-edge) and is not as sharply curved as the camera makes it look to be. |
|
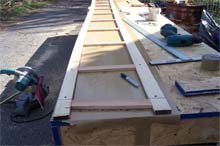
Rungs
The ladder frame takes shape. Fit the rungs tightly if using tirebond glue. Fit them loosely if using gap filling epoxy glue. I use epoxy filled with fumed silica and belt sander dust. |
|
Heat
Temperature dropped so added plastic to try to make a solar heater and to shield the uncured epoxy from the rain. |
|
Rain
The work stayed dry, but spring weather caused numerous problems along the way. |
|
Glue-up
Each joint was glued as follows:
1) The ends of the end-grain pieces were brushed with epoxy.
2) Repeated end grain treatment after about five minutes.
3) Thickened epoxy was added at each joint.
4) After the glue had kicked somewhat, fresh epoxy was added over each joint and a six ounce fiberglass patch was added over each joint. The weave was filled, and excess epoxy was brushed onto the frame rung using a small disposable foam brush. |
|
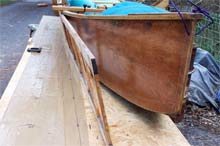
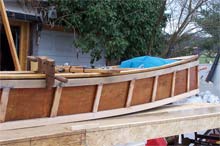
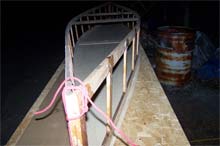
Check fairness
The frame is being compared to a Storer Quick Canoe to check fairness and to see how well the design matches. (The intent was to try to match the profile of this canoe fairly closely, but remember that I screwed up and reversed the numbers for the bottom curvature). |
|
Match
As the frame is bent along the older canoe, we see that designs match well enough. |
|
We'll see
Perhaps the central curve could have been a bit longer. (It was 20mm in eight feet, for this boat). Doesn't look like I'll need to do much tweaking. I got my numbers crossed when I lofted the frame. Wanted 10mm central curve with 20mm uplift at stems, but got them reversed...oh, well, we'll see how she performs. ( I'm still trying to understand the math for the hull geometry). |
|
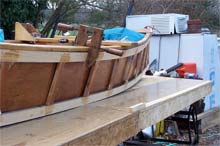
Comparison
Folks ask about the curve along the bottom. If the chine stringer runs straight before being bent, the resultant curve will produce a boat with excessive rocker (more like a drift boat). Here the intent was to get most of the rocker out of the central part of the boat while adding a bit of uplift to the ends. There are trade offs between tracking and turning as well as how the boat sits. Most of my boats are built for turning in rivers. This one may be an exception to that. If so, I'll know how to fix it on my next boat. |
|
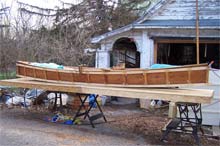
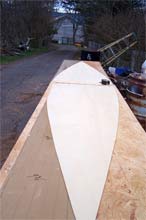
Bottom halves
This is going to be a fat canoe. Camera perspective makes it look asymmetrical but it is not. The halves of the bottom are identical. |
|
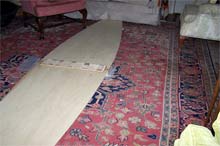
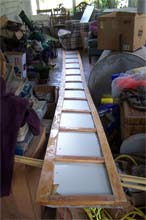
Inside
Snow outside and using epoxy don't mix well, so the bottom panels were brought inside. Wax paper protects carpet. (Shows I have a tolerant and understanding wife). Tape covered plywood pads are screwed through the hull to a tape covered board under the joint. Stringers support the panels away from the joint to keep everything on the same plane. |
|
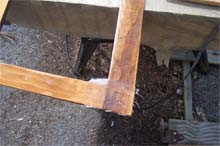
Butt joint
Unthickened epoxy was brushed onto the butt joint and then epoxy, thickened with fumed silica and belt sander dust, was applied to all mating surfaces. Screws were tightened until a bit of the glue oozed out all around. The excess glue was removed before it cured (wherever I could get at it). |
|
Test fit
Bottom will be pulled in to about this width and top will be spread farther in final configuration. |
|
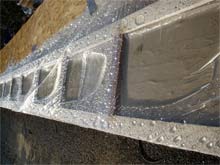
Frame w/ 6oz glass patch both sides
Frame w/ 6oz glass patch both sides. End grain was pre-soaked with unthickened epoxy prior to joining. Six ounce glass patches were applied to both sides at each joint. |
|
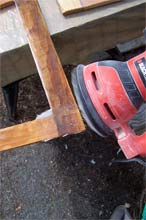
Epoxy has cured - sand off excess
Hold it on angle. 120 grit does it nicely. I don't know where I left the dust bag. I keep the nozzle pointed away from me. |
|
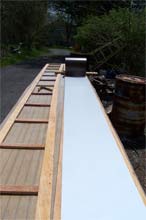
Rolling out the aluminum trim coil
The aluminum trim is much stouter than I had imagined. I'm going with the white outside thinking that the white might be blinding on a bright day if it is inside. It would be nice to find brown both sides or brown and green. I was not sure if the color is anodized or painted. |
|
Trim coil metal
The aluminum is 0.3mm thick and the knife removes the finish, so it is paint, but seems pretty well applied. I have been advised to sand the area which is going to be glued through wet epoxy. Not sure if I am going with that step. I understand the intent, but it sounds awfully messy. |
|
Trim coil
Here we see plastic tape on tabletop. Epoxy does not stick to the packaging tape. The table is OSB which needed protection from rain, so the tape does double duty. |
|
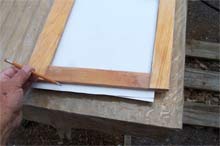
Tracing
Tracing is really unnecessary since aluminum works almost like wood and so can be trimmed after attaching. The main concern here is getting it centered onto the frame. |
|
Changed my mind
Decided to go ahead with sanding the area of the aluminum to be glued, changed my mind about which color to have outside and ran into trouble with the epoxy due to the surprise rapid onset of summer temperatures. As I worked in full sun, brown side up, the aluminum began to expand between the brads. As soon as possible I moved the assembly into shade and supported it with a slight curve toward the exterior. I plan to do the other side in the evening, but trouble is we've been getting afternoon storms almost every day. |
Next time we go 3D
|