|
We've already covered the fact that sewing is not women's work in previous articles, and it hardly needs stating that the manliest of sewing is that which involves large pieces of fabric, like sailmaking, cover tarps, tents, etc. The trouble is that sewing big work is difficult without a specialized work space.
One area where the home sailmaker comes up short of the professional is the setup for actually sewing the seams. Professional sailmakers have cool things like machines set into giant tables with a slight slope to help the fabric on its merry way. We don't have that, so we start out with the machine on the floor, our body cramped into all manner of inhuman positions trying to be short enough to operate a 10" tall machine on fabric that is flat on the floor.
After sewing a pitifully short distance, we stand up and stagger around to find the ibuprofen. We wisely give up and put the machine on a table. Then, predictably, we deal with the weight of the fabric creating wildly uneven stitch lengths.
I figured there had to be a better way.
What if we don't move the fabric and instead move the machine? This means a lot less dragging our fabric around and getting it dirty(er), as well as better control of stitch length. Actually I would be surprised if nobody has thought of a moving sewing machine before. After all, the farmer brings the baler to the hay and the welder brings the electrode to the work, not vice-versa. Most of us even bring the circular saw to the wood! It has been a long time since sewing machines were pinned in place by their relationship to a factory's overhead shaft.
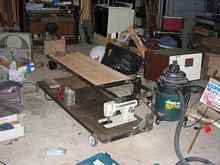
Anyway, my first thought was a rolling table standing maybe 3" off the floor with the machine inset.
But where would the operator sit? By the way, I hate the dehumanizing term "operator". When I weld I'm a welder, but when I sew I can't very well be a "sewer", can I? I'd like to propose "seamster" - a male form of seamstress. That "seamster" is unused is a form of hidden discrimination against men in the world of sewing! Anyway, I guess in the current context we can say "sailmaker". Whatever we call him, we can't very well expect him to walk along with the machine bent over. That body position is just as inhuman as in our first example, and provides no good control of the speed pedal.
This improves if we use the wheels to also move the sailmaker! Now one foot can control motor speed and the other can control feed, and the sailmaker can sit on a cushioned seat with a back. But what does he do with his left leg? It needs to go under the fabric table, which means raising everything up to accommodate his leg. This in turn makes for longer feed ramps and more disturbance of how flat the fabric lays.
And still he's not exactly comfortable. His legs are a lot better off, but he gets a terribly stiff neck and shoulders looking straight down to see what the machine is doing. He probably needs one of those knitting magnifiers to make it work very well at all.
Getting rid of the stiff neck requires getting the sailmaker's face closer to where the seam is being made. Short of hiring raccoons to do the work, this requires a pretty radical re-thinking of the process of sewing. I think I have something for it.
This works like the creeper we use to work under a car, only we face downward to see the machine. We are using the machine "backwards", but this is actually nice because it provides a better view of what's coming up on the in-feed. Normally we see the outfeed best, and by then it's sewn already and too late! (And yes, I know I need to clear some space to sew in.)
The head rest - even in this test version without padding - makes a positively immense difference in fatigue, and this setup lets us keep the feed very low. All of these factors combine for a dramatic improvement in stitch quality. Well, they did for mine anyway. Best of all, no cramps from squatting and kneeling! I won't say I lay on it for fun, but there's a whole lot less pain.
This could be made in a form that collapses or disassembles, but it is simpler to weld in one piece, so I just hang it in the roof trusses of the garage when not in use. Those with tighter space constraints might consider making it unbolt to store flatter.
I should probably patent this one. I think I'll call it the Sew-Commando, because it feels sort of like operating a bomb sight or something, and it helps us use a fast "commando raid" approach to getting the most out of borrowed lofting space. (Patent or not, you should go ahead and make one for your own use - just let me know if you want to sell them.)
So let's look at how I built it.
Construction Details
The frame of the prototype is welded from scrap steel harvested from two or three bedframes rescued from the trash. These are normally terrible, brittle steel that is impossible to drill, so be prepared to burn some ugly holes with your welding electrode or weld on better steel where you need to drill. But try drilling first - sometimes you get lucky. (This could probably be built with wood too, but welding is faster if you have the equipment and scrap steel.)
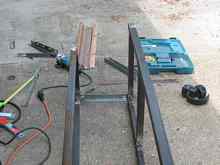
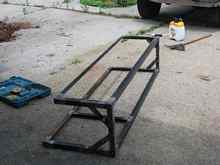
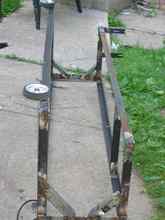
Here are the top and bottom frames welded.
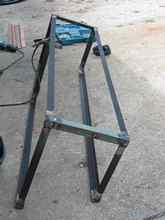
And here are the uprights welded in place.
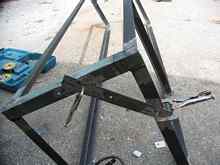
It was pretty tough this way, but flexible enough that I felt the brittle bedframe steel would fatigue and break, so I added some diagonal bracing.
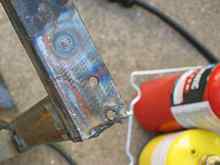
By the way, those little vice-grip pliers do a fine job of clamping down the smaller bits of metal that need more complicated cuts.
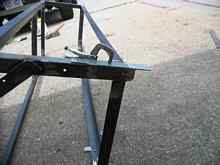
Then we need some vertical pieces to hold the foot pedal.
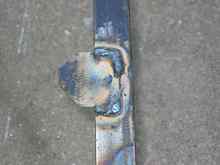
And finally, the lower angles on mine could not be drilled. I even tried spot annealing to no avail.
Well, if you can't beat 'em, weld on something you can beat.
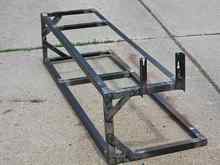
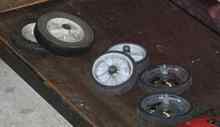
Lawnmower wheels (left) would work, but they tend to be a bit big. I grabbed wheels from bicycle training wheels and they seem to work OK. The smoother your workspace floor, the smaller the wheels you can get away with, and the less you'll need to displace your fabric.
I used 4.25" diameter wheels on the fabric side and 5" diameter on the propulsion side. This makes the whole assembly tilt a little, but that's OK, and possibly even preferable.
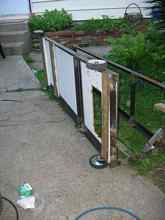
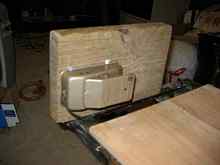
Next we cut some 3/8" plywood for the working deck, and make a cutout for the sewing machine. I can't tell you what size or shape cutout your machine will need, but here's what mine looked like.
Since this steel is so hard to drill, I mounted the decks by screwing to scrap lumber beneath the frame to clamp the decks down.
The same trick attaches ½" plywood to the top for the operator to ride on.
Fortunately I had some holes that made it easy to screw down some 2x stock for mounting the speed pedal.
As I completed the construction, I realized I was out of sailmaking thread. (Logistical genius at work. stand back!) So putting the new tool into action will have to wait for next time. But given the population of maple seeds and associated nastiness I had to scrub out of the SS16's cabin sole last week, I have some idea what the first sewing project will be.
*****

|