| At some point during my apprenticeship I started
using a homemade scraper given to me by an old shipwright.
The scraper was made from a six-inch long section
of a 3 inch wide power hack saw blade and the teeth
on one edge of the blade were covered with a few strips
of funky duct tape so they didn’t dig into your
hands when scraping. This stiff old scraper was about
3/16” thick and impossible to bend or flex,
but once you got the blade sufficiently sharpened
it stayed sharp longer than any scraper I have owned
since—the problem was it took 15 minutes of
vigorous and careful work with a new sharp file to
get the darn thing sharp. And you had to be careful
to file perfectly straight across—a flat 90
degree angle, which provided 2 sharp edges. But after
all that it did work well, not only to strip paint
and varnish but also to fair and shape. I found myself
using this tough old scraper more and more and sandpaper
less and less.
As years passed I almost eliminated the use of sandpaper
in my own shop. I used to keep six or eight different
grades of sandpaper, and like we were all taught,
when finishing wood we worked through the numbers
starting with rough and finishing down to fine. I
kept my stash of sandpaper, complete sleeves full
of all the different grades, on special shelves located
high on the wall behind the little Jotul wood stove,
because without the drying effect of the wood stove
the humid northwest coastal climate turned the sandpaper
damp and useless in a few weeks. Not only was the
stuff expensive it required special care, and while
sandpaper has its special uses, the scrapers still
worked better for most applications.
Once I realized the potential of scrapers I started
looking around for other types. I used the edges of
old plane irons, the blade of wide chisels and slicks
and the flat blade of a lightweight Japanese hatchet
that fit my hand just right. All worked to a degree,
and some worked very well for specific jobs, but for
convenience I eventually graduated to thin rectangular
scrapers for most jobs. Rectangular
scrapers had advantages. All four sides could be sharpened
with a fresh file in about 2 minutes, which provided
8 sharp cutting edges. They could easily be filed
to accommodate a slight convex or concave shape and
thin scrapers could even by bent or sprung slightly
in your hand to accommodate a particular shape. Just
so they wouldn’t disappear in the bottom of
my tool chests I drilled a small hole in the middle
of each one and stuck them up on the wall so I could
find the one I wanted.
Traditional cabinet
scrapers made by Bahco which was once Sandvik
Over the years I’ve accumulated a variety of
scrapers but I still mostly use the traditional rectangular
cabinet scraper. I have over a dozen much used rectangular
scrapers in my toolbox and a variety of other types
that still work well for specific jobs. Some have
been filed down almost to a small sliver and others
have been shaped to accommodate concave or convex
shapes. I’ve tried scrapers
with attached handles and blade inserts, and I suppose
they might work for some applications but I usually
prefer the versatility and convenience of holding
a rectangular scraper in my hand. Its easy to flip
it around to a fresh sharpened edge, and when using
a really sharp scraper I seldom need the leverage
provided by the handle. An attached handle does allow
you to bear down harder, and they work well if you
need that leverage. Scrapers with handles also won’t
reach into small spaces as easily as a hand-held rectangular,
plus you’re working with only a single edge.
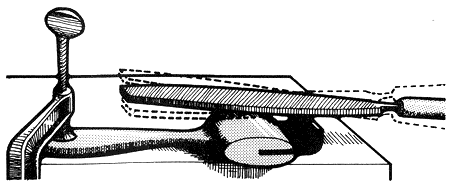
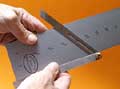
The angle of a scraper blade can be modified for a
particular job
Scrapers can be used for both fairing and smoothing,
and it's worth repeating that the critical factor
is to keep them sharp. I used to carry my scraper
kit around in a canvas bag in which I kept a half
dozen of my favorite scrapers of different sizes and
shapes, 2 or 3 sharp fresh files in their protective
plastic envelopes and my trusty little heirloom “clamp-on”
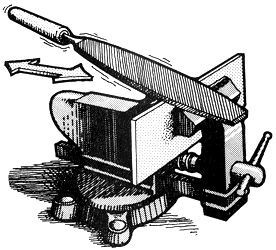
vise. I can clamp the little vise to the edge of a
table or sawhorse and sharpen all four sides of a
scraper in about 90 seconds, which provides 8 fresh
sharp edges. If you don’t have a vise you can
also use C-clamps to hold a scraper securely in a
vertical position to be filed, but the hassle of fiddling
with the clamps will keep you from sharpening as much
as you should. You also need fresh files—those
old beat up files in the bottom of your toolbox won’t
cut it. And if you find it necessary to really muscle
the scraper to remove difficult spots of varnish or
paint you may also need a pair of leather gloves to
protect your hands.
Once you start using scrapers you’ll find more
and more uses for them. They’re great for stripping
off built-up layers of tough old clouded varnish from
cap rails and hatch covers, and then they’ll
take off a very fine controlled shaving of weathered
or stained wood in preparation for a new coating of
varnish. They’ll level a finely fitted scarf
joint in a teak caprail, take a controlled shaving
off the rail and stiles of a cabinet door, shave down
opposing or run-out grain without lifting either side,
and they can also work well for final shaping of carvings.
SCRAPERS AND EPOXY
Scrapers work well in many traditional woodworking
applications, but they function particularly well
when building or modifying with epoxy,
on flat or curved surfaces. I don’t know what
else but a scraper would work for the first cleaning
of plywood panels after the initial saturation coating.
That first coat of epoxy will raise splinters, there
will likely be bubbles from outgassing, lint and kamakazee
bugs will raise craters that must be removed for a
smooth final finish—not to mention possible
drips and runs--and I can’t image using anything
but a sharp scraper. Sandpaper will gum up and scratch
the surface and if you try to hand sand without using
a block you’ll eventually discover all kinds
of gouges as you continue finishing the surface. A
scraper just “scrapes” off the high spots---duh!---and
successive coatings will fill in the low spots.
Dealing with outgassing and bubbles can be a nightmarish
situation if you bring cold plywood out into the sun
or into a heated shop and immediately apply epoxy.
The trick is to heat the wood beforehand, then allow
the temp to be dropping as the epoxy kicks. Makes
a tremendous difference. Maybe theres not much you
can do about those gnats and flys that appear as soon
as you’ve carefully laid on that coat of epoxy,
but outgassing can be controlled to an extent. Second
and successive coatings of epoxy will go on smooth
and silky, expecially if you apply it with a thin
foam roller for consistent coverage then tip it off
with a foam
throw-away brush, and I still run a wide
scraper lightly over the surface to catch any imperfections.
I also use scrapers to take down the raised “selvage”
edge of glass tape and by dragging a sharp scraper
lightly across a sheathed surface it will highlight
areas of the cloth that need more epoxy to fill the
weave. You’ll be surprised how effectively a
sharp scraper will take controlled shavings off a
hard ridge of cured glass tape. When I graphite
the bottom of one of my small boats I scrape after
each coating to highlight and shave off drips and
show me low spots where I can roll on more epoxy/graphite
mix. In this manner the bottom gets slicker and smoother
every time it gets scraped and at the end of each
season the wear pattern on the bottom also shows where
more graphite or hull reinforcement may be needed.
Epoxy fillets are cool looking and useful on wood
and fiberglass boats, but they require some practice
to make them really nice. What I hate to see is a
hand sanded fillet that looks “worked”—they
never look right—so I try hard to make fillets
that won’t need sanding. I file down a scraper
corner to the radius I want—and then I use that
scraper as a paddle to apply the fillet. Then I use
the same scraper to “scrape” the cured
fillet. Doesn’t gouge like hand sanding leaving
that worn-out look, and still cleans up the inevitable
bumps and lumps on the fillet, making it ready for
a final seal coating of epoxy and then paint or varnish.
When you use a scraper, hold it perpendicular to
the work surface with one hand on each side. Tilt
it slightly toward you if you’re pulling the
scraper, and away from you if you’re pushing—works
both ways so you can scrape down a large area quick
with a minimum of passes. If you encounter a really
tough area, sharpen the edge, slip on a leather work
glove and hold the scraper like a chisel. Use the
smaller ends of a rectangular scraper for difficult
work as it concentrates force in a smaller area. The
thinner blades of the new scrapers can also be bent
or sprung slightly to conform to different surfaces,
so it's possible to reach into a slight concave without
the corners digging or even conform to a slight convex
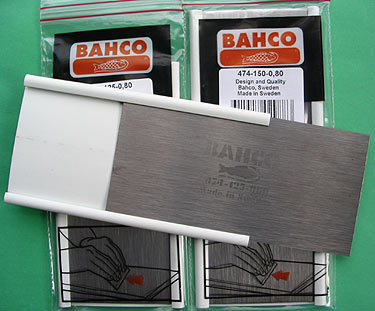
shape. All my best scrapers used to have the Sandvik
trademark stamped on them, but the new Bahco scrapers
are the same brand with a different name.

Paul Butler has designed and built small wood
boats professionally for over 25 years. He was a
contributing editor to the late Small Boat Journal,
and with Marya Butler has published 3 books and
over 200 magazine articles. Detailed building plans
for their most popular small boat designs and other
projects can be purchased from the website at: butlerprojects.com
Illustrations are by Marya Butler and she can be
contacted at: fins_n_feathers@hotmail.com
for custom illustration quotes.
More articles by Paul and Marya Butler:
|