|
The Dinghy Project - Part 1 |

|
|
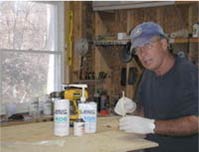
By Bob Means - Remlik, Virginia - USA |
Part 2 - Part 3
| First you got to go to your lumber yard and buy three sheets of plywood. One 1/2"AC, One 3/8"AC and one sheet of Luan. |
|
|
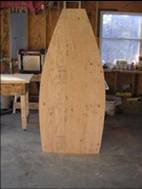
 Your 3/8" is your soul or bottom piece. Put the good side down and measure 81" for the length. Measure 37" for the width or beam. You will end up with 36" by 80' when finished. Measure 18 1/2" at both ends of your 36' that will be center of you boat and snap a line. At the stern from the centerline measure 15 1/2" each side of center and that will give you a stern transom width of 31'. For the bow transom measure 6" each side of center line and that will give you a bow transom width of 12". Your 3/8" is your soul or bottom piece. Put the good side down and measure 81" for the length. Measure 37" for the width or beam. You will end up with 36" by 80' when finished. Measure 18 1/2" at both ends of your 36' that will be center of you boat and snap a line. At the stern from the centerline measure 15 1/2" each side of center and that will give you a stern transom width of 31'. For the bow transom measure 6" each side of center line and that will give you a bow transom width of 12".
Then you nail a small finish nail at each outside points fore and aft. Take a batten (long straight board 1/2"x1/2"X7') and place on the inboard side of the nail, then bend out until the batten is 18" from centerline. That will give you curve you need for your outside plank. Do both sides the same.
|
|
| When you cut out your bottom or soul piece make sure you set your saw at 20 degrees for the stern transom, 30 degrees for the bow transom and 15 degrees for the sides. You'll see why later. |
|
|
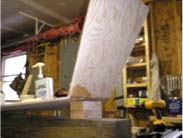
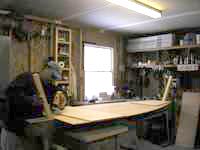 What I do next is take a 8' long 6"x6" and center my bottom piece on it long ways and screw both ends down about 6" back and as close to the edge of the 6x6 as possible. That becomes my work platform. Then I cut 2 2x2's about 18" long, one with a 30 degree angle and one with 20 degree angle. I center the angle on the 6x6 and hold it tight to the front and back of the bottom, 30 degree forward and 20 degree aft and screw it in to the 6x6. Those will support the fore and aft transoms as I glue them to the bottom piece. What I do next is take a 8' long 6"x6" and center my bottom piece on it long ways and screw both ends down about 6" back and as close to the edge of the 6x6 as possible. That becomes my work platform. Then I cut 2 2x2's about 18" long, one with a 30 degree angle and one with 20 degree angle. I center the angle on the 6x6 and hold it tight to the front and back of the bottom, 30 degree forward and 20 degree aft and screw it in to the 6x6. Those will support the fore and aft transoms as I glue them to the bottom piece. |
|
 Then I cut out my fore and aft transom. The aft transom is 18" high and you will use your 1/2" ac ply for this. Rip a piece at 18" by 4", set your saw blade at 20 degrees and make sure the short point of your cut is on the A side of your plywood. From the center of your 4' end where you cut the angle, measure 15 1/2" each side of center. That will be the bottom of your aft transom. At the top of your transom measure 18 1/2" each side of center. That will make your bottom measurement 31" and your top 37". Scribe those two lines and cut it. Then I cut out my fore and aft transom. The aft transom is 18" high and you will use your 1/2" ac ply for this. Rip a piece at 18" by 4", set your saw blade at 20 degrees and make sure the short point of your cut is on the A side of your plywood. From the center of your 4' end where you cut the angle, measure 15 1/2" each side of center. That will be the bottom of your aft transom. At the top of your transom measure 18 1/2" each side of center. That will make your bottom measurement 31" and your top 37". Scribe those two lines and cut it. |
|
 For the transom, take your 1/2" ply and measure 12" at the bottom, 6" each side of center. Measure up 20" then measure 9" each side of center and scribe a line. The bottom cut will be at a 30 degree angle, making sure the short point of the cut is on the A side of your ply. • • Then take both bow and stern transom and place them for and aft with the angle cut down and screw them to the temp post you screwed to the 6x6 as shown. This will hold them while the epoxy sets up. For the transom, take your 1/2" ply and measure 12" at the bottom, 6" each side of center. Measure up 20" then measure 9" each side of center and scribe a line. The bottom cut will be at a 30 degree angle, making sure the short point of the cut is on the A side of your ply. • • Then take both bow and stern transom and place them for and aft with the angle cut down and screw them to the temp post you screwed to the 6x6 as shown. This will hold them while the epoxy sets up. |
|
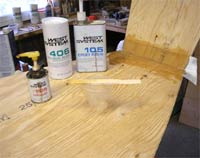
| I use West System epoxy to glue all my boats together, just mix as directed. |
|
|
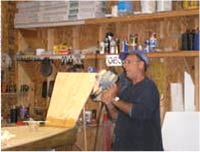
| Apply the epoxy liberally, mix it to the consistency of peanut butter. Apply on both the bottom piece and the bottom of transom where they each contact. |

|
|
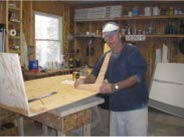
| Re-screw the transoms to the post then use a 4" piece of fiberglass cloth layer half over the joint and apply straight epoxy with out adhesive filler. Then let set up. |
|
|
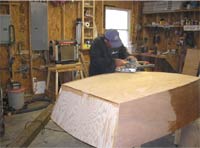
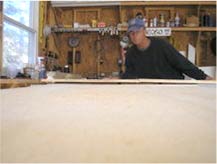
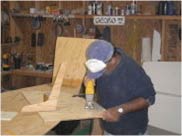
 O.K. where were we? Oh yes, we now have the bow and stern transom glue to the bottom or soul. The next thing I do is take my belt sander and bevel the outside edges of the transoms. I use to cut those in before but never got it right so sanding it in afterwards takes all the guess work out and only takes a second or two. O.K. where were we? Oh yes, we now have the bow and stern transom glue to the bottom or soul. The next thing I do is take my belt sander and bevel the outside edges of the transoms. I use to cut those in before but never got it right so sanding it in afterwards takes all the guess work out and only takes a second or two. |
|
 Now we need to make the mid-frames that support the side pieces amidships. This will take 1/2" ply, you should have a piece big enough left over from your transom cuts. The bottom cut you will measure 12 1/2" from the edge and the 14 1/2" up from the bottom for the side piece. Then to get the angle measure 3" from the edge at the bottom and scribe a line from that mark to the upper outside mark. Now we need to make the mid-frames that support the side pieces amidships. This will take 1/2" ply, you should have a piece big enough left over from your transom cuts. The bottom cut you will measure 12 1/2" from the edge and the 14 1/2" up from the bottom for the side piece. Then to get the angle measure 3" from the edge at the bottom and scribe a line from that mark to the upper outside mark. |
|
| The width of those pieces will be 3" up and over from the edge for the inside angle and 1 1/2" at both ends. Scribe a line and use a quart can to make the radius on the inside and outside ends. Cut out the inside with a jigsaw and use a table saw for your outside cuts. |
|
|
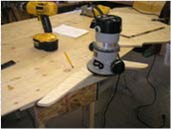
| I use a router to round the inside of these frames, you can just hit it with sand paper if you don't have a router. I just screw the piece to the bottom to use as a clamp. I fill in all the holes later. |
|
|
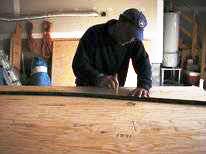
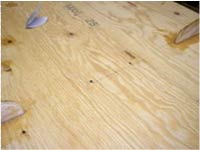
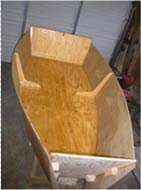
| After your frame pieces are cut out and sanded, measure 31" from the aft transom and put a mark on each side of the bottom. From those marks take a straight edge and scribe a line across the bottom. Place your side frames along this line at the edge of the bottom an forward of the line and scribe around the frame with a pencil. What I do is drill two small pilot holes in the center of the scribed area about 2" from each end. Then I place the frame back on the scribed area and drive two screws up from the bottom to hold the frame as clamps (I use 1 5/8" sheet rock screws for all this). Then I back out the screws until just the tips a exposed releasing the frames as I mix some epoxy with the adhesive filler. I put a liberal amount on the bottom of the frame along with the scribed in area where the frame goes. Place the frame back on the area where the two tips of the screws will hold the frame in place as you reach under and re-drive the screws to hold the frames while the epoxy sets up. |
|
| Always remember to clean up excess epoxy before it sets up, it's a bitch if you don't. You can just use a small squeegee for this purpose. You can use the excess to fill small voids and cracks in the plywood. |
|
|
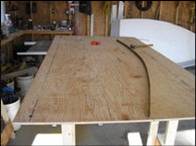
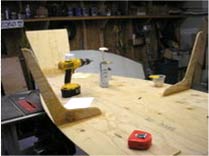
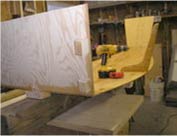
 O.K. that completed we now need to put rocker or a curve in the bottom before we attach the sides. We first remove the temp-posts fore and aft that were supporting the transom. Just take out the screws and hit them with a hammer to break them away from any clued area. Then in between the two frames you just added along the line that was scribed across the bottom screw in two screws attaching that area to the 6x6, as shown here. O.K. that completed we now need to put rocker or a curve in the bottom before we attach the sides. We first remove the temp-posts fore and aft that were supporting the transom. Just take out the screws and hit them with a hammer to break them away from any clued area. Then in between the two frames you just added along the line that was scribed across the bottom screw in two screws attaching that area to the 6x6, as shown here. |
|
 Back out the screws foreword and aft that were holding the bottom to the 6x6 and you might pop loose the bottom from each end if some excess clue attached the bottom to the 6x6 (it's not hard). Then cut three blocks from a 2x6, 3" long. Lift the fore peak of the bottom and place two of the blocks (one on top of the other) on the 6x6 and slide them under the bottom piece. Back out the screws foreword and aft that were holding the bottom to the 6x6 and you might pop loose the bottom from each end if some excess clue attached the bottom to the 6x6 (it's not hard). Then cut three blocks from a 2x6, 3" long. Lift the fore peak of the bottom and place two of the blocks (one on top of the other) on the 6x6 and slide them under the bottom piece. |
|
 Take the other block and do the same under the aft section but only use one block. Take the other block and do the same under the aft section but only use one block.
Make sure you screw all these together and screw down from the top to hold everything together. This will give you the proper rocker necessary while you attach the side pieces . |
|
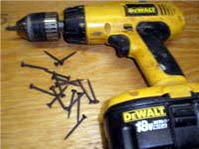 O.K., now we put on the sides. I find using my battery drill and sheetrock screws save hours of time and trouble. Don't worry about all the hole’s one makes, we just fill them in later with epoxy mixed with filler (I'll show you later on in the process. O.K., now we put on the sides. I find using my battery drill and sheetrock screws save hours of time and trouble. Don't worry about all the hole’s one makes, we just fill them in later with epoxy mixed with filler (I'll show you later on in the process.
|
|
| Always remember to clean up excess epoxy before it sets up, it's a bitch if you don't. You can just use a small squeegee for this purpose. You can use the excess to fill small voids and cracks in the plywood. |
|
|
| First I cut little two inch blocks with one side at 30 degrees, and screw them to the outside, around the edges of the transom and bottom. |

|
|
| Then rip the 4x8 sheet of Luan into two 19"x8' pieces. Pre-drill those pieces to the blocks starting at the rear transom holding up 14" from the bottom. |
|
|
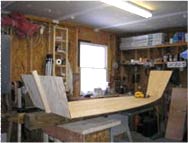
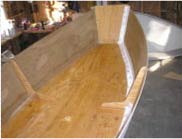
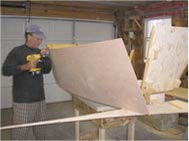 Then come forward to the bow transom and hold up the side piece until the top is about 3/4" above the frame amidships and screw into the upper block on the bow transom. Then go ahead and finish screwing into all the other blocks along the bottom and transoms. Then come forward to the bow transom and hold up the side piece until the top is about 3/4" above the frame amidships and screw into the upper block on the bow transom. Then go ahead and finish screwing into all the other blocks along the bottom and transoms.
|
|
|
Before you remove the screws take a pencil and scribe the inside along transoms, bottom and frame. You will need this line to show where to apply epoxy with adhesive filler when ready. Now back out the screws but not all the way, just enough to release the side from the blocks with some of the tip exposed. You can use these to find hole in blocks after you apply the adhesive. |
|
 Then mix the epoxy and adhesive filler and apply liberally to the edges of transoms and bottom. Also apply to the out side of the scribed lines of the side pieces. Take the side pieces and re-screw into the blocks. You should have epoxy beaded around the edges, take a squeegee and remove excess and fill in the voids. Then mix the epoxy and adhesive filler and apply liberally to the edges of transoms and bottom. Also apply to the out side of the scribed lines of the side pieces. Take the side pieces and re-screw into the blocks. You should have epoxy beaded around the edges, take a squeegee and remove excess and fill in the voids.
|
|
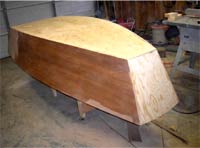
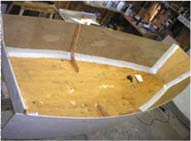
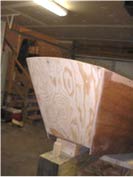
| The outside should look like this. |
|
|
After the epoxy adhesive sets up take 4" strips of fiberglass cloth (you can buy these already made up and West Marine) and place these along the inside edges, 2" either side of joints.
|
|
|
 Mix up a good batch of just epoxy and hardener and apply to the fiberglass cloth until you can see through it. I use a squeegee and 2" throw away brush to apply the epoxy. Make sure its well seated and no air bubbles. You can take out the air bubbles by tapping on them with the edge of the squeegee. Then take a break while the epoxy sets off. Mix up a good batch of just epoxy and hardener and apply to the fiberglass cloth until you can see through it. I use a squeegee and 2" throw away brush to apply the epoxy. Make sure its well seated and no air bubbles. You can take out the air bubbles by tapping on them with the edge of the squeegee. Then take a break while the epoxy sets off.
|
|
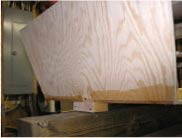
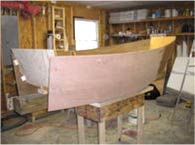
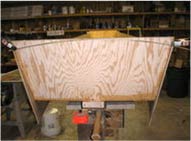
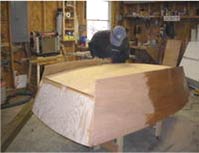
After the epoxy set up and before removing from the 6x6, attach a batten to the top of the transoms and lift and scripe to give the transoms some crown.
|
|
|
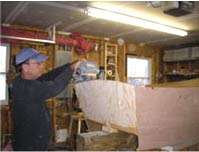
Cut off with your jig saw and use a belt sander to smooth out the curve if needed.
|
|
|
Do the same, for the fore and aft.
|
|
|
Now remove the hull from the 6x6 and throw it away, you will no longer need the 6x6. Cut off the excess luan leaving 1/4" excess bead to be sanded smooth.
|
|
|
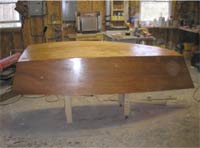 Mix epoxy and hardener half and half with Denatured Alcohol and saturate the outside of the hull. This will plasticize the wood and allow for longevity of life for your little dingy that you can show off and enjoy for years to come. Mix epoxy and hardener half and half with Denatured Alcohol and saturate the outside of the hull. This will plasticize the wood and allow for longevity of life for your little dingy that you can show off and enjoy for years to come. |
|
Continue to Part 2

More Articles by or about Bob Means:
|