|
By Rob Rohde-Szudy - Madison, Wisconsin - USA
with special thanks to Max Wawrzyniak
Fuel Gauge Repair
in an OMC Pressurized Fuel Tank
|
|
|
I got lucky on a 1955 Johnson 5.5 at a yard sale – it ran reliably right from the beginning. Downright trustworthy after replacing the $40 in parts recommended by Max Wawrzyniak (The old outboard guru). Unfortunately, the fuel gauge didn’t work. Usually not a big deal on a sailboat, but I find I’m often using it as a motor launch on the lovely rivers we have here in Wisconsin. The fuel gauge becomes a bigger deal.
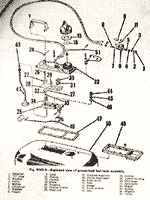
Fortunately it’s an easy repair. The manual shows it to be a float on the end of a wire, which turns a simple quadrant as the float rises. Easy diagnosis too. The float was sunk.
(click images for larger views) |
|
|
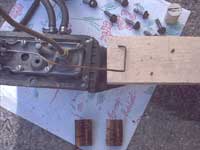
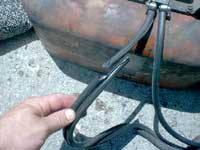 Before doing anything else, I had to replace the old cracking hoses. I keep my tank right next to the motor, so I opted for two separate 2’ lengths of 3/16” fuel hose. The old stuff cracked apart in about 4 places just trying to get it off. I’m amazed it was still pumping fuel. The photo shows the old stuff at left, new stuff installed at right. Before doing anything else, I had to replace the old cracking hoses. I keep my tank right next to the motor, so I opted for two separate 2’ lengths of 3/16” fuel hose. The old stuff cracked apart in about 4 places just trying to get it off. I’m amazed it was still pumping fuel. The photo shows the old stuff at left, new stuff installed at right. |
|
|
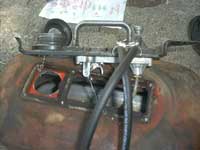 Taking the tank head apart requires nothing more than a largish slothead screwdriver. But those screws are REALLY tight, and soft enough that it’s easy to strip the head. They didn’t want to back out too well. TIGHTENING them slightly broke them loose, then they came out easily. Don’t lose the little hard rubber washers! Here it is coming apart. Taking the tank head apart requires nothing more than a largish slothead screwdriver. But those screws are REALLY tight, and soft enough that it’s easy to strip the head. They didn’t want to back out too well. TIGHTENING them slightly broke them loose, then they came out easily. Don’t lose the little hard rubber washers! Here it is coming apart.
|
|
 |
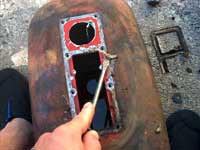
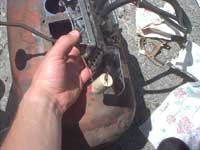
At this point you have to unscrew the chain from the cap to get it all apart. Should have done that first. Don’t count on the old gasket surviving this. It won’t. Also note the crud in the remaining gas. |
|
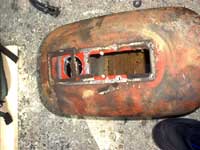
| So I scraped off the old gasket with the same screwdriver, cleaned the surface with some of the old gas, and wiped out the tank with paper towels. Here’s the scraping: |
|
|
 |
Nice and clean now, but I should’ve worn long sleeves. |
|
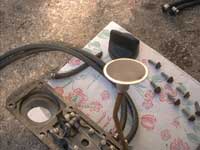
Then I covered the tank with some paper towels and weighed it down with scrap wood. After cutting myself up to wipe it out, I was not going to let any dust in there.
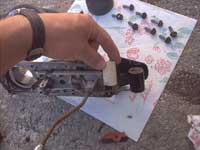
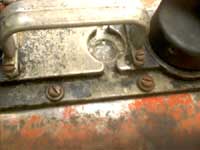
Back to the tank head. Fortunately, the intake screen looked very clean. |
|
|
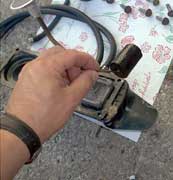 |
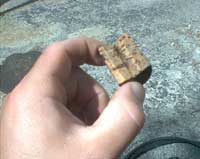
The float didn’t look so good. |
|
| Here it is next to the new cork. |
|
|
 |
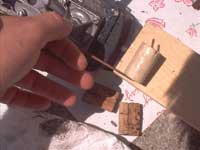
Here it is shown just prior to cutting it off. |
|
| …and after… |
|
|
 |
You can see that we need to use the pliers to bend the end of that float arm. Otherwise we won’t be able to get the new float on. |
|
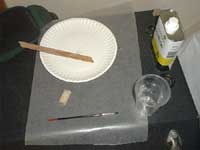 I don’t know if the original float was coated with anything, but it seemed wise to do so. Max suggested fuel proof paint, but epoxy is fuel proof and I had some. So after drilling the hole through the new cork, I mixed up some 5-minute epoxy and thinned it with acetone to make it brushable. I brushed it on the cork, taking care to get a lot in the hole, and left it to dry on some waxed paper. Be sure to use the shiny side! I don’t know if the original float was coated with anything, but it seemed wise to do so. Max suggested fuel proof paint, but epoxy is fuel proof and I had some. So after drilling the hole through the new cork, I mixed up some 5-minute epoxy and thinned it with acetone to make it brushable. I brushed it on the cork, taking care to get a lot in the hole, and left it to dry on some waxed paper. Be sure to use the shiny side! |
|
 |
A few hours later it was on the float arm… |
|
| …and clinched in place. Note the new gasket. |
|
|
 |
Now I can tell how much fuel I have without lifting the tank and guessing! Hard to see in the photo, but it’s reading “1/2”. |
|
“Special tools” required:
-
largish flathead screwdriver
-
largish pliers
-
Needlenose pliers
-
Hammer
-
Scrap of 1x wood
Materials:
-
Tank gasket
-
Cork (new), wine bottle size or a bit bigger
-
3/16” fuel hose
-
4 small hose clamps
-
paper towels
-
waxed paper
-
5 minute epoxy
-
acetone
-
paper cup
-
small disposable paintbrush
I managed to lose the receipts, but the total cost well under $10.
--Rob Rohde-Szudy
Madison, WI
robrohdeszudy@netzero.net

Other Articles by Rob Rohde-Szudy:
|