|
Designing and Building a Dinghy
Don Baldwinson
This project started as a tender for my Bolger Micro Navigator, but ended up being quite different, a little fishing dinghy for one, or two. I didn't want the hassles of another trailer, so cartopping it had to be. I owned plans of a Bolger Bee which was very attractive, but a bit too small. The same design enlarged would be too heavy for 1 person cartopping, my family not being the least interested in boats. So, a purpose-design seemed the answer.

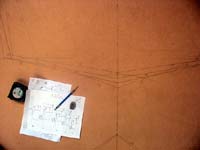
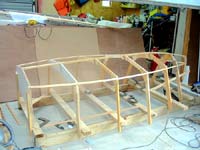
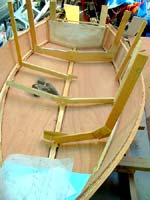
First I drew the lines on paper for a simple hard chine displacement dinghy, using temporary scrap timber frames. Stitch and tape, dress-making style seems the norm these days, but I preferred a traditional building frame for more precise control over the final shape. Having said that, after erecting the frames and bending around the chine and shear strips, it dawned on me that I needed a boat to steal a little quick time, not to spend hours puttering to fishing places. So the chines and keel were unscrewed,straightened and paralleled for the aft half of the boat, hopefully so we could plane to the fish. Some guesswork and fretting, because the tight space meant I could not get back and view the whole hull. Also, the drawings were now hardly relevant as a check.
click thumbnails
for larger views

|
|
|
|
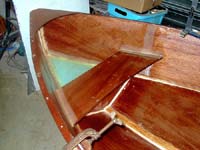
Fairing-
Fairing the longitudinal members of a chine hull needs care, and a careful change of lap as you get near the bow. There is also the chance of altering the shape if you get it wrong. I felt that if I retained the shape of the chines as they were bent in place, the outside corners would be as fair as they could ever be, so why alter that edge with a plane? The bottom ply was screwed into the very corner of the chine leaving a triangular gap between chine and bottom, knifed full with thickened epoxy later. Heavy grade diagonal bias glass tape strips were epoxied around the outside line of the chine. The small flat keel was not faired either.
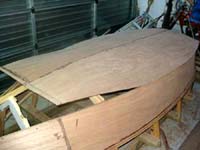
Compound Curves-
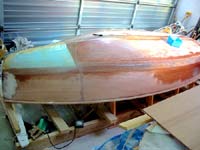
I wanted the boat to be as light as was reasonble, flat plywood being inherently flexible without extra weight-giving extra frame members. Using 6mm ply, the best way to achieve stiffness with lightness is to force some compound curves into the ply and stress it. Accordingly, the bottom sheets of ply were screwed down and glued to the flat keel, with the outside edges propped up level until the glue cured. Looked like a flight deck. Then, working forward, a bit each side at a time, the ply was forced down and screwed and glued to the chine edge as described above. The bottom of the transom had already been cut with a curve. This worked until nearer the bow, when to get the ply down would have required a 1000lb press which would have exploded the whole caboodle. Lengthwise saw cuts between the bottom ply and the keel relieved the pressure, and both sides folded down nicely. The bottom came out with a very nice and fair curve from the transom, turning into a more vee shape where she would part the waves.
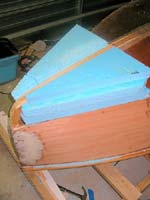
Foam Bow-
This could have been completed with ply, as early racing dinghies were built, with multiple diagonal saw cuts and mass epoxy filler, but I felt foam slabs glued in place, faired and glassed would do a better and easier job. And also provide buoyancy in event of catastrophie. I had already built a false bow like this on my Navigator, see-
https://oink.kiwiwebhost.biz/
I did not use any other fibreglass in the boat, except for the critical chine joint and along the keel, to save weight. I consider glassing a hull which lives out of the water and protected, a waste of time and money. Better to spend the money on quality marine ply as in this case, with one coat of epoxy resin to harden the surface, though even this weight was resented! The interior was completed using 2 layers of glued ply for thwarts, with light ply brackets here and there. Completed, I could lift the hull and stand on the scales, but no way could I see the reading without breaking my body! Sitting the bathroom scales under the transom and an old spring balance hanging from the rafters at the bow gave two readings which totalled 80lbs. I suppose that works?
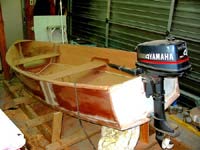
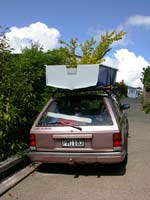
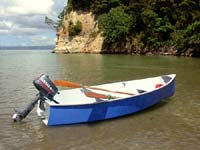
Launching-
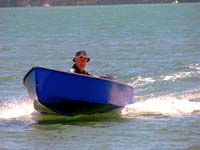
The boat was easy to slide onto the roof rack, and I bought a $20 hand trolley new, inflatable tyres, and the boat was easily launched into a warm blue and calm sea. She sat as light as a feather, neither end up nor down, and rowed easily. So far so good,followed by a leisurely slow cruise up the coast to a beautiful bay for some photos. Going home was much quicker, and to my delight at half throttle the bow went down and we rocketed along at I would guess 15knots (downgraded from 18knots to allow for owner exaggeration). Alert for cracking and grief noises, one still had time for surprise that a 4hp fishing engine could skip this hull along like a real runabout. Ferry wake, though smallish, were no problem.
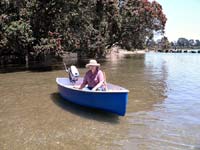
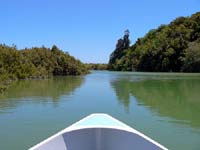
The following sunday was again one out of the box, and my non-boating wife came along too. After sitting her on a reef to take photos of me speeding past, we took a leisurely putter up a long creek twining through the mangroves, past old jetties with mullet leaping from our path, and gently past the odd kayaker. With the knowlege that should our consciences have been pricked, we could have unshipped the oars and joined them in silence.
|