Each piece can be individually
prepared, without having to assemble the whole boat. Where there
are special fittings, they do not include glue and wait times
taking up the apartment. Any clamping can be done, then the
piece put into the closet to dry.
Construction:
Each piece of plywood can be
laid out separately, measured then cut. Measurements given are
for the pieces to fit together at the measurements, which is
why they do not follow clean measurements by the foot.
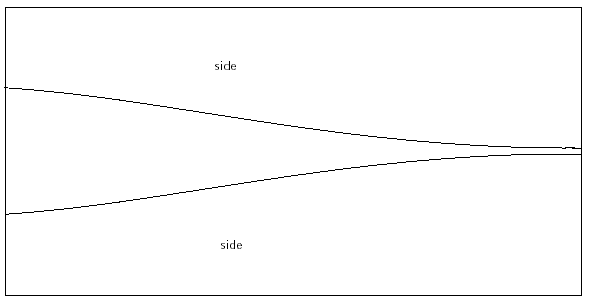
Lines (click to enlarge)
In making the boat, exactness
in fitting is not critical, as the cloth is the waterproof skin.
Unlike other cloth covered craft, the cloth does not have to
have high tension to maintain its form, as it is the plywood
that holds the shape. Hence, throughout, we are not looking
at high tensions for the boat.
Assembly:
Bring all pieces to the place
where the boat will be launched. First lay out the cloth, then
center the bottom. Snap the two ends together. Snap the ends
together to make the form. Join the sides, front to back, and
at the ends to each other. Rest the sides on the bottom, joining
the slots and tabs. Snap together. Then wrap the bottom up the
sides, attaching it over the sides with the bungie cord. Bring
it to the water and launch.
Alternatives:
One concept is to add a permanent
keel by gluing it to the bottom of the cloth. There is a eight
foot stretch of bottom that is flat, so a piece can be measured
to fit there quite easily. I think a 2x6 should work as a keel,
but remember, this is just an option.
Power options:
This is where I have not completely
worked out the details, some of which I won’t know until
a prototype is built and tested.
Oars are a given. All that is
needed to do is to measure where the oarlocks should be positioned.
That I have not done yet.
Paddles, of course. They don’t
even need oarlocks.
Because the boat is so light and slippery through the water,
and secondly one does not want to bash such a light hull by
speeding, I figure a small, light motor can be utilized. For
this purpose, I envision having a temporary bracket attached
onto the back deck which can hold a light, to about 30 lbs,
motor. Yes, it will be slightly off center, but on such a long,
narrow hull, that shouldn’t cause a problem, especially
if the optional keel is also included.
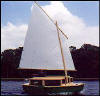
The sail is the most interesting
option. For this, one will need either the optional keel, or
add leeboards. Like the motor, the rudder will be off center,
attached to a temporary bracket. That way, the tiller can go
up the side of the boat allowing the person who is steering
to sit on the boat’s centerline comfortably. One option
I have considered is to have both the rudder and outboard attach
to the same bracket, one on each side of the boat.
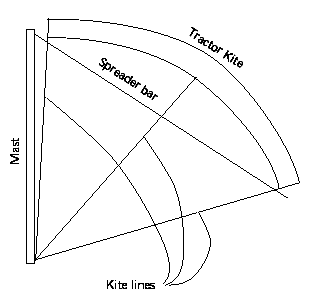
I would use a single line tractor
kite. Anchor the one line to a spot just in front of the mast.
I would use one of those tractor kites that have a spreader
bar keeping it to a certain width. The main power will be transmitted
through the main line, but the mast and control lines will make
it that it is easy to control without having constant attention
as is needed with present tractor kites. In this, I’m
trading efficiency for ease of use. Further, it will not fall
into the water when the wind drops. Each end of the kite’s
spreader bar will have two control lines: one goes to a anchor
point at the top of the mast, the other to a control point,
probably in the bow. Again, I will need to evaluate a prototype
in order to know exactly how things work out and where is the
best place to set up controls.
As for the position of the mast,
should it be right in the center of the boat or slightly forward?
I don’t know, again I need a prototype to test. Sorry,
this is the problem with breaking new ground—one has to
build test boats before one can make designs to sell.
Cutting diagram (click to enlarge)
This is the most complex of the
boards to cut, so it is best to make all measurements before
cutting. The measurements should end up in the pattern above.
If not, remeasure.
Measure a line 21 inches (1,9,0)
from one side, measuring end to end. Then take the measurements
from the table of offsets and measure out the bottom piece.
Add a half inch to the outside, the half inch will be for the
tabs that help hold the sides and bottom in register to each
other.
When cutting the bottom out,
cut out along the extra half inch line. Then cut out the tabs,
in other words, cutting to the original measured line. I recommend
making the first cut along the original line from start to the
first measure at 0,1,3+, then out, then cut to line from 0,4,3+
to 0,7,3+, skip to 0,10,3+ and cut to 1,1,3+ and so forth. Then
when cutting the sides, make sure that the cuts to the line
are opposite so that the tabs will intermesh.
When cutting the cutout along
the center, do cut out even the whole length of the measurement
that is only the kerf of the saw blade wide. Even though there
is no extra space being generated by the cut, the bottom sheet
is already starting to bend, so if it cannot bend easily, it
will set up high tension along that section.
After cutting out the bottom,
this is the time to add reinforcements. Measure from 0,1,3+
from the left edge at the sides of the bottom, then draw a straight
line from both sides of the bottom to where the center cut ends.
It is within this triangle that the bottom is flat and reinforcing
boards can be added. I haven’t figured out which pattern
would be best, a question I leave unanswered until I can make
a prototype.
To join the bottoms, I propose
taking a 1x3 and cutting a sine wave pattern along its length.
For the bottom, cut it 1.5" shorter than the boat’s
beam, then carefully fit in onto the two halves of the bottom
such that both the bottom sheets and the boards fit tightly
together. Do the same for the sides once they’re cut out,
but for them have the boards start at the place where the bottom
meets the sides on up.
To measure the side decks, first
measure the bottom about 48 inches from the left, add about
an inch from the measured bottom, then draw a line through that
point at an angle of 10° from the lengthwise measurement.
Measure along that line from the left 4,3,2. From there measure
a line perpendicular to the first line over the bottom 1,5,0,
then a line parallel to the first line. These lines are shown
by the dotted lines above. The line crossing the bottom is the
base line from which one uses the information from the second
column in the table of offsets to measure out the side decks.
The end deck pieces are 3,8,4
long, measured from the right side for a change, by 1,3,3+ as
measured from the sides. measure in an inch, then follow the
second column of the table of offsets starting with where the
left column reads 4,0,0. If it is wanted that the decks interlock
with the sides, the measurements should be added to by only
about a quarter of an inch, as the sides are only one eighth
of an inch thick. Except for the widest point measurements,
which are 0,1,3+ from the center, all other measurements on
the decks follow even three inch intervals, which will intermesh
with the side measurements which are not even.
I was not able to get the end
decks cut in one piece unless I used a new sheet of ply only
for them. However, there is plenty of scrap available, from
which one can make 3" wide strip backing for making butt
joints for the decks.

click to enlarge
There are two sheets identical
for the sides. Like the bottom, measure from the left side,
then measure from the edges to get the above form, then add
a half inch for the tabs. Most of the instructions for the sides
are the same as for the bottom, so one should follow them.
Below is an attempt to illustrate
the tractor kite / sail of the boat. The idea is to make it
so that most of the tension generated by the sail will be fed
through the kite lines, the mast and the control lines from
the spreader bar will have to handle only the tensions generated
by controlling the kite. Therefore, they can be built fairly
lightly.
Miscellaneous notes
The optional keel may have to
be a T, where the keel itself is attached to a piece of plywood
a foot to two feet wide, then the plywood is glued to the cloth.
I don’t have the pattern
for the bottom cloth worked out yet, I was planning to make
the wooden form first, then line up the cloth under it, fold
it up the sides and figure out the pattern from that. I know
that at the widest point the cloth will reach a little over
halfway up the sides, so there will have to be some sewing of
cloth to fit the gaps.
As for benches for rowing, I
am considering rowing boxes sort of like what the Vikings had
in their ships. This will allow the crew to move around, optimize
their weight distribution if needed, and allow for clearing
out the bottom for setting the boat up for sleeping if it is
used for dinghy cruising.
Note to the judges: This is
a boat that is still very much in idea form and not finished.
In this I’m exploring new ideas and therefore do not know
the final disposition of all the details and the deadline is
upon me. A lot of the details I would have to determine experimentally
as I build the prototype, and I haven’t bought the materials.
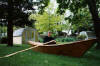
A couple years ago I thought
I’d wait till I finish the prototype before sending in
the plan—I have an unfinished two sheet boat in my workroom
as I ran into some construction problems that took a lot longer
to resolve than I expected. Right now it is awaiting final fairing
and painting so I finally resolved the construction difficulties.
But from that I learned that I won’t submit a design for
a contest if I wait until I have all details already worked
out. The table of offsets was computer generated, therefore
quite detailed. The things that were not computer generated
are the silly details that are taking all the time.
Bio
I am a middle aged person, euphemistically
stated to be between jobs though more likely going through a
mid life crisis. I have been designing boats since childhood,
but never took a class in boat design. I have always been dissatisfied
with traditional design, so I have usually tried to see what
I can do to improve on tradition.
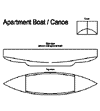
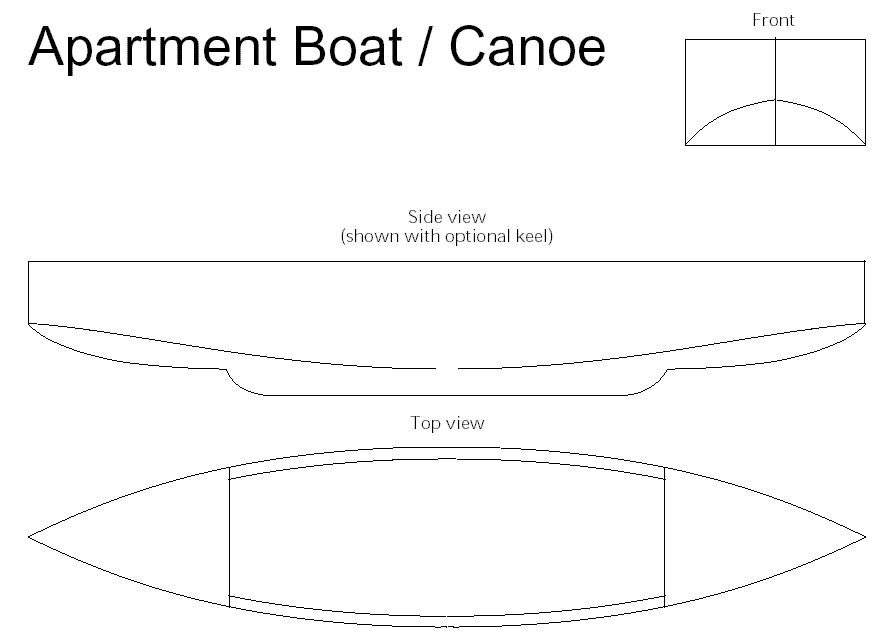
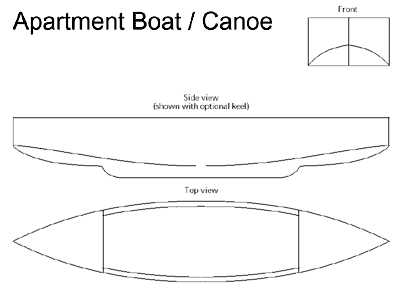
The question of the apartment
boat has challenged me for a while, so when I saw this contest,
I decided to rethink the question. Thinking that the storage
room in the apartment is 2' deep by 4' wide and 8' tall (it's
an older apartment) this design has a couple of boards that
exceed the length by about an inch. Empty weight should be between
50-100 pounds depending on cloth, waterproofing and a few other
design considerations. It should easily carry 5-6 people on
a daysail, one or two dinghy cruising with sleeping onboard.
Karl W. Randolph.