|
The Yahoo
Michalak Discussion Group
(Max
is the moderator)
(click pictures below
to enlarge)
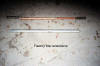
tiller extensions
my AF4

Evinrude Service
Bulletin

|
Obsolete
Outboards
by Max Wawrzyniak
Column #5
Rigging Old OMC Outboards
for Remote control
(Part 2 - remote steering)
It does one little good to control shift, throttle, and shut-down
from a remote location unless one can also control steering.
Before we delve into remote steering, we should consider an alternative;
The tiller extension. For the smaller boat that can be controlled from the
general vicinity of the outboard motor, a tiller extension makes a lot of
sense. There were factory-made tiller extensions for these old OMC
engines, but one can be easily made from PVC pipe from the local hardware
store. Jim Michalak has
instructions on how to build your own tiller extension posted in the
back issues of his website.
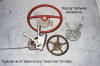
But if you just HAVE to have a steering wheel
Back in the 50s and early 60s, the most common outboard remote steering
system, by far, was the cable-over-sheave (pulley) system. The components
for these systems were readily available and cheap, and despite what boat
dealers say about them, these systems were safe and reliable and very
fixable by your average Joe. The reason that they fell out of favor was
because they can be time-consuming to install, compared to push-pull cable
and hydraulic systems.
Dont you believe it when a boat dealer or mechanic tells you that such
systems are suitable only for low-horsepower engines. I have personally
piloted commercial vessels 100 feet in length equipped with cable-over
sheave steering systems. As long as the system is laid out correctly and
the hardware properly sized to the job, these systems can be reliable and
relatively friction free. And anyway, we are talking about low-horsepower
engines here.
The components needed to install such as system are cable and sheaves,
both Of which are still available new, and I would suggest that you buy
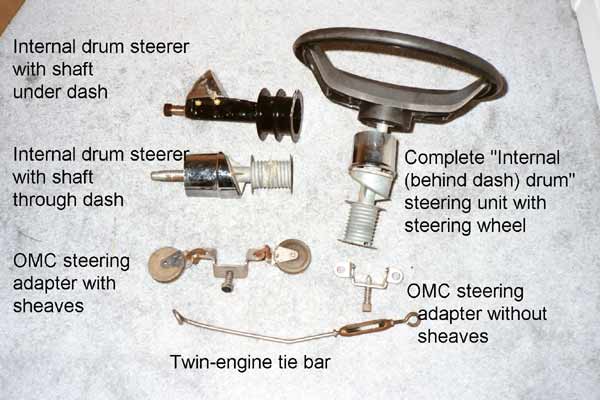
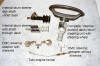
them new, with safety in mind. You also need a helm unit, or steerer,
consisting of a cable drum, steering wheel, and the stuff that holds them
together and mounts them. Other than for racing use, these cable-drum helm
units are not longer manufactured, but are often seen at swap meets and on
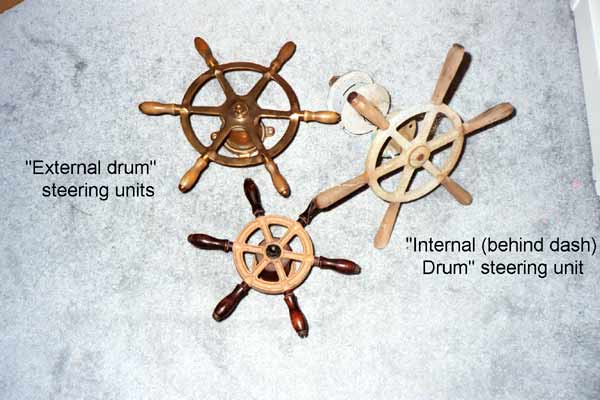
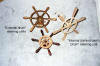
the auction sites. There are several different variations; some have the
drum mounted on the exterior of the dashboard; some have the drum mounted
on the interior of the dashboard, and the shaft to the steering wheel
either runs through the dash , or under the dash. The cheapest units you
find will have an automotive-style steering wheel and have the drum on the
inside of the dash.
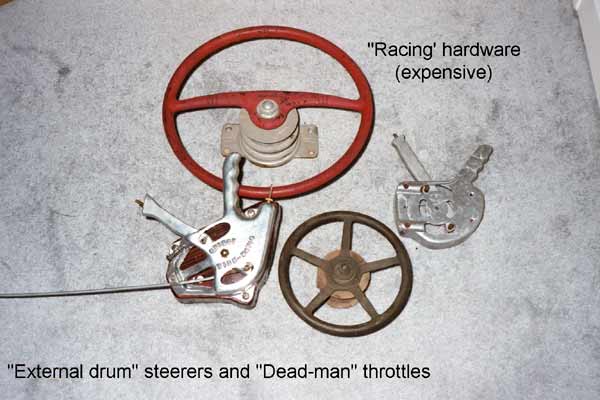
The outboard racers tend to drive up the prices of external drum
steerers with automotive wheels, and the nautical collectors drive up the
prices of anything with a ships wheel.
Also, note that the steering shaft may mount perpendicular to the
dash panel or at an angle to the dash panel. Being flexible should get you
a reasonably priced helm unit. Although newer units have a shaft with a
standard taper that will accept most modern steering wheels, be advised
that some really old steerers from the 50s and maybe early 60s may have
an odd shaft arrangement and you had better get a wheel with the drum
unit.
The only other parts needed are maybe fair leads where the steering cable
needs to make a slight bend, and some way to attach the cable to the
outboard.
Nearly all (but not all) of the OMC outboards that we are talking about
feature a steering-attachment mounting hole in the carry handle on the
front of the engine. With a genuine OMC steering attachment, hooking the
steering up to an engine is a one minute job (after you have rigged all of
the cables and sheaves. Of course). If one lacks the proper attachment, it
is possible to engineer something that will work.
Which brings us to safety. If your steering system fails, someone could
get hurt or killed. Which means that you should use lock-nuts or lock-tite
on bolted connections, and which means it is always preferable to bolt
sheaves rather than fasten them with screws. It also means that you
thoroughly test your steering system before putting it into service, and
that you inspect it regularly.
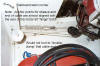
Laying out the cable runs is the hard part. It will take a little time.
And you will run into problems, but they can be solved. For instance, if
you are running your steering Cables along the insides of the hull,
but the hull sides curve fore and aft, the cable, which is under tension
and straight, is 6 inches away from the curving side of the boat
amidships. No problem. Just install a few fairleads to hold the cable in
close to the hull sides. The slight amount of drag that the fairleads will
induce will not be a problem. If, however, you need to make a corner or 45
degrees or more, you had better use a sheave.
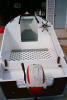
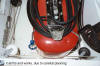
When I installed cable-over-sheave steering in my
AF4, I mounted the
wheel to starboard on the aft bulkhead of the cabin, and ran both cables
down the starboard side of the boat, with a couple of fairleads to hold
them close to the side of the hull. After both cables pass through holes
in the forward motor well bulkhead, one cable goes over a sheave and makes
a 90-degree turn and leads over to the port-side of the boat. Two more
sheaves lead it to the port side of the motor. The remaining cable stays
to starboard and turns to meet the outboard with one sheave mounted in the
starboard stern corner of the motor well.
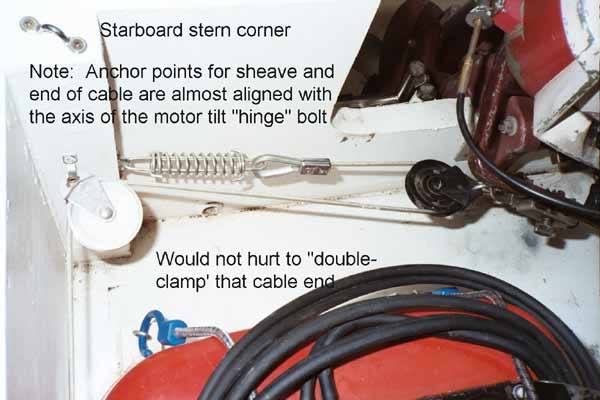
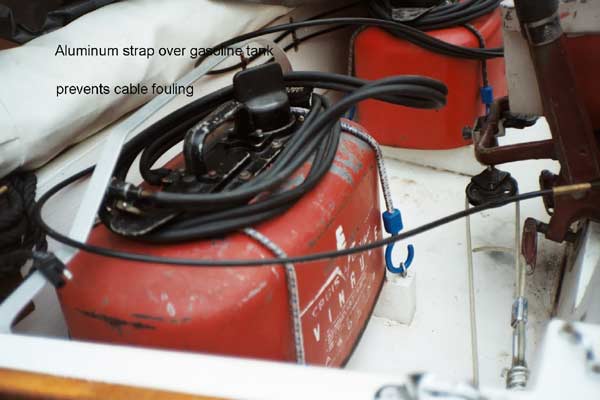
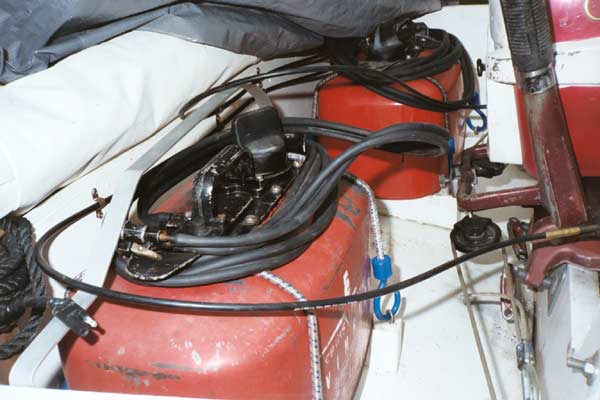
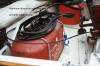
It is common practice to lead the cables to a sheave on the motor
connector and have the cables return to the corners of the boat, where
they are secured to compression springs to allow for changing cable length
when the motor is tilted up. These gives a 2 to 1 mechanical advantage to
the steering system and is all the power steering that you get or need.
It is important to try to have the anchor points for the final sheave at
the transom, and the end of the cable, as closely aligned with the axis of
the outboard motor tilt hinge pin or tilt tube, as is possible. This
will minimize the tendency of the cables to go slack or tighten up as the
motor is tilted up.
Once you hassle with laying-out these cables, sheaves, and fairleads, you
will see why boat builders and dealers prefer to install push-pull cables,
but if you lay it out right, and dont have the cable dragging on
anything, you will have a very friction-free steering system.
Or you can buy a brand-new push-pull system and figure out how to adapt it
to your old engine. I have adapted these new systems to old outboards, but
one has to engineer ones own connector kits. Plus, the cable and sheave
system can be cheap if one runs into a deal, such as someone removing a
whole system to replace it with something more modern often the old
system will be offered for sale, complete and cheap.
With nearly all old OMC outboards from the mid50s until the early 70s,
there is no reason that you cannot have remote control of shift, throttle,
steering, and engine shut-down. Which can make operating your Bolger
Sneakeasy or
Michalak Dorado
that much more fun, and at not much cost.
Later, dudes
Max |